Quick Summary (TL;DR):
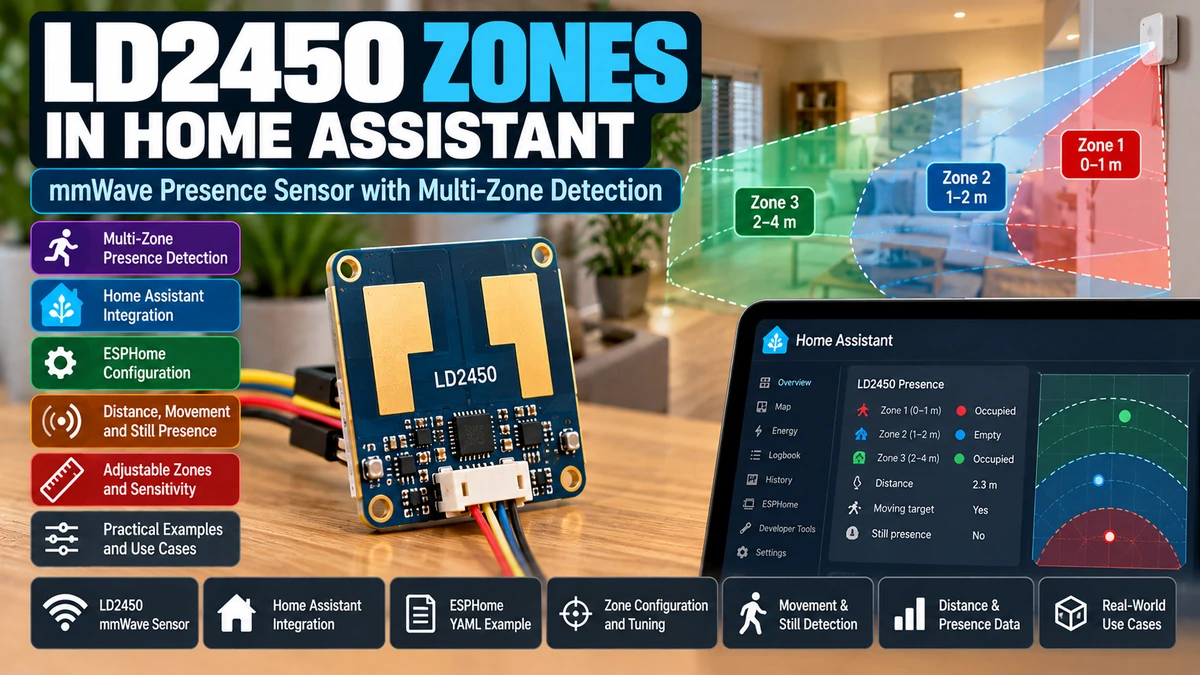
The HLK-LD2450AliExpress price becomes much more useful in Home Assistant when you stop treating it as a simple presence sensor and start using its X/Y coordinates and three configurable rectangular zones. With current ESPHome, the LD2450AliExpress price can expose up to three targets, each with X position, Y position, speed, angle, distance and direction, plus separate target counts for Zone 1, Zone 2 and Zone 3. The coordinate system is straightforward: X is left/right from -3000 mm to +3000 mm, while Y is distance forward from 0 to 6000 mm. That lets one radar create virtual areas such as Desk, Sofa and Dining Table without three physical sensors. ESPHome also exposes the LD2450AliExpress price Zone Type setting: Detection makes the configured rectangles the areas you want to detect, while Filter uses them as exclusion areas you want the radar to ignore. This is extremely useful for doorways, hall traffic, ceiling fans, curtains or parts of an adjacent room. For most rooms, the best workflow is: mount the sensor permanently, expose the target coordinates in Home Assistant, walk around the room while watching X/Y values, write down the useful boundaries, configure the three rectangles, and then create clean binary occupancy entities from each zone target count. Do not design zones purely from a floor-plan drawing: radar field of view, reflections and real target tracks matter. Also remember that the LD2450AliExpress price is primarily a position-tracking radar; if your only requirement is detecting somebody sitting almost perfectly still, the LD2410AliExpress price remains easier to tune for that job.
Materials You’ll Need
| Item | Why you need it |
|---|---|
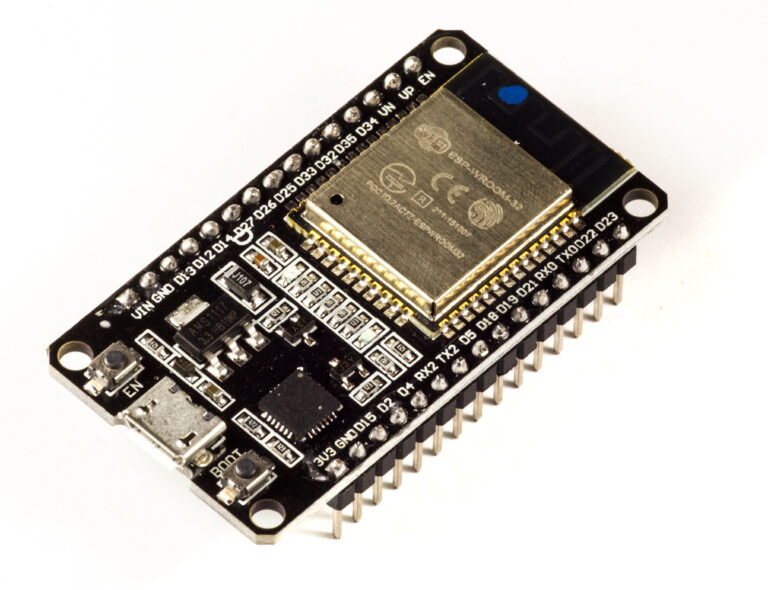
| ESP32 development board | Runs ESPHome and sends LD2450 data to Home Assistant |
| HLK-LD2450 radar module | 24 GHz multi-target X/Y tracking sensor |
| Stable 5 V supply | Reliable radar + ESP32 operation |
| Jumper wires or permanent connector | UART wiring during prototype or installation |
| Home Assistant | Graphs coordinates, builds zone automations and dashboards |
| ESPHome 2026.x | Native LD2450 component with zone configuration and target counts |
| Tape measure | Turns room dimensions into useful X/Y boundaries |
| Phone/tablet running Home Assistant | Very useful while walking the room and recording live coordinates |
You do not need three LD2450 modules to monitor three parts of one room. One sensor can expose three built-in rectangular zones, provided the areas fall inside its useful radar coverage.
What This Guide Adds Beyond a Basic LD2450 Setup
A normal LD2450 tutorial answers:
Is someone detected?
How many targets are there?
Where are Target 1 / 2 / 3?
A zone-based installation answers much more useful Home Assistant questions:
Is somebody at the desk?
Is the sofa occupied?
Is anybody in the dining area?
Should movement in the doorway be ignored?
Which lighting scene should run?
That difference is what makes LD2450 worth choosing over a simpler mmWave sensor.
LD2450 Coordinate System Explained
ESPHome reports target coordinates in millimetres. Think of the radar as the origin of a simple 2D floor-plan coordinate system.
             FARTHER INTO ROOM
                   +Y
                   ↑
                   │
   LEFT (-X)  ←──── LD2450 ────→  RIGHT (+X)
                   │
                   │
                 Y = 0
SENSOR| Axis | Meaning | ESPHome range |
|---|---|---|
| X | Left / right relative to sensor | -3000 to +3000 mm |
| Y | Distance forward from sensor | 0 to 6000 mm |
Negative X means left. Positive X means right. Y increases as the target moves farther away from the radar.
Coordinate Examples
| Target position | Approximate coordinates |
|---|---|
| 1 m left, 2 m forward | X = -1000 mm, Y = 2000 mm |
| Centre of room, 3.5 m forward | X = 0 mm, Y = 3500 mm |
| 1.8 m right, 2.5 m forward | X = +1800 mm, Y = 2500 mm |
| Very close to sensor | Y near 0 mm |
You do not need to calculate coordinates from the radar angle manually because ESPHome exposes X and Y directly. The angle and distance values are still useful for diagnosis.
Useful Geometry: Distance and Angle
If you want to understand what the X/Y values mean physically, ordinary geometry applies.
distance ≈ √(X² + Y²)

angle ≈ arctan(X / Y)
For example, X = 1000 mm and Y = 3000 mm represents a target roughly 3.16 m from the sensor and about 18° to the right of centre.
The Configurable Rectangle Is Bigger Than the Guaranteed Radar Field
ESPHome allows zone coordinates across a rectangular configuration space of ±3 m in X and 0–6 m in Y. That does not mean every point in that rectangle is equally detectable.
Hi-Link specifies the LD2450 at roughly ±60° azimuth with a maximum detection range around 6 m. The physical radar field therefore behaves more like a widening fan than a perfect 6 m × 6 m rectangle.
Configuration coordinate limits:
┌──────────────────────────────┐
│                              │
│        actual useful         │
│       radar coverage         │
│          /      \            │
│        /          \          │
│      /              \        │
└─────── LD2450 ───────────────┘
This is one reason a floor-plan-only zone design can disappoint. The right method is to use the room plan as a starting point and then confirm the boundaries with real target tracks.
What Is an LD2450 Zone?
A zone is a rectangle described by two corners:
x1, y1 = near-left corner
x2, y2 = far-right corner
ESPHome supports a maximum of three zones: zone_1, zone_2 and zone_3.
Zone rectangle

 (x1,y2) ┌──────────────────┐ (x2,y2)
         │                  │
         │                  │
 (x1,y1) └──────────────────┘ (x2,y1)
The names “Desk”, “Sofa” and “Dining” are names you create in Home Assistant/ESPHome. The radar itself simply knows Zone 1, Zone 2 and Zone 3.
Zone Coordinate Limits
| Parameter | Allowed range |
|---|---|
| x1 | -3000 to +3000 mm |
| x2 | -3000 to +3000 mm |
| y1 | 0 to 6000 mm |
| y2 | 0 to 6000 mm |
Keep the near/far ordering logical: use the smaller Y value for the near edge and the larger Y value for the far edge.
The Best Way to Measure Your Room
Do not begin by guessing numbers in YAML. First establish a physical coordinate map.
- Fix the LD2450 in its final orientation.
- Mark the point directly in front of the radar as X = 0.
- Measure left/right distances from that centre line.
- Measure forward distance from the radar face.
- Sketch furniture on a simple plan.
- Use live target coordinates to confirm what the radar actually reports.
A simple handwritten grid is enough. You do not need CAD.
Example Living Room
                    FAR WALL
Y=5000  ┌─────────────────────────────┐
        │      SOFA       DINING      │
Y=3500  │   ┌────────┐   ┌────────┐   │
        │   │        │   │        │   │
Y=2000  │   └────────┘   └────────┘   │
        │                              │
Y=1000  │ DESK             DOORWAY     │
        │ ┌──────┐                     │
Y=0     └──────────── LD2450 ──────────┘
        -3000      X=0          +3000
In this example, the radar is on the near wall facing into the room. The left side of the drawing is negative X and the right side is positive X.
Example Three-Zone Layout
| Zone | X1 | Y1 | X2 | Y2 |
|---|---|---|---|---|
| Desk | -2700 | 500 | -600 | 2600 |
| Sofa | -1800 | 2500 | 500 | 4800 |
| Dining | 600 | 1800 | 2800 | 4800 |
These numbers are only an example. Your real values should come from the actual room and live coordinate testing.
First ESPHome Requirement: Correct Firmware and UART
Before debugging zones, make sure the basic LD2450 installation is sound. Current ESPHome documentation requires LD2450 firmware V2.02.23090617 or newer for proper integration.
The default UART speed is 256000 baud, with parity NONE and one stop bit. ESPHome strongly recommends a hardware UART at that speed.
uart:
  id: ld2450_uart
  tx_pin: GPIO17
  rx_pin: GPIO16
  baud_rate: 256000
  parity: NONE
  stop_bits: 1

ld2450:
  id: ld2450_radar
  uart_id: ld2450_uart
Expose the Raw Target Coordinates First
Before creating any zones, expose all three targets. You need to see how the sensor maps your actual room.
sensor:
  - platform: ld2450
    ld2450_id: ld2450_radar

    target_count:
      name: "LD2450 Target Count"

    target_1:
      x:
        name: "Target 1 X"
      y:
        name: "Target 1 Y"
      speed:
        name: "Target 1 Speed"
      angle:
        name: "Target 1 Angle"
      distance:
        name: "Target 1 Distance"

    target_2:
      x:
        name: "Target 2 X"
      y:
        name: "Target 2 Y"

    target_3:
      x:
        name: "Target 3 X"
      y:
        name: "Target 3 Y"
Current ESPHome can track a maximum of three targets. It also exposes moving/still target counts and per-target direction information.
Use Home Assistant as a Live Survey Tool
The easiest way to design zones is to open the X and Y entities on a phone while walking around the room.
- Stand at the left edge of the desk and note X/Y.
- Move to the right edge and note X/Y.
- Walk to the near and far edges.
- Repeat for sofa/dining areas.
- Watch whether coordinates jitter when you stand still.
- Walk through doorways and places you want to exclude.
Record a range, not one exact point. Human movement and radar tracking naturally move around by hundreds of millimetres.
Give Zones Some Margin
A common mistake is defining a sofa zone to exactly match the sofa footprint. The radar tracks the human body, not the furniture.
A person sitting on the edge, leaning forward or standing up can move the target position outside a too-tight rectangle.
Furniture footprint
┌────────────┐
│    sofa    │
└────────────┘

Better occupancy zone
┌──────────────────┐
│   ┌──────────┐   │
│   │   sofa   │   │
│   └──────────┘   │
└──────────────────┘
Start slightly wider than the furniture, then tighten the zone if adjacent traffic creates false occupancy.
Expose LD2450 Zone Coordinates to Home Assistant
ESPHome can expose each zone boundary as a Number entity. This is extremely useful because you can tune the rectangle from Home Assistant without recompiling firmware every time.
number:
  - platform: ld2450
    ld2450_id: ld2450_radar

    presence_timeout:
      name: "LD2450 Presence Timeout"

    zone_1:
      x1:
        name: "Zone 1 X1"
      y1:
        name: "Zone 1 Y1"
      x2:
        name: "Zone 1 X2"
      y2:
        name: "Zone 1 Y2"

    zone_2:
      x1:
        name: "Zone 2 X1"
      y1:
        name: "Zone 2 Y1"
      x2:
        name: "Zone 2 X2"
      y2:
        name: "Zone 2 Y2"

    zone_3:
      x1:
        name: "Zone 3 X1"
      y1:
        name: "Zone 3 Y1"
      x2:
        name: "Zone 3 X2"
      y2:
        name: "Zone 3 Y2"
After flashing, use those Number entities to enter your measured zone boundaries.
Zone Type: Disabled, Detection or Filter
ESPHome exposes the LD2450 Zone Type setting as a Select entity.
select:
  - platform: ld2450
    ld2450_id: ld2450_radar
    zone_type:
      name: "LD2450 Zone Type"
| Zone Type | Meaning |
|---|---|
| Disabled | Zone-area filtering/detection is disabled |
| Detection | Use configured zones as the areas where targets should count/detect |
| Filter | Use configured zones as areas to exclude/ignore |
Detection Mode: Build Virtual Rooms Inside One Room
Use Detection when your main goal is to define useful occupied areas.
Zone 1 = Desk
Zone 2 = Sofa
Zone 3 = Dining

Target enters Desk rectangle
→ Zone 1 target count > 0
→ Desk Occupied = ON
This is the mode most people want when creating area-aware lighting and scene automations.
Filter Mode: Exclusion Zones
Use Filter when the problem is unwanted detections from one or more areas.
- open doorway where people pass but should not occupy the room
- adjacent hallway visible to the radar
- moving curtains
- fan or mechanical movement
- part of another room through a thin partition
- other predictable false-target area
Doorway rectangle
→ Zone Type = Filter
→ targets inside exclusion rectangle ignored by zone logic
Filter mode is particularly useful after you already have reliable room presence but one specific corner keeps creating false detections.
Important Limitation: One Zone Type Setting
The LD2450 exposes one overall zone mode: Disabled, Detection or Filter. Do not assume Zone 1 can simultaneously be a Detection zone while Zone 2 is a Filter zone using the radar’s built-in zone setting.
If you need more complicated logic — for example two occupancy zones plus one independent doorway exclusion — you can keep the radar in a useful base mode and build additional logic from raw X/Y coordinates or zone counts inside ESPHome/Home Assistant.
Expose Zone Target Counts
The most useful ESPHome entities for automations are the per-zone target counts.
sensor:
  - platform: ld2450
    ld2450_id: ld2450_radar

    zone_1:
      target_count:
        name: "Desk Target Count"
        id: desk_target_count
      moving_target_count:
        name: "Desk Moving Targets"
      still_target_count:
        name: "Desk Still Targets"

    zone_2:
      target_count:
        name: "Sofa Target Count"
        id: sofa_target_count
      moving_target_count:
        name: "Sofa Moving Targets"
      still_target_count:
        name: "Sofa Still Targets"

    zone_3:
      target_count:
        name: "Dining Target Count"
        id: dining_target_count
      moving_target_count:
        name: "Dining Moving Targets"
      still_target_count:
        name: "Dining Still Targets"
Now Home Assistant can see not only whether the whole room has a target, but how many targets are inside each configured area.
Turn Zone Counts into Clean Occupancy Binary Sensors
For automations, a binary Desk Occupied entity is usually easier than checking whether a numeric sensor is greater than zero every time.
binary_sensor:
  - platform: template
    name: "Desk Occupied"
    id: desk_occupied
    device_class: occupancy
    lambda: |-
      return id(desk_target_count).state > 0;
    filters:
      - delayed_off: 3s

  - platform: template
    name: "Sofa Occupied"
    id: sofa_occupied
    device_class: occupancy
    lambda: |-
      return id(sofa_target_count).state > 0;
    filters:
      - delayed_off: 5s

  - platform: template
    name: "Dining Occupied"
    device_class: occupancy
    lambda: |-
      return id(dining_target_count).state > 0;
    filters:
      - delayed_off: 3s
The small delayed-off filters prevent a momentary tracking drop from instantly turning lights/scenes off.
Why I Prefer Zone Counts over Target Identity
The LD2450 can expose Target 1, Target 2 and Target 3, but you should not build an automation that assumes “Target 1 is always Panos” or even “Target 1 remains the same physical person forever.”
Tracking IDs are useful diagnostic channels, not permanent human identities. For room automation, the stable question is usually:
How many targets are in this rectangle?
not
Which numbered radar track is this person?
That is why zone target counts are normally the better Home Assistant abstraction.
Multi-Target Tracking
ESPHome exposes a switch for the LD2450 multi-target mode.
switch:
  - platform: ld2450
    ld2450_id: ld2450_radar

    multi_target:
      name: "LD2450 Multi Target Tracking"
Keep multi-target tracking enabled when the room can contain multiple people and the whole reason for using LD2450 is area-aware occupancy.
Example: Two People in Different Zones
Person A at desk
→ Desk Target Count = 1

Person B on sofa
→ Sofa Target Count = 1

Whole room Target Count = 2
That allows Home Assistant to run desk lighting and sofa lighting independently even though both occupants are seen by the same radar.
Example: Two People in the Same Zone
Desk Target Count = 2
Sofa Target Count = 0
Dining Target Count = 0
For most automations you only need “count > 0,” but the actual count can be useful for dashboards, room analytics or more advanced scenes.
Home Assistant Automation: Desk Lamp
alias: Desk lamp from LD2450 zone
triggers:
  - trigger: state
    entity_id: binary_sensor.desk_occupied
    to: "on"

actions:
  - action: light.turn_on
    target:
      entity_id: light.desk_lamp

mode: restart
For a real installation, combine this with a lux condition so the desk lamp does not turn on in bright daylight.
Home Assistant Automation: Turn Desk Lamp Off
alias: Desk lamp off when desk clears
triggers:
  - trigger: state
    entity_id: binary_sensor.desk_occupied
    to: "off"
    for: "00:02:00"

actions:
  - action: light.turn_off
    target:
      entity_id: light.desk_lamp
A longer Home Assistant off-delay is useful for human comfort. The short ESPHome delayed-off handles radar jitter; the longer Home Assistant delay handles normal occupancy behaviour.
Two Different Delays Solve Two Different Problems
| Delay | Purpose |
|---|---|
| ESPHome 2–5 s delayed_off | Smooth tiny radar/track dropouts |
| Home Assistant 1–5 min off delay | Prevent lights switching off during normal brief occupancy gaps |
Sofa Automation Example
alias: Sofa occupied evening scene
triggers:
  - trigger: state
    entity_id: binary_sensor.sofa_occupied
    to: "on"

conditions:
  - condition: sun
    after: sunset

actions:
  - action: scene.turn_on
    target:
      entity_id: scene.living_room_evening
Dining Zone Example
The dining zone can control different behaviour from the sofa zone even though both areas are in one open-plan room.
Dining occupied + lux low
→ dining pendant ON

Sofa occupied + TV ON
→ movie scene

Desk occupied
→ desk task lighting
This is the exact kind of logic that a simple PIR or one-bit presence sensor cannot provide.
A Stronger Whole-Room Occupancy Entity
You may still want one simple “Living Room Occupied” entity. Build it from the useful zones rather than from every radar return.
binary_sensor:
  - platform: template
    name: "Living Room Occupied"
    device_class: occupancy
    lambda: |-
      return id(desk_target_count).state > 0 ||
             id(sofa_target_count).state > 0 ||
             id(dining_target_count).state > 0;
    filters:
      - delayed_off: 10s
This gives you a clean whole-room entity that automatically ignores anything outside your chosen occupancy areas.
Doorway Exclusion: Two Ways to Do It
Doorways are a classic problem. Someone walks past the room and the radar briefly sees them.
Method 1: Built-in Filter mode. Define the doorway as one of the rectangles and set Zone Type to Filter.
Method 2: Detection zones only. Define Desk/Sofa/Dining rectangles and build whole-room occupancy only from those zones. A target that passes through an unimportant doorway area never satisfies the useful occupancy logic.
For Home Assistant, Method 2 is often conceptually cleaner because it asks “where do I care about occupancy?” rather than trying to model every unwanted space.
How to Build a Doorway Filter Rectangle
Suppose the doorway sits 1.8–2.8 m to the right of the radar and extends only 0–1.2 m into the room.
| Boundary | Example value |
|---|---|
| X1 | +1800 mm |
| Y1 | 0 mm |
| X2 | +2800 mm |
| Y2 | 1200 mm |
Walk through the doorway several times and enlarge the rectangle until the unwanted track falls fully inside it.
Zone Overlap
Avoid overlapping zones unless you have a deliberate reason. A target inside overlapping rectangles can logically contribute to more than one zone.
Bad accidental overlap:
Desk ┌───────────────┐
     │        ┌──────────── Sofa
     │ overlap│
     └────────┘

One person can appear to occupy both logical areas.
Leave a small neutral gap if you want mutually exclusive desk/sofa states.
But Do Not Make the Neutral Gap Too Large
A huge gap creates another problem: the person walks between zones and your whole-room occupancy turns off briefly.
The right amount depends on the automation. For lighting, a small overlap may actually be preferable to a dead gap. For “which chair is occupied?” logic, non-overlapping zones are cleaner.
Think in Terms of Automation Intent
| Goal | Zone design |
|---|---|
| Keep room lights on | Broad zones with tolerance; gaps are bad |
| Detect exact seating area | Tighter non-overlapping zones |
| Ignore corridor traffic | Detection zones away from doorway or Filter rectangle |
| Count people per area | Non-overlapping zones strongly preferred |
Target Jitter Near Zone Boundaries
A target near the edge of a rectangle may move in and out of the zone even when the person is not intentionally changing areas.
This can happen because of body motion, radar resolution, changing reflection points or simply leaning in a chair.
- Give the zone margin around the real activity area.
- Use delayed-off filtering.
- Do not put a critical boundary through the middle of a chair.
- Watch raw coordinates for several real sessions before finalising.
Why Coordinates Sometimes Jump
mmWave radar does not see a human as a precise GPS point. It sees radar reflections from a moving body and estimates a track from those reflections.
Different parts of the body can dominate the return at different moments. That is why a person standing still around X = 1000 mm may not produce exactly 1000 on every update.
Still Targets vs Moving Targets
Current ESPHome exposes total, moving and still target counts globally and per zone. This gives you more control than older LD2450 integrations.
However, do not confuse “still target output exists” with “LD2450 is automatically better than LD2410 at motionless occupancy.” LD2450’s main advantage remains position and multi-target tracking. LD2410’s architecture and tuning model remain extremely strong for detecting small/stationary human presence.
When to Combine LD2450 and LD2410
For a high-value room where both where and stillness matter, using both sensors can be justified.
LD2450
→ where are people?
→ desk / sofa / dining zones

LD2410
→ is somebody still present?
→ micro-motion / stationary confidence
You can then use LD2450 for zone-specific actions and LD2410 as a whole-room “do not turn everything off yet” safety net.
When PIR + LD2450 Is Better
A PIR can react very quickly to somebody entering the room, while LD2450 provides the richer position information after the target is established.
PIR ON
→ immediate room light

LD2450 target enters Desk
→ desk scene

LD2450/other presence remains
→ keep room occupied
This combination is especially useful where instant light-on response matters.
Use the Presence Timeout Carefully
ESPHome exposes an LD2450 presence_timeout Number entity. The default is 5 seconds.
The important nuance is that this timeout applies to the presence binary sensor states; it does not delay target details or target-count sensors.
That means changing the radar presence timeout is not the same thing as adding a delayed-off filter to your zone-derived binary sensors.
ESPHome Already Throttles LD2450 Updates
Current ESPHome applies default filters to LD2450 data to avoid flooding Home Assistant. Binary sensors use a one-second settle filter by default, while numeric target sensors are throttled/held at roughly one-second intervals unless you override the filters.
For room automation, one-second coordinate updates are usually more than enough. Removing all filtering can create a huge amount of state traffic without making the lights noticeably smarter.
Do Not Log Every Coordinate Forever
Three targets × X/Y/speed/angle/distance plus zone counts can create a lot of Home Assistant recorder data.
Once zoning is tuned, consider which diagnostic entities actually need long-term history. Your automation may only need:
- Desk Occupied
- Sofa Occupied
- Dining Occupied
- Whole Room Occupied
- Target Count
Raw X/Y entities can remain available for troubleshooting without necessarily being the centre of your dashboard/history strategy.
Placement Matters More Than Perfect YAML
The best zone definitions cannot compensate for poor physical placement.
- Mount the radar rigidly so it cannot vibrate.
- Face it into the useful activity area rather than across several rooms.
- Avoid unnecessary view through thin walls/doors if possible.
- Keep the radar face clear of metal.
- Test curtains, fans and moving objects in the real room.
- Do final zoning only after the enclosure and permanent mounting are fixed.
Moving the sensor 30 cm or rotating it a few degrees changes the entire coordinate map.
Sensor Rotation Completely Changes X/Y
The X/Y coordinates are relative to the radar, not to your house.
Rotate radar 20°
→ room furniture did not move
→ coordinate system DID move
That is why you should not tune zones while the module is lying loose on a desk and then mount it differently on a wall.
Do Not Put the Radar at an Extreme Angle
Zone automation is easiest when the sensor faces the area roughly straight on. An extreme diagonal installation compresses some useful floor-plan areas into awkward coordinate boundaries and pushes targets toward the edge of the field of view.
Use a Floor-Plan Screenshot in Home Assistant
A practical tuning trick is to keep a simple room sketch beside the raw X/Y sensor cards. You can then mark the coordinates where tracks appear while walking around.
You do not need a fancy custom radar map to get useful results. A table of measured boundary coordinates is often faster and easier to maintain.
What About Fancy Live X/Y Radar Maps?
Live radar-map cards can be excellent for tuning, but they are not required for the final automation.
The most robust final setup is usually boring: three zone counts converted into three occupancy entities.
Fancy graph = useful for setup
Simple binary occupancy = useful for daily automation
Example Complete ESPHome Zone Configuration
uart:
  id: ld2450_uart
  tx_pin: GPIO17
  rx_pin: GPIO16
  baud_rate: 256000
  parity: NONE
  stop_bits: 1

ld2450:
  id: ld2450_radar
  uart_id: ld2450_uart

binary_sensor:
  - platform: ld2450
    ld2450_id: ld2450_radar
    has_target:
      name: "Living Room Presence"
    has_moving_target:
      name: "Living Room Moving Target"
    has_still_target:
      name: "Living Room Still Target"

  - platform: template
    name: "Desk Occupied"
    device_class: occupancy
    lambda: |-
      return id(desk_target_count).state > 0;
    filters:
      - delayed_off: 3s

  - platform: template
    name: "Sofa Occupied"
    device_class: occupancy
    lambda: |-
      return id(sofa_target_count).state > 0;
    filters:
      - delayed_off: 5s

  - platform: template
    name: "Dining Occupied"
    device_class: occupancy
    lambda: |-
      return id(dining_target_count).state > 0;
    filters:
      - delayed_off: 3s

sensor:
  - platform: ld2450
    ld2450_id: ld2450_radar

    target_count:
      name: "Living Room Target Count"

    target_1:
      x:
        name: "Target 1 X"
      y:
        name: "Target 1 Y"

    target_2:
      x:
        name: "Target 2 X"
      y:
        name: "Target 2 Y"

    target_3:
      x:
        name: "Target 3 X"
      y:
        name: "Target 3 Y"

    zone_1:
      target_count:
        name: "Desk Target Count"
        id: desk_target_count

    zone_2:
      target_count:
        name: "Sofa Target Count"
        id: sofa_target_count

    zone_3:
      target_count:
        name: "Dining Target Count"
        id: dining_target_count

number:
  - platform: ld2450
    ld2450_id: ld2450_radar

    presence_timeout:
      name: "LD2450 Presence Timeout"

    zone_1:
      x1:
        name: "Desk X1"
      y1:
        name: "Desk Y1"
      x2:
        name: "Desk X2"
      y2:
        name: "Desk Y2"

    zone_2:
      x1:
        name: "Sofa X1"
      y1:
        name: "Sofa Y1"
      x2:
        name: "Sofa X2"
      y2:
        name: "Sofa Y2"

    zone_3:
      x1:
        name: "Dining X1"
      y1:
        name: "Dining Y1"
      x2:
        name: "Dining X2"
      y2:
        name: "Dining Y2"

select:
  - platform: ld2450
    ld2450_id: ld2450_radar
    zone_type:
      name: "LD2450 Zone Type"

switch:
  - platform: ld2450
    ld2450_id: ld2450_radar
    multi_target:
      name: "LD2450 Multi Target Tracking"
After flashing, enter your measured coordinates through the Number entities and set the Zone Type appropriate to your design.
Troubleshooting: Zone Always Shows Zero
- Confirm raw target count is greater than zero.
- Confirm target X/Y actually passes through the rectangle.
- Check Zone Type is not Disabled.
- Verify x1/x2 and y1/y2 boundaries.
- Check the target lies inside the physical radar field, not just the allowed coordinate numbers.
- Confirm LD2450 firmware meets the current ESPHome requirement.
If raw coordinates are good but the zone count is always zero, the issue is almost certainly zone configuration rather than UART wiring.
Troubleshooting: Zone Is Occupied When Nobody Is There
- Watch raw X/Y to identify where the false track sits.
- Check fans, curtains, doors and vibration.
- Look for activity behind thin partitions.
- Reduce the zone rectangle rather than immediately changing every automation.
- Try Filter mode if the false-target area is stable and predictable.
The advantage of a tracking radar is that false detections have coordinates. Use that information.
Troubleshooting: Person Moves Between Target 1 and Target 2
Do not use target numbers as permanent identities. Build automations from zone counts or physical X/Y position.
Troubleshooting: Sofa Occupancy Drops While Sitting
- Make the sofa rectangle larger around the human seating position.
- Add a few seconds of delayed-off filtering.
- Check whether the person’s track drifts outside the rectangle when leaning/reclining.
- If true stationary presence is the primary requirement, consider LD2410 or sensor fusion.
The fix is often zone geometry, not “increase sensitivity.”
Troubleshooting: People in the Hall Trigger the Room
This is exactly what Detection zones or a doorway Filter zone are for. Watch the hallway track, record its coordinates and remove it from the logical occupied area.
Troubleshooting: Coordinates Look Mirrored
Remember that X is relative to the sensor’s left/right orientation. If you are standing behind the module while looking toward the room, your visual left/right reference may be opposite to the target’s coordinate reference.
Walk deliberately along one side of the room and confirm whether ESPHome reports negative or positive X before drawing the entire map.
Troubleshooting: Coordinates Changed After Installation
If the final enclosure changes the module angle, the coordinate system changes too. Retune after permanent mounting.
Best Rooms for LD2450 Zones
| Room | Why zones are useful |
|---|---|
| Living room | Sofa / dining / desk / TV-area scenes |
| Office | Desk occupancy vs walking area |
| Open-plan kitchen | Cooking zone vs dining zone |
| Bedroom | Bedside / dressing / doorway logic, with caution for still presence |
| Home cinema | Seating area occupancy and lighting scenes |
| Large room | Different functional areas from one radar |
Where LD2450 Zones Are Less Useful
- tiny room where simple occupied/not occupied is enough
- spaces where completely motionless presence is the only priority
- rooms with difficult reflections that cannot be solved by placement
- outdoor use
- installations where the sensor must look through several partitions
Do not choose LD2450 just because “three targets” sounds more advanced. Use it when the positional data solves a real automation problem.
LD2450 vs LD2410 for Home Assistant
| Need | Better choice |
|---|---|
| Simple reliable room presence | LD2410 |
| Stationary/micro-motion focus | LD2410 |
| X/Y coordinates | LD2450 |
| Desk/Sofa zones | LD2450 |
| Up to three tracked targets | LD2450 |
| Detailed distance-gate tuning | LD2410 |
LD2450 vs RD-03D for Zones
RD-03D is the closest alternative in concept because it also provides multi-target X/Y tracking and now has native ESPHome support.
LD2450 still has the more established Home Assistant zoning ecosystem and current ESPHome exposes its built-in three-zone configuration directly. That makes LD2450 the easier starting point for a zone-based room automation project.
Best Practical Setup
One LD2450 on fixed wall
        ↓
ESP32 hardware UART @ 256000
        ↓
ESPHome raw X/Y + three zone counts
        ↓
Desk / Sofa / Dining occupancy binary sensors
        ↓
Home Assistant lighting, scenes and HVAC logic
My Recommended Tuning Workflow
- Start with raw tracking only.
- Mount the sensor permanently.
- Walk the real room and record X/Y.
- Create broad rectangles.
- Watch several days of normal use.
- Tighten only where false occupancy occurs.
- Add short ESPHome delayed-off filters.
- Add longer Home Assistant comfort delays.
- Hide/ignore unnecessary diagnostic entities once stable.
Final Recommendation
The LD2450’s real Home Assistant advantage is not “mmWave detects people.” Many sensors can do that. Its advantage is that one inexpensive radar can turn a single room into several logical occupancy areas.
LD2410 asks:
"Is somebody here?"

LD2450 can ask:
"Where are they?"
Use the coordinate system as a measurement tool, not as a theoretical drawing exercise. Install the radar, watch real X/Y tracks, define the three useful rectangles and convert the zone counts into simple occupancy entities.
For most users, the cleanest design is Detection zones for the areas that actually matter rather than trying to model every square metre of the room. Use Filter mode when one repeatable false-target area needs to be excluded.
Once tuned, the automation can become genuinely location-aware: the desk lamp follows the desk, the evening scene follows the sofa, the dining pendant follows the table, and corridor traffic can be ignored — all from one ESP32 and one LD2450.
Related ESP32 Guides
- ESP32 LD2450 Multi-Target Presence Sensor with Home Assistant
- LD2410 vs LD2450 vs LD2420 vs RD-03D: Best mmWave Sensor
- ESP32 LD2410 mmWave Presence Sensor with Home Assistant
- RD-03D ESP32 Multi-Target mmWave Home Assistant Guide
Datasheets & External Resources
All external manufacturer/framework links are collected here so the main article keeps readers inside esp32.co.uk.
- ESPHome LD2450 Component — current UART, target, zone, number, select, filter and multi-target configuration.
- Hi-Link HLK-LD2450 Product Page — official 24 GHz FMCW sensor overview, 6 m range and ±60° azimuth specification.
- Hi-Link LD2450 Downloads and Technical Resources — manufacturer manuals, UART protocol, tools and firmware resources.