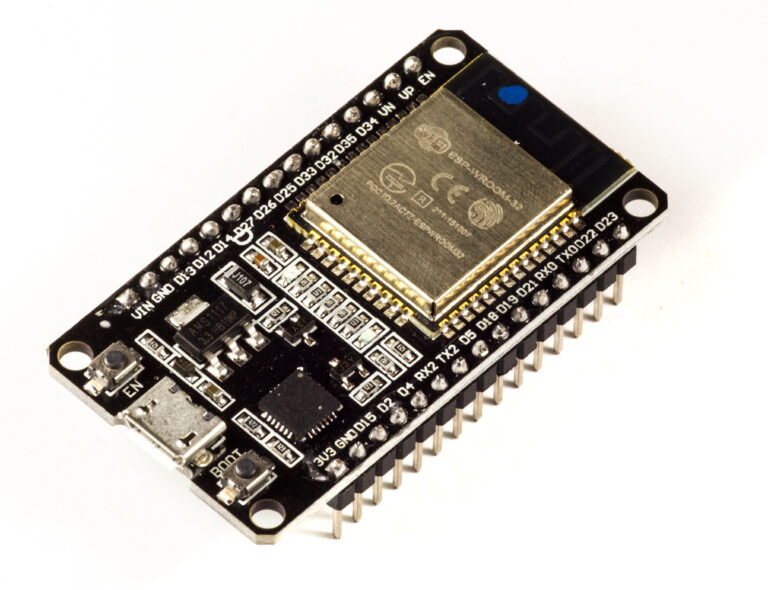
Quick Summary (TL;DR):
A conventional roller shutter or tubular blind motor normally uses two direction inputs: OPEN/UP and CLOSE/DOWN. An ESP32AliExpress price can control those directions through two relay outputs and expose the motor as a native Home Assistant cover entity with Open, Close, Stop and estimated position. The critical electrical rule is that UP and DOWN must never be energised together. Current ESPHome supports GPIO relay interlocking and interlock_wait_time, but its own documentation warns that software interlocks cannot guarantee safety during every reset, boot or software failure. For a mains shutter motor, use a hardware interlock or purpose-built shutter relay as well. If the motor has factory endstops but gives ESPHome no feedback, use a time_based cover: measure full opening and closing times and let ESPHome estimate position. If you have real open/closed limit switches or motor-movement feedback, use an endstop or feedback cover. The modern feedback cover can add max run time, direction-change delay, movement sensing, obstacle inputs and optional rollback. For most retrofits, the best architecture is: retain the motor’s factory endstops, use two hardware-interlocked relays, add a short stop-before-reverse delay, keep wall-switch control local, and expose only the cover entity to Home Assistant.
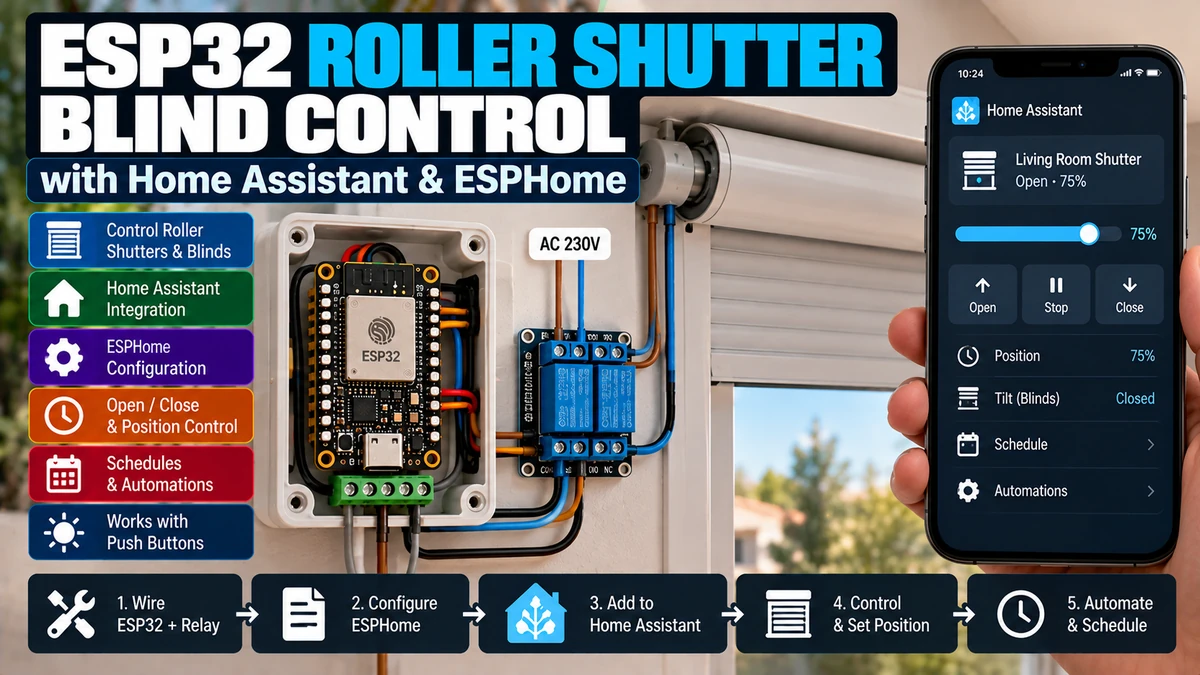
Materials You’ll Need
| Item | Why you need it |
|---|---|
| ESP32AliExpress price development board | Runs ESPHome and cover logic |
| Two-direction shutter relay / interlocked relay pair | Switches UP and DOWN safely |
| Roller shutter / blind motor | Existing tubular or geared motor |
| Isolated low-voltage PSU | Powers ESP32AliExpress price and relay logic |
| Optional wall buttons | Local manual control |
| Optional open/closed endstops | True endpoint confirmation |
| Optional movement/current sensor | Advanced feedback and diagnostics |
| Home Assistant + ESPHome | UI, schedules, sun and presence automations |
Understand the Motor Before Wiring
Many mains tubular motors use a common neutral plus separate live direction wires. One direction wire drives the motor upward and the other downward. Exact colours and wiring differ between brands, so use the motor manufacturer diagram rather than a generic colour assumption.
Concept only:

Neutral ───────────── motor common
Live → UP relay ───── motor UP
Live → DOWN relay ─── motor DOWN

Never energise UP + DOWN simultaneously
Hardware Interlock Is Not Optional Engineering Detail
ESPHome can interlock two GPIO switches in software, but current ESPHome documentation explicitly says a software bug or reset-time GPIO behaviour can still activate outputs unexpectedly. For a direction-reversing motor, design the relay circuit so both directions cannot physically be powered together.
| Layer | Purpose |
|---|---|
| ESPHome interlock | Prevents normal software commands from enabling both relays |
| Interlock wait time | Creates a stop period before reverse direction |
| Hardware interlock | Physically/electrically prevents simultaneous motor directions |
| Motor endstops | Stop travel at top/bottom |
ESPHome Relay Interlock
switch:
  - platform: gpio
    id: shutter_open_relay
    internal: true
    restore_mode: ALWAYS_OFF
    pin: GPIO26
    interlock: [shutter_close_relay]
    interlock_wait_time: 500ms

  - platform: gpio
    id: shutter_close_relay
    internal: true
    restore_mode: ALWAYS_OFF
    pin: GPIO27
    interlock: [shutter_open_relay]
    interlock_wait_time: 500ms
The 500 ms value is a practical example, not a universal motor specification. Some motors/controllers require a longer pause before reversing.
Why restore_mode: ALWAYS_OFF Matters
After reboot, both direction relays should normally default to OFF. A reboot should not resume a shutter movement automatically. Still test the actual relay board because active-low inputs and boot GPIO states can briefly behave differently before ESPHome fully starts.
Use a Cover Entity, Not Two Relay Switches
The raw relay switches should normally be internal. Home Assistant should see one object: cover.living_room_shutter. That gives consistent Open, Close, Stop and position controls and prevents automations from bypassing the cover state machine.
Time-Based Cover: Best for Most Existing Tubular Motors
Use time_based when the motor already has reliable built-in top/bottom endstops but ESPHome has no true position feedback. ESPHome estimates position from motor run time.
cover:
  - platform: time_based
    name: "Living Room Shutter"
    id: living_room_shutter

    open_action:
      - switch.turn_on: shutter_open_relay
    open_duration: 22s

    close_action:
      - switch.turn_on: shutter_close_relay
    close_duration: 24s

    stop_action:
      - switch.turn_off: shutter_open_relay
      - switch.turn_off: shutter_close_relay
How Time-Based Position Works
0%   = fully closed
100% = fully open

Full opening = 22s
Run upward for ~11s from closed
→ estimated position ≈ 50%
This is an estimated state, not encoder feedback. It can be very useful for daily automation but can drift if the motor moves without ESPHome knowing.
Measure Open and Close Times Separately
- Start from fully closed and time a complete opening.
- Repeat at least three times.
- Average the actual travel time.
- Repeat separately from fully open to fully closed.
- Do not assume gravity/load makes both directions identical.
Use the actual motor travel time, not a guessed value from another shutter.
Position Drift: Why It Happens
- wall switch drives the motor outside ESPHome
- power fails during movement
- travel time changes slightly with temperature/load
- manual mechanical movement
- incorrect opening/closing duration
A full movement to a known built-in endpoint can re-anchor the estimate. True endstop feedback eliminates much of this uncertainty.
Endstop Cover: Add True Endpoint Confirmation
If you can install physical switches for fully open and fully closed positions, ESPHome can stop and confirm the cover at those real endpoints.
binary_sensor:
  - platform: gpio
    id: open_endstop
    pin:
      number: GPIO32
      mode:
        input: true
        pullup: true
      inverted: true

  - platform: gpio
    id: closed_endstop
    pin:
      number: GPIO33
      mode:
        input: true
        pullup: true
      inverted: true

cover:
  - platform: endstop
    name: "Living Room Shutter"

    open_action:
      - switch.turn_on: shutter_open_relay
    open_duration: 22s
    open_endstop: open_endstop

    close_action:
      - switch.turn_on: shutter_close_relay
    close_duration: 24s
    close_endstop: closed_endstop

    stop_action:
      - switch.turn_off: shutter_open_relay
      - switch.turn_off: shutter_close_relay

    max_duration: 30s
Why max_duration Is Valuable
If a limit switchAliExpress price fails or wiring breaks, maximum duration prevents a command from remaining active forever. Set it longer than legitimate worst-case travel but short enough to limit a fault.
Feedback Cover: The Most Flexible 2026 Option
Current ESPHome’s feedback cover can operate with time estimation, endpoint sensors, movement sensors or combinations of these. It also adds direction-change wait time, maximum duration, obstacle sensors and optional rollback.
- open/closed endstop inputs
- opening/closing movement feedback
- infer built-in endstop when movement stops
- direction_change_wait_time
- acceleration_wait_time
- max_duration
- obstacle sensors
- obstacle rollback
cover:
  - platform: feedback
    name: "Living Room Shutter"
    id: living_room_shutter

    open_action:
      - switch.turn_on: shutter_open_relay
    open_duration: 22s
    open_endstop: open_endstop

    close_action:
      - switch.turn_on: shutter_close_relay
    close_duration: 24s
    close_endstop: closed_endstop

    stop_action:
      - switch.turn_off: shutter_open_relay
      - switch.turn_off: shutter_close_relay

    max_duration: 30s
    direction_change_wait_time: 500ms
Stop Before Reverse
Opening
→ CLOSE command arrives

1. UP relay OFF
2. wait 500ms
3. DOWN relay ON
This is mechanically/electrically kinder than instant reversal and complements the relay interlock.
Wall Switch Integration
A smart shutter should remain usable when Wi-Fi or Home Assistant is unavailable. The cleanest retrofit is often to make the wall rocker a low-voltage ESP32AliExpress price input and let the ESP32 command the interlocked relay module.
Wall switch/button
→ isolated low-voltage input
→ ESP32 local cover action
→ interlocked relays
→ motor
Do not place mains from an existing wall switch directly on an ESP32 input.
Momentary Wall Buttons
binary_sensor:
  - platform: gpio
    id: shutter_up_button
    pin:
      number: GPIO18
      mode:
        input: true
        pullup: true
      inverted: true
    on_press:
      - cover.open: living_room_shutter

  - platform: gpio
    id: shutter_down_button
    pin:
      number: GPIO19
      mode:
        input: true
        pullup: true
      inverted: true
    on_press:
      - cover.close: living_room_shutter
Momentary buttons are usually easier to integrate than maintained UP/DOWN mains rockers because every press becomes a clear command event.
How to Implement STOP
- a dedicated centre STOP button
- second press of same direction stops
- opposite-direction press first stops, then reverses after delay
- both low-voltage buttons together = stop
Choose behaviour that matches what users expect from the original shutter control.
Keep Local Button Logic Local
Preferred:
wall button → ESPHome → motor
                   ↓
              Home Assistant sees state

Avoid if unnecessary:
wall button → HA automation → Wi-Fi → ESPHome → motor
Local ESPHome actions remain responsive during Home Assistant restarts or network outages.
Mains and Isolation
The ESP32 should only handle low-voltage logic. Use correctly rated, isolated relay hardware for mains motor circuits. Roller shutter motors are inductive loads, so select relays/contactors for motor duty and inrush rather than only the nominal running current.
Existing Motor Endstops Should Stay in Service
Factory mechanical/electronic endstops are the primary travel limits on most tubular motors. Time estimation is for smart position tracking, not a replacement for the motor’s end-of-travel protection.
Current / Movement Feedback
If you can detect actual motor current or movement, ESPHome can use that feedback to know when the motor is really running. This is especially useful when the motor has internal endstops: current/movement stops when the motor reaches the end.
Relay commanded ON
→ current/movement detected
→ shutter really moving

Movement stops without STOP command
→ likely built-in endstop reached
Current-Based Obstacle Detection Has Limits
Do not assume a current spike is a certified anti-crush system. ESPHome warns that some mechanisms can physically damage an obstacle before current-based detection reacts. Use the safety system appropriate to the shutter, awning, gate or blind mechanism.
Obstacle Sensors and Rollback
Feedback cover can accept separate obstacle binary sensors and optionally roll back after an obstruction.
Closing
→ obstacle sensor ON
→ STOP
→ optional reopen ~10%
Only configure rollback when you have a valid obstacle sensor and have tested the mechanical result.
Position Percentage Is Motor Travel, Not Always Visible Opening
Roller slats can stack, unroll and change effective drum diameter. A mathematically 50% motor-travel position may not equal exactly 50% visible window area. If daylight opening matters, calibrate a custom position mapping.
Home Assistant Automations
alias: Close shutters at sunset
triggers:
  - trigger: sun
    event: sunset

actions:
  - action: cover.close_cover
    target:
      entity_id: cover.living_room_shutter
alias: Morning shutter
triggers:
  - trigger: time
    at: "07:30:00"

actions:
  - action: cover.open_cover
    target:
      entity_id: cover.living_room_shutter
Summer Solar-Heat Automation
External shutters are excellent for reducing solar heat gain. A useful automation can partially close a south/west-facing shutter only when sun position, outdoor temperature and indoor conditions justify it.
Direct sun on facade
+ outdoor temp > 30°C
+ indoor temp rising
→ close shutter to ~20–30% open
Awnings Need Wind Logic
If the same ESPHome pattern controls an awning, add local wind-protection logic and follow the manufacturer’s limits. Do not rely solely on a cloud automation for a condition that can physically damage an awning.
Power Failure During Movement
A time-based cover can lose position accuracy if power fails while it is moving. The next full run to a known built-in endpoint can re-synchronise position. Real endstop sensors make recovery more deterministic.
Boot-Test Before Connecting the Motor
- Disconnect the motor direction wires.
- Power-cycle the ESP32 repeatedly.
- Press Reset repeatedly.
- Perform OTA updates.
- Watch both relay outputs.
- Confirm both relays are OFF at idle.
- Confirm they never energise simultaneously.
- Confirm reverse direction includes a stop period.
- Only then connect the motor.
Hardware interlock should still be present even if all software tests pass.
Active-Low Relay Boards
Many relay modules energise when GPIO goes LOW. Configure inversion correctly and verify boot behaviour.
switch:
  - platform: gpio
    id: shutter_open_relay
    pin:
      number: GPIO26
      inverted: true
    restore_mode: ALWAYS_OFF
Troubleshooting: Open Command Moves Down
The motor direction wires or relay identities are swapped. Correct the physical wiring or swap the cover actions so the Home Assistant labels always match real movement.
Troubleshooting: Position Drifts
- re-measure open and close durations
- route manual wall control through ESPHome
- check unexpected power failures
- periodically run to a full endpoint
- add endstop/movement feedback if position accuracy matters
Troubleshooting: Both Relays Pulse at Boot
Disconnect the motor immediately. Review GPIO choice, active-low relay inputs and boot state. Use a hardware interlock so a software/boot failure cannot apply both directions.
Troubleshooting: Shutter Reaches End but ESPHome Keeps Running
If the motor has built-in endstops, the motor can stop internally while the relay command remains active until the timed action completes. Use accurate durations, maximum run limits, or movement/endstop feedback so the controller better matches real motion.
Troubleshooting: Reverse Command Trips or Jars the Motor
Increase the stop-before-reverse delay. Some motors need more than a few hundred milliseconds before direction reversal.
Which Cover Platform Should You Choose?
| Hardware | Best starting platform |
|---|---|
| Built-in motor endstops, no feedback | time_based |
| Physical top/bottom limit switches | endstop or feedback |
| Movement/current feedback | feedback |
| Obstacle input / rollback | feedback |
| External/manual controller movement should be tracked | feedback |
Complete Practical Time-Based Example
esphome:
  name: living-room-shutter
  friendly_name: Living Room Shutter

esp32:
  board: esp32dev
  framework:
    type: esp-idf

logger:

api:
  encryption:
    key: !secret shutter_api_key

ota:
  - platform: esphome
    password: !secret ota_password

wifi:
  ssid: !secret wifi_ssid
  password: !secret wifi_password

switch:
  - platform: gpio
    id: shutter_open_relay
    internal: true
    restore_mode: ALWAYS_OFF
    pin: GPIO26
    interlock: [shutter_close_relay]
    interlock_wait_time: 500ms

  - platform: gpio
    id: shutter_close_relay
    internal: true
    restore_mode: ALWAYS_OFF
    pin: GPIO27
    interlock: [shutter_open_relay]
    interlock_wait_time: 500ms

cover:
  - platform: time_based
    name: "Living Room Shutter"
    id: living_room_shutter

    open_action:
      - switch.turn_on: shutter_open_relay
    open_duration: 22s

    close_action:
      - switch.turn_on: shutter_close_relay
    close_duration: 24s

    stop_action:
      - switch.turn_off: shutter_open_relay
      - switch.turn_off: shutter_close_relay

binary_sensor:
  - platform: gpio
    id: shutter_up_button
    pin:
      number: GPIO18
      mode:
        input: true
        pullup: true
      inverted: true
    on_press:
      - cover.open: living_room_shutter

  - platform: gpio
    id: shutter_down_button
    pin:
      number: GPIO19
      mode:
        input: true
        pullup: true
      inverted: true
    on_press:
      - cover.close: living_room_shutter
Recommended Architecture
Motor factory endstops
        ↓
hardware-interlocked shutter relay
        ↓ low-voltage inputs
ESP32 + ESPHome
├─ local wall buttons
├─ time/feedback cover
├─ direction-change delay
└─ max run / feedback where available
        ↓
Home Assistant cover entity
Final Recommendation
Treat an ESP32 roller-shutter project as a motor-control retrofit, not just a smart relay project. The motor’s two directions must never be active together, so combine software interlocking with proper hardware interlocking and a stop-before-reverse delay.
For the common case of a tubular motor with built-in endstops and no feedback, time_based is simple and effective. Calibrate open and close travel separately, keep the raw relays internal and expose one proper cover entity to Home Assistant.
If you have real endstops, current/movement feedback or obstacle sensors, move to feedback cover so the controller can observe more of the physical mechanism and enforce max duration, reversal delay and safety actions.
Keep local wall control functional without Home Assistant. Home Assistant should add sun/heat schedules, scenes, remote control and convenience—not become the only way to operate the shutter.
Related ESP32 Guides
Datasheets & External Resources
All external manufacturer/framework references are collected here so the main article keeps readers inside esp32.co.uk.
- ESPHome Time Based Cover — time-estimated position without feedback.
- ESPHome Endstop Cover — endpoint sensors and maximum duration.
- ESPHome Feedback Cover — movement/endstop feedback, direction-change delay, obstacle sensors and rollback.
- ESPHome Current Based Cover — current-based movement/endstop concepts and safety cautions.
- ESPHome GPIO Switch Interlocking — software interlock, wait time and hardware-interlock warning.