Quick Summary (TL;DR):
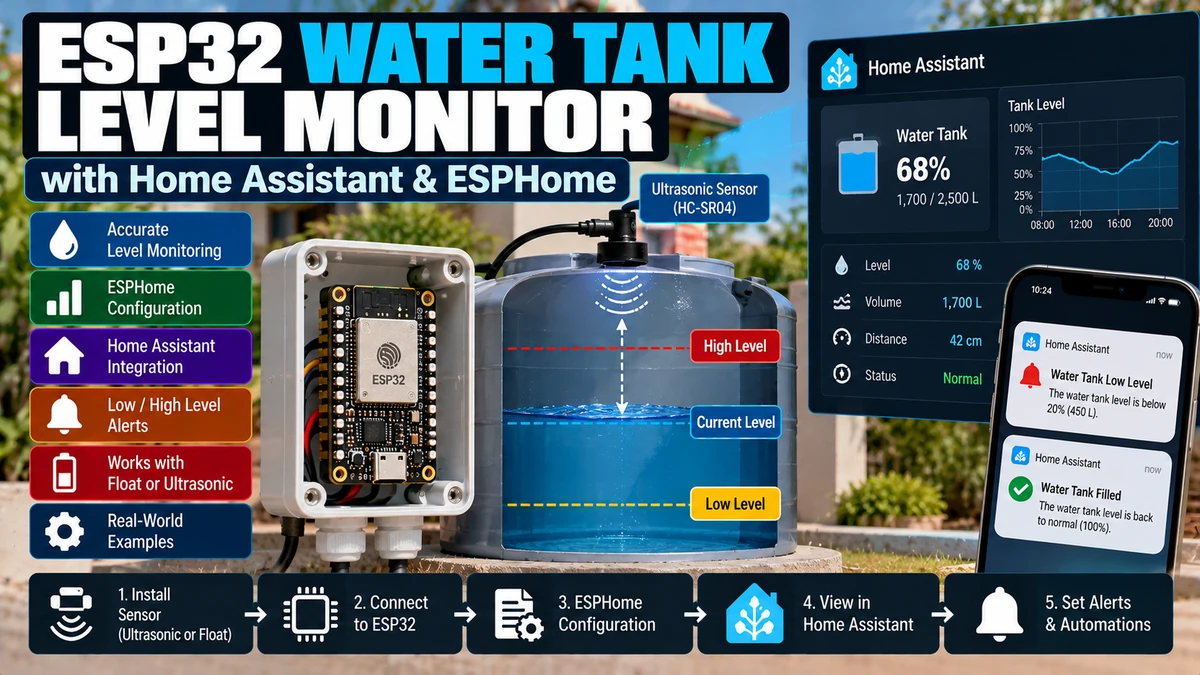
You can turn an ESP32AliExpress price into a reliable water tank level monitor for Home Assistant using an ultrasonic distance sensorAliExpress price such as the JSN-SR04TAliExpress price/AJ-SR04M or, for difficult tanks, a hydrostatic pressure sensor. The ESP32AliExpress price does not measure “water level” directly with ultrasonic: it measures the air gap from the sensor to the water surface. You then convert that distance into level using two real calibration points: empty-tank distance and full-tank distance. The basic formula is percentage = (empty distance − measured distance) ÷ (empty distance − full distance) × 100, clamped to 0–100%. For a vertical rectangular or vertical cylindrical tank with constant cross-sectional area, litres scale linearly with percentage, so litres = percentage × tank capacity. For a horizontal cylindrical or irregular tank, litres are not linear with height; use the horizontal-cylinder formula or a calibration table. For an outdoor/plastic tank, I prefer a waterproof ultrasonic transducer over HC-SR04. Current ESPHome has a dedicated jsn_sr04t component for JSN-SR04TAliExpress price/AJ-SR04M in serial modes, documenting approximately 25 cm to 600 cm measurement range and 1 mm resolution. That 25 cm blind zone matters: the sensor must remain at least roughly 25 cm above the maximum water surface. If you use a conventional trigger/echo ultrasonic module powered at 5 V, protect the ESP32 from any 5 V ECHO/TX signal with a divider or level shifter. For stable Home Assistant data, use a median filter to reject occasional acoustic outliers, then a moving average if needed. Once the level is available, Home Assistant can show percentage, litres and days-of-water estimate, send low-level alerts, detect abnormal consumption and control a refill pump—with a separate physical float switch or other independent high-level safety cut-off strongly recommended for any automatic fill system.
Materials You’ll Need
| Item | Why you need it |
|---|---|
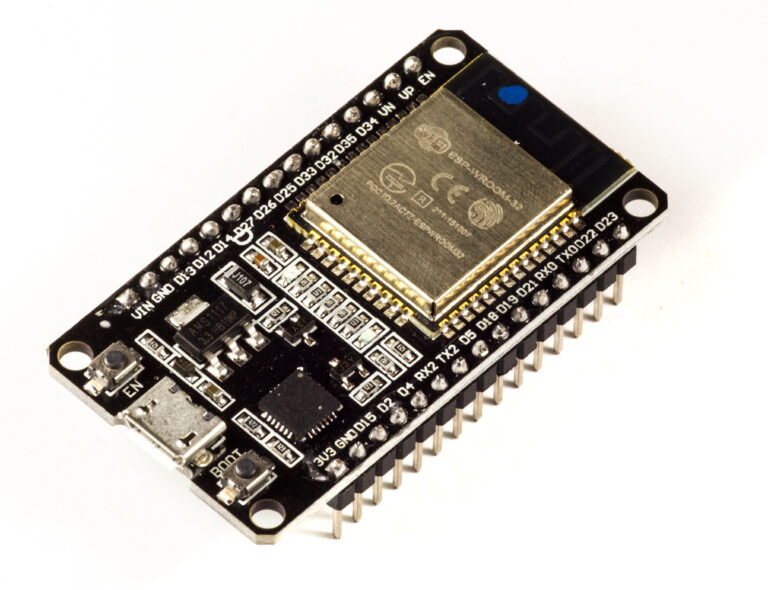
| ESP32 development board | Runs ESPHome, calculation and Home Assistant connection |
| JSN-SR04T or AJ-SR04M waterproof ultrasonic sensor | Preferred non-contact sensor for many outdoor/plastic tanks |
| 5 V supply | Typical supply for ESP32 board and many ultrasonic modules |
| Voltage divider / level shifter | Protects ESP32 RX/ECHO input when sensor logic is 5 V |
| Water-resistant enclosure | Keeps ESP32 and sensor electronics dry |
| Tank dimensions/capacity | Needed for percentage and litres calculations |
| Tape measure | Measures empty/full calibration distances |
| ESPHome | Distance sensor, filtering and derived level entities |
| Home Assistant | Dashboard, alerts, history and pump automation |
| Optional float switches | Independent low/high-level confirmation and safety |
| Optional pressure transducer | Alternative for tanks where ultrasonic is unreliable |
How Ultrasonic Tank Monitoring Works
Sensor mounted at top of tank
        ↓ ultrasonic pulse
        ↓
      air gap
        ↓
~~~~~~~~~~~~~~~~~~~~  water surface
████████████████████  stored water
The ultrasonic sensor measures the distance from its transducer to the water surface. When the tank fills, the measured air-gap distance becomes smaller. When the tank empties, the measured distance becomes larger.
The Two Measurements That Matter
| Calibration point | Meaning |
|---|---|
| Empty distance | Sensor-to-water/bottom reference when tank is considered 0% |
| Full distance | Sensor-to-water distance when tank is considered 100% |
Do not assume full distance is zero. Every ultrasonic sensor has a near-field blind zone, and the transducer usually sits above the tank’s actual maximum water level.
The Percentage Formula
level_fraction = (empty_distance - measured_distance)
                 / (empty_distance - full_distance)

level_percent = level_fraction × 100
Example:
Empty distance = 2.00 m
Full distance  = 0.30 m
Measured       = 1.15 m

Level = (2.00 - 1.15) / (2.00 - 0.30)
      = 0.85 / 1.70
      = 0.50
      = 50%
Always Clamp the Result
Real sensors can occasionally report slightly outside your calibration range. Clamp the calculated result so Home Assistant never shows -4% or 107%.
percentage < 0   → publish 0%
percentage > 100 → publish 100%
Best Sensor Choice
| Sensor type | Best use | Main limitation |
|---|---|---|
| JSN-SR04T / AJ-SR04M | Outdoor/plastic tanks, waterproof transducer | ~25 cm blind zone; condensation/foam can still affect sound |
| HC-SR04 | Dry indoor prototype | Exposed transducers; often limited to shorter practical range |
| Hydrostatic pressure sensor | Deep tanks, condensation/foam, narrow geometry | Requires wetted sensor and analog/4–20 mA interface |
| Float switches | Simple fixed points / safety | No continuous percentage |
For the project in this guide, the waterproof ultrasonic sensor is the primary build because it keeps all electronics out of the water.
Why I Prefer JSN-SR04T for a Water Tank
- sealed remote ultrasonic transducer
- long cable between transducer and electronics board
- current ESPHome support
- up to roughly 6 m documented range in current ESPHome component
- non-contact measurement
- no corrosion/electrode fouling
- easy to retrofit through a top opening
The electronics PCB still needs a dry enclosure. “Waterproof ultrasonic” normally describes the transducer, not the entire loose PCB assembly.
The 25 cm Blind Zone Is Critical
Current ESPHome documentation for JSN-SR04T/AJ-SR04M lists a minimum distance of about 25 cm. If the water can rise to 8 cm below the transducer, the sensor may be unable to measure the final part of the fill.
Bad:
sensor
  ↓ 8 cm
~~~~~~~~ water at FULL

Better:
sensor
  ↓ 30+ cm
~~~~~~~~ water at FULL
Design the mounting position so the maximum water surface remains outside the near-field blind zone.
Do Not Aim at a Tank Brace or Float Valve
Ultrasonic sensors return the strongest nearby acoustic reflection. If the beam hits a cross-brace, pipe, float valve or sloped tank shoulder before it hits water, Home Assistant may report that object instead of the water surface.
- Mount above an unobstructed vertical acoustic path.
- Keep the beam away from inlet pipes and internal braces.
- Use a stilling tube only when its geometry is appropriate and tested.
- Check the reading at empty, half and full levels before trusting the installation.
Sensor Placement on a Plastic Tank
The best position is usually on the top, facing vertically downward toward a broad, flat part of the water surface.
TOP VIEW
┌────────────────────┐
│        ● sensor    │
│                    │
│    broad clear     │
│    water area      │
│                    │
└────────────────────┘
Avoid mounting close to a side wall where echoes can bounce between the wall and water.
Condensation Is the Main Ultrasonic Enemy
A waterproof transducer can survive moisture, but a film of water on the acoustic face can distort or weaken the ultrasonic pulse.
Warm water tanks, underground cisterns and sealed tanks can develop heavy condensation at the roof. In those environments:
- mount the transducer so droplets can drain rather than pool
- avoid recesses that collect condensation
- use slower update intervals rather than constant pinging
- watch for sudden impossible distance jumps
- consider a pressure sensor if condensation remains chronic
Foam Can Also Break Ultrasonic Measurements
Ultrasonic relies on a clean acoustic reflection from the liquid surface. Thick foam, turbulent filling, splashing or a very uneven surface can produce unstable readings.
This is another case where hydrostatic pressure is often a better measurement principle.
JSN-SR04T ESPHome: Current Serial Modes
Current ESPHome has a dedicated jsn_sr04t sensor component for JSN-SR04T and AJ_SR04M in supported serial modes.
| Mode | Behaviour |
|---|---|
| Mode 1 | Sensor measures continuously and sends distance on TX at 9600 baud |
| Mode 2 | ESPHome requests a reading by sending a command; sensor replies with distance |
For tank monitoring, controlled/requested measurements are generally preferable because you do not need 10 readings per second for a water level that changes slowly.
Mode Selection Depends on Board Revision
JSN-SR04T V1/V2/V3 boards use different mode pads/resistor arrangements. Current ESPHome documentation specifies the required pad/resistor choices for each revision.
Check the printed revision on your module before soldering a mode resistor. Do not assume a random internet photo matches your PCB.
JSN-SR04T UART Wiring
Sensor VCC  ───── 5V supply
Sensor GND  ───── ESP32 GND
Sensor TX   ───── ESP32 RX (level-shift if sensor TX is 5V)
Sensor RX   ───── ESP32 TX
If you power a module at 5 V and its serial TX output is also 5 V logic, reduce that signal before it reaches the ESP32 RX pin. ESP32 GPIOs are 3.3 V logic.
Simple 5 V to 3.3 V Divider
Sensor TX/ECHO (5V)
       │
      10kΩ
       │
       ├──── ESP32 RX/GPIO (~3.3V)
       │
      20kΩ
       │
      GND
The exact resistor values are not sacred; the ratio is what reduces 5 V to a safe logic level. A proper logic-level shifter is also fine.
Never Connect 5 V ECHO Directly to ESP32
This warning also applies to a conventional HC-SR04-style trigger/echo setup. The standard HC-SR04 is a 5 V module and its ECHO output can be 5 V.
The ESP32 may appear to work for a while with direct 5 V input, but that is outside normal GPIO specifications and is not a sound design.
Current ESPHome JSN-SR04T YAML
uart:
  id: tank_uart
  tx_pin: GPIO17
  rx_pin: GPIO16
  baud_rate: 9600

sensor:
  - platform: jsn_sr04t
    uart_id: tank_uart
    model: jsn_sr04t
    name: "Tank Water Distance"
    id: tank_distance
    update_interval: 10s
Current ESPHome defaults the component update interval to 60 seconds in controlled mode. Ten to thirty seconds is already very frequent for most domestic tanks; one minute is perfectly adequate in many installations.
Do You Need One-Second Updates?
No. A 2000-litre tank does not meaningfully change every second under normal domestic use.
Useful tank monitoring:
10–60 second measurements

Usually pointless:
10 measurements/second stored in Home Assistant
Slower updates reduce acoustic traffic, Wi-Fi/database noise and reaction to temporary surface turbulence.
Filter the Raw Distance Before Calculating Level
Ultrasonic sensors occasionally return outliers due to splashes, acoustic multipath or weak echoes. Filter distance first, then calculate percentage.
sensor:
  - platform: jsn_sr04t
    uart_id: tank_uart
    name: "Tank Water Distance"
    id: tank_distance
    update_interval: 10s
    filters:
      - median:
          window_size: 5
          send_every: 3
          send_first_at: 3
Current ESPHome’s median filter is specifically designed to reject outlier values. A five-value window is a good starting point for a slowly changing tank.
Median vs Moving Average
| Filter | What it does | Tank use |
|---|---|---|
| Median | Rejects isolated high/low outliers | Excellent first filter for ultrasonic |
| Moving average | Smooths remaining noise | Optional after median |
Do not apply a huge moving average that takes several minutes to respond if you also want fast overflow/refill monitoring.
Example Median + Moving Average
filters:
  - median:
      window_size: 5
      send_every: 3
      send_first_at: 3
  - sliding_window_moving_average:
      window_size: 3
      send_every: 1
Start with the median filter alone. Add additional smoothing only if the graph is still unnecessarily noisy.
Calculate Tank Percentage in ESPHome
Assume:
empty_distance = 2.00 m
full_distance  = 0.30 m
sensor:
- platform: template
name: "Water Tank Level"
id: tank_level_percent
unit_of_measurement: "%"
icon: "mdi:water-percent"
accuracy_decimals: 0
update_interval: 10s
lambda: |-
const float empty_distance = 2.00;
const float full_distance = 0.30;
float d = id(tank_distance).state;
if (isnan(d)) {
return NAN;
}
float pct = (empty_distance - d)
/ (empty_distance - full_distance) * 100.0;
if (pct < 0.0) pct = 0.0;
if (pct > 100.0) pct = 100.0;
return pct;
Replace the two calibration constants with measurements from your actual tank.
Do Not Calculate from the Manufacturer’s Tank Height Alone
The useful measurement geometry includes mounting spacers, lid thickness, sensor recess, overflow level and the ultrasonic blind zone.
Measure the real sensor-to-water distances at known empty/full conditions whenever possible.
What Does ‘Empty’ Mean?
It does not necessarily mean physically dry. A pump pickup may stop being usable with 100 litres still in the bottom of the tank.
Define 0% as the lowest usable level if that is more useful for automation.
What Does ‘Full’ Mean?
Define 100% around the normal safe full/overflow level, not at a theoretical water surface that would submerge or enter the ultrasonic blind zone.
Calculate Litres: Vertical Rectangular Tank
For a rectangular tank with constant horizontal cross-section:
Volume = length × width × water_height

1 cubic metre = 1000 litres
If you already know the manufacturer capacity and 0–100% maps to the usable capacity, the simpler calculation is:
litres = tank_capacity_litres × percentage / 100Calculate Litres: Vertical Cylindrical Tank
For a vertical cylinder:
Volume = π × radius² × water_heightBecause the horizontal cross-sectional area is constant, volume is linear with water height. Therefore the percentage calculation can again be multiplied directly by the usable tank capacity.
ESPHome Litres Sensor
sensor:
  - platform: template
    name: "Water Tank Volume"
    unit_of_measurement: "L"
    icon: "mdi:cup-water"
    accuracy_decimals: 0
    update_interval: 10s
    lambda: |-
      const float capacity_l = 2000.0;
      if (isnan(id(tank_level_percent).state)) {
        return NAN;
      }
      return capacity_l * id(tank_level_percent).state / 100.0;
Horizontal Cylindrical Tank: Percentage Is Not Litres Percentage
This is an important trap. A horizontal cylinder has much less volume per centimetre near the bottom and top than near the middle.
50% liquid height
→ 50% volume (symmetry)

25% liquid height
→ NOT 25% volume
If your tank lies horizontally, either calculate the circular-segment volume or build a calibration table.
Horizontal Cylinder Formula
For cylinder radius r, liquid depth h measured from the bottom, and cylinder length L:
V = L × [ r² × acos((r-h)/r)
          - (r-h) × sqrt(2rh - h²) ]
Use consistent units. Convert cubic metres to litres by multiplying by 1000.
Irregular Tank: Use a Calibration Table
Moulded water tanks often have curved shoulders, ribs or tapered sections. In that case, a calibration table is more reliable than pretending the tank is a perfect cylinder.
| Measured air gap | Known volume |
|---|---|
| 0.30 m | 2000 L |
| 0.55 m | 1750 L |
| 0.82 m | 1500 L |
| 1.10 m | 1250 L |
| 1.35 m | 1000 L |
| 1.60 m | 750 L |
| 1.82 m | 500 L |
| 2.00 m | 0 L |
You can interpolate between known calibration points in ESPHome/Home Assistant. The table above is only an example; fill your own tank in measured increments if you need accurate litres.
Why Tank Manufacturer Capacity Can Be Wrong for Your Usable Volume
- outlet sits above the bottom
- overflow level is below total internal height
- tank shoulders reduce usable volume
- sediment occupies space
- pump is intentionally stopped before complete emptying
For operational Home Assistant use, “usable litres” can be more useful than catalogue litres.
Low-Level Binary Sensors
binary_sensor:
  - platform: template
    name: "Water Tank Low"
    device_class: problem
    lambda: |-
      return !isnan(id(tank_level_percent).state)
             && id(tank_level_percent).state < 20.0;
    filters:
      - delayed_on: 1min
      - delayed_off: 1min
The delay prevents a brief bad ultrasonic reading from sending an unnecessary low-water alert.
Critical-Low Sensor
binary_sensor:
  - platform: template
    name: "Water Tank Critical"
    device_class: problem
    lambda: |-
      return !isnan(id(tank_level_percent).state)
             && id(tank_level_percent).state < 10.0;
    filters:
      - delayed_on: 2min
Home Assistant Low-Level Notification
alias: Water tank low warning
triggers:
  - trigger: state
    entity_id: binary_sensor.water_tank_low
    to: "on"

actions:
  - action: notify.mobile_app_phone
    data:
      title: "Water Tank Low"
      message: >
        Water tank is {{ states('sensor.water_tank_level') }}%.
Do Not Notify on Every 1% Change
Use threshold crossings such as 25%, 15% and 10% or a daily summary. Constant notifications make the system annoying and users eventually ignore the important alarm.
Days of Water Remaining
If you already track daily consumption, you can estimate remaining autonomy.
days_remaining = current_litres / average_litres_per_dayThis is an estimate, not a guarantee, because household consumption changes.
Example Home Assistant Template
template:
  - sensor:
      - name: "Water Days Remaining"
        unit_of_measurement: "d"
        state: >
          {% set litres = states('sensor.water_tank_volume')|float(0) %}
          {% set daily = states('sensor.water_daily_consumption')|float(0) %}
          {{ (litres / daily) | round(1) if daily > 0 else 0 }}
Combine Tank Level with Water Meter Data
This is where the project becomes much more useful. A tank-level sensor tells you stored quantity; a pulse/flow meter tells you usage.
Tank level
→ how much water remains

Water meter
→ how quickly you are using it

Together
→ consumption trend + leak/abnormal behaviour
This creates a natural internal cluster with the existing ESP32 water-meter project.
Detect Unexpected Water Loss
If no known outlet should be running but tank litres fall unusually fast, Home Assistant can flag possible leakage.
Ultrasonic level is not accurate enough to replace a proper water meter for small flows, but it can detect larger unexplained tank losses over time.
Refill Pump Automation
A tank level can control a refill pump or valve, but automatic water filling needs independent protection against sensor failure.
Level < 25%
→ request refill

Level > 90%
→ stop refill
Do not rely on one ultrasonic sensor as the only overflow protection.
Recommended Pump Safety Layers
- Ultrasonic/pressure level — normal control
- Independent high float switch — hard stop / safety input
- Maximum pump runtime — stops endless filling if level sensor fails
- Low-source-water / dry-run protection where required
- Manual override
- Existing pump thermal/overload protection left intact
For mains pumps, use correctly rated contactors/relays and electrical protection. The ESP32 should provide low-voltage control logic, not replace required mains safety hardware.
ESPHome Pump Interlock Concept
Normal condition:
tank < low threshold AND high float not active
→ pump may run

Stop if ANY:
tank > high threshold
OR high float active
OR max runtime reached
OR fault
Why Hysteresis Matters
Do not turn the refill pump ON at 50% and OFF at 51%. It will short-cycle.
Start refill: 25%
Stop refill: 90%

Large hysteresis
→ long efficient fill cycles
Choose thresholds appropriate to your water source, pump and tank.
Float Switches Are Still Valuable
A cheap float switch provides a completely different sensing principle from ultrasonic. That makes it excellent as an independent high/low confirmation.
| Sensor | Role |
|---|---|
| Ultrasonic | Continuous %/litres |
| High float | Overflow safety / full confirmation |
| Low float | Pump dry-run / critical empty confirmation |
Do not dismiss simple switches because you already have a “smart” continuous sensor.
Ultrasonic Failure Detection
ESPHome template sensors can return NAN when the raw sensor is invalid. Home Assistant should distinguish “unknown sensor” from “tank empty.”
No valid distance
≠ 0% tank

Publish unavailable / NAN
→ automation can enter fault state
Do Not Convert Missing Distance to 0%
If a cable breaks and your lambda turns missing data into zero, Home Assistant may believe the tank is empty and start a refill pump. That is the wrong failure mode.
Return NAN for invalid distance and stop/disable automatic actions until a valid measurement returns.
Sensor Fault Binary Sensor
binary_sensor:
  - platform: template
    name: "Water Tank Sensor Fault"
    device_class: problem
    lambda: |-
      return isnan(id(tank_distance).state);
    filters:
      - delayed_on: 1min
Use the fault state in pump logic and notifications.
Reasonable Distance Validation
Even a numeric reading can be physically impossible. For example, if your calibrated air gap must be between 0.30 m and 2.00 m, a 5.4 m reading should be rejected as an echo error.
float d = id(tank_distance).state;
if (isnan(d) || d < 0.25 || d > 2.20) {
  return NAN;
}
Allow some margin around your normal range so small calibration changes do not cause unnecessary faults.
Why Ultrasonic Readings Jump During Filling
- water jet creates waves
- surface foam
- falling water gives multiple acoustic targets
- pipe/float movement
- condensation droplets
Use median filtering and avoid making safety decisions from one reading during active filling.
Use a Stilling Tube Carefully
A vertical stilling tube can isolate the measurement from surface waves, but the tube must be wide enough and acoustically suitable for the transducer beam. A narrow tube can create strong internal reflections and make readings worse.
Test the exact tube geometry before permanent installation.
Temperature Affects Speed of Sound
Ultrasonic distance depends on the speed of sound, which changes with air temperature. For normal domestic tank-level monitoring the resulting error is often small relative to the total tank height, but it can matter if you need high volumetric accuracy.
Do not claim litre-level metering accuracy from a cheap ultrasonic sensor unless you have calibrated the complete installation.
This Is a Level Monitor, Not a Billing Meter
An ultrasonic tank level estimate is excellent for “20% left”, “about 400 litres remain” and pump automation. It is not a certified metering instrument.
Pressure Sensor Alternative
A hydrostatic level sensor measures the pressure created by the water column. For water:
Pressure = density × gravity × water_heightPressure can be a better choice when:
- tank roof has severe condensation
- surface foams
- tank is narrow/tall
- internal geometry blocks ultrasonic beam
- you need a measurement unaffected by surface turbulence
- transducer mounting above the liquid is difficult
0–5 V Pressure Sensors and ESP32
Many inexpensive pressure transducers output 0–5 V. The ESP32 ADC cannot safely accept a 5 V signal directly.
Use a correctly designed voltage divider/interface and calibrate the resulting ADC voltage to water height. Also consider ESP32 ADC accuracy if you need precise measurements.
4–20 mA Pressure Transducers
Industrial 4–20 mA level transmitters are often more robust over long cable runs. Convert current to a safe voltage using an appropriate shunt/interface, ideally with isolation/protection suited to the installation.
For a remote underground tank tens of metres from the controller, 4–20 mA can be more engineering-friendly than a long ultrasonic digital signal cable.
Submersible Pressure Sensor
A submersible hydrostatic probe sits near the tank bottom. It avoids ultrasonic condensation problems but introduces wetted materials, cable sealing and potable-water compatibility concerns.
If the tank stores drinking water, use a sensor explicitly suitable for that application.
Which Measurement Method Should You Choose?
| Tank condition | Best starting choice |
|---|---|
| Outdoor plastic rainwater tank | JSN-SR04T/AJ-SR04M |
| Dry indoor tank with easy access | HC-SR04 can work |
| Tall/deep tank | Pressure sensor often attractive |
| Heavy condensation | Pressure sensor |
| Foamy/turbulent liquid | Pressure sensor |
| Need only low/full states | Float switches |
| Potable water | Non-contact ultrasonic avoids wetted sensor; verify materials for any wetted alternative |
HC-SR04 ESPHome Example
For a dry indoor prototype, current ESPHome’s generic ultrasonic platform supports HC-SR04-style trigger/echo sensors.
sensor:
  - platform: ultrasonic
    trigger_pin: GPIO5
    echo_pin: GPIO18
    name: "Tank Distance"
    id: tank_distance
    timeout: 2.5m
    update_interval: 30s
Remember: standard HC-SR04 ECHO is typically 5 V when the module is powered at 5 V, so put a divider/level shifter before GPIO18.
ESPHome timeout Is a Distance
The generic ultrasonic component’s timeout is specified as a maximum distance to wait for the echo. Set it slightly beyond the farthest valid tank distance rather than a huge arbitrary value.
Full ESPHome Project Example
esphome:
  name: water-tank-monitor
  friendly_name: Water Tank Monitor

esp32:
  board: esp32dev
  framework:
    type: esp-idf

logger:

api:
  encryption:
    key: !secret tank_api_key

ota:
  - platform: esphome
    password: !secret ota_password

wifi:
  ssid: !secret wifi_ssid
  password: !secret wifi_password

uart:
  id: tank_uart
  tx_pin: GPIO17
  rx_pin: GPIO16
  baud_rate: 9600

sensor:
  - platform: jsn_sr04t
    uart_id: tank_uart
    model: jsn_sr04t
    name: "Tank Raw Distance"
    id: tank_distance
    update_interval: 10s
    filters:
      - median:
          window_size: 5
          send_every: 3
          send_first_at: 3

  - platform: template
    name: "Water Tank Level"
    id: tank_level_percent
    unit_of_measurement: "%"
    icon: "mdi:water-percent"
    accuracy_decimals: 0
    update_interval: 10s
    lambda: |-
      const float empty_distance = 2.00;
      const float full_distance = 0.30;

      float d = id(tank_distance).state;

      if (isnan(d) || d < 0.25 || d > 2.20) {
        return NAN;
      }

      float pct = (empty_distance - d)
                  / (empty_distance - full_distance) * 100.0;

      if (pct < 0.0) pct = 0.0;
      if (pct > 100.0) pct = 100.0;

      return pct;

  - platform: template
    name: "Water Tank Volume"
    id: tank_volume_l
    unit_of_measurement: "L"
    icon: "mdi:cup-water"
    accuracy_decimals: 0
    update_interval: 10s
    lambda: |-
      const float capacity_l = 2000.0;

      if (isnan(id(tank_level_percent).state)) {
        return NAN;
      }

      return capacity_l * id(tank_level_percent).state / 100.0;

binary_sensor:
  - platform: template
    name: "Water Tank Low"
    device_class: problem
    lambda: |-
      return !isnan(id(tank_level_percent).state)
             && id(tank_level_percent).state < 20.0;
    filters:
      - delayed_on: 1min
      - delayed_off: 1min

  - platform: template
    name: "Water Tank Sensor Fault"
    device_class: problem
    lambda: |-
      return isnan(id(tank_distance).state);
    filters:
      - delayed_on: 1min
Replace calibration distances and capacity with your real tank values. For a horizontal cylindrical or irregular tank, do not use the simple linear litres calculation.
Home Assistant Dashboard
- Tank level (%) gauge
- Remaining litres
- Raw ultrasonic distance
- 24-hour / 30-day level graph
- Low-water warning
- Sensor-fault warning
- Daily water consumption
- Estimated days remaining
- Pump/refill state if automated
Keep raw distance visible somewhere even if the main dashboard shows only percentage/litres. Raw distance is the fastest way to diagnose a bad echo.
Water Level Gauge
A standard Home Assistant gauge card works well with severity bands such as red below 15%, amber 15–30% and green above 30%.
Daily Tank Drop
You can also calculate the difference between morning/evening or use statistics to see how quickly stored water is being consumed.
Be careful interpreting small changes because ultrasonic noise and water-surface movement can look like a few litres of “usage.”
Low-Level Alert Strategy
| Level | Example action |
|---|---|
| 30% | Dashboard turns amber |
| 20% | Normal warning notification |
| 10% | Critical warning |
| Sensor unavailable | Separate sensor-fault alert — do not treat as empty |
Pump Automation Example in Home Assistant
The following is only the logical layer. A real pump system should also have independent high-level and runtime safety protection.
alias: Refill water tank
triggers:
  - trigger: numeric_state
    entity_id: sensor.water_tank_level
    below: 25

conditions:
  - condition: state
    entity_id: binary_sensor.water_tank_sensor_fault
    state: "off"
  - condition: state
    entity_id: binary_sensor.tank_high_float
    state: "off"

actions:
  - action: switch.turn_on
    target:
      entity_id: switch.tank_refill_pump
alias: Stop water tank refill
triggers:
  - trigger: numeric_state
    entity_id: sensor.water_tank_level
    above: 90
  - trigger: state
    entity_id: binary_sensor.tank_high_float
    to: "on"

actions:
  - action: switch.turn_off
    target:
      entity_id: switch.tank_refill_pump
Maximum Pump Runtime
Add a hard automation limit so a failed ultrasonic sensor or broken inlet does not leave a pump running indefinitely.
Pump turns ON
→ start runtime timer

Tank reaches high level
→ normal stop

OR max runtime exceeded
→ force stop + notify
Failure Mode: Sensor Reads Too Full
- echo is hitting tank brace/inlet pipe
- condensation film on transducer
- foam/splash echo
- full level inside blind zone
- incorrect calibration constants
A suspiciously small distance means the sensor believes something is close to it.
Failure Mode: Sensor Reads Too Empty
- weak/no echo from water surface
- sensor tilted
- tank depth exceeds practical range
- beam hits angled surface and reflects away
- wrong UART/trigger mode
- bad cable/level shifting
A very large distance or unavailable value usually means the expected echo did not return correctly.
Failure Mode: Reading Jumps by 30–100 cm
- multiple echoes
- splashing
- condensation
- tank geometry
- electrical serial/echo problem
Use a median filter and physically inspect the acoustic path before adding extreme averaging.
Failure Mode: Level Is Backwards
If the percentage rises when the tank empties, your formula is inverted. Remember: ultrasonic distance gets smaller as the water level gets higher.
Failure Mode: Level Never Reaches 100%
Your full-distance calibration is probably wrong, or the highest water level remains farther from the transducer than you assumed. Measure the real air gap at the normal full point.
Failure Mode: Level Is Fine Until Near Full
This strongly suggests the water surface is entering the ultrasonic blind zone. Move the transducer higher or define the practical full point lower.
Failure Mode: Works with Lid Open, Fails with Lid Closed
- condensation increases
- lid geometry changes acoustic reflections
- sensor becomes recessed inside a narrow opening
- electronics/cable moves when lid closes
Tune and validate with the tank in its final closed configuration.
Failure Mode: Tank Reading Changes with Temperature
Some small change is physically expected because the speed of sound changes with air temperature. Large changes usually indicate condensation or installation effects rather than normal acoustic compensation error.
Failure Mode: Sensor Is Offline After Rain
The transducer may be waterproof but the PCB, connectors and ESP32 usually are not. Put all electronics and wire joints in a weather-resistant enclosure with appropriate cable glands/drainage.
Outdoor Installation Checklist
- weather-resistant electronics enclosure
- cable glands
- drip loop
- UV-resistant cable where exposed
- strain relief
- no pooled condensation on sensor face
- surge/ESD consideration for long outdoor cables
- stable power supply
- Wi-Fi signal confirmed with lid/enclosure closed
Long Sensor Cable
The remote transducer cable on JSN-style modules is useful because the electronics board can stay outside the humid tank space. Do not casually extend the transducer cable far beyond the manufacturer design; it is part of the ultrasonic analogue system and cable characteristics can affect performance.
Long ESP32-to-Sensor UART Cable
If the sensor electronics are far from the ESP32, TTL UART is not ideal over very long/noisy runs. Keep the MCU close or use a more robust industrial signal method such as RS485/4–20 mA when distances become substantial.
Do Not Put the ESP32 Inside the Tank
Keep the ESP32 and loose electronics outside the water/condensation environment. Only the sensor element designed for that exposure should enter the tank space.
Potable Water Considerations
Non-contact ultrasonic has an advantage for drinking-water storage because no measurement probe has to be immersed. Any wetted pressure/float sensor must use materials appropriate for potable-water contact if that matters for your application.
Best Use Cases
| Project | Why this works |
|---|---|
| Rainwater harvesting tank | Level %, litres, low-water alerts |
| Garden irrigation tank | Pump interlock + remaining water |
| Domestic non-potable storage | Consumption trend + refill control |
| RV/boat water tank | Compact ESP32 monitoring; verify sensor geometry |
| Remote cistern | Level alerts and pump state |
| Generator/plant water reservoir | Operational low-level monitoring |
When Not to Use Ultrasonic
- tank is pressurised
- surface is constantly foamy
- heavy condensation cannot be controlled
- tank is too narrow for clean acoustic path
- very accurate billing/process inventory is required
- sensor must measure through a solid tank wall
Use a measurement principle appropriate to the physical environment.
My Recommended Design
Waterproof ultrasonic transducer
        ↓
JSN-SR04T/AJ-SR04M electronics
        ↓ safe 3.3V UART/echo interface
ESP32 + ESPHome
├─ filtered raw distance
├─ level %
├─ litres
├─ low-level state
└─ sensor-fault state
        ↓
Home Assistant
├─ dashboard/history
├─ low-water notifications
├─ water-meter correlation
└─ refill control with independent float safety
My Recommended Calibration Workflow
- Mount the sensor permanently first.
- Verify stable raw distance with tank at several levels.
- Measure the real normal-full air gap.
- Measure the real usable-empty air gap.
- Add median filtering.
- Calculate/clamp percentage.
- Validate at approximately 25%, 50% and 75%.
- Only then add litres and pump automation.
Final Recommendation
For a typical Home Assistant rainwater or domestic storage tank, an ESP32 plus a waterproof JSN-SR04T/AJ-SR04M-style sensor is one of the cleanest ways to obtain continuous level data without putting electronics into the water.
The key is to design around the sensor’s physics rather than simply wiring it and trusting the first distance number. Leave enough clearance for the near blind zone, give the ultrasonic beam a clear path, protect any 5 V logic signal before it reaches the ESP32, and filter occasional acoustic outliers.
Calculate percentage from measured empty/full distances, not theoretical tank height. Use a simple linear litres conversion only for tanks with constant cross-sectional area; use proper geometry or a calibration table for horizontal cylindrical/irregular tanks.
If condensation, foam or tank geometry makes ultrasonic unreliable, move to a hydrostatic pressure sensor rather than endlessly filtering bad acoustic data.
Finally, if you automate a refill pump, treat the ESP32 level sensor as the normal control input—not the only safety device. An independent high-level float switch and maximum pump runtime make the system much safer and more fault-tolerant.
Related ESP32 Guides
- ESP32 Water Meter for Home Assistant
- ESP32 Smart Relay for Home Assistant
- ESP32 + DS18B20 with Home Assistant
- ESPHome DS18B20 Multiple Sensors & Long Wires
Datasheets & External Resources
All external manufacturer/framework references are collected here so the main article keeps readers inside esp32.co.uk.
- ESPHome JSN-SR04T/AJ_SR04M Component — current waterproof ultrasonic support, 25 cm–600 cm range, serial modes and configuration.
- ESPHome Ultrasonic Distance Sensor — HC-SR04-style trigger/echo configuration and timeout.
- ESPHome Sensor Filters — median, moving-average and other filtering options.
- ESPHome ADC Sensor — basis for analog pressure-transducer interfaces.
- ESP-IDF HC-SR04 Component Hardware Notes — ESP32 3.3 V GPIO and 5 V ECHO level-shifting guidance.