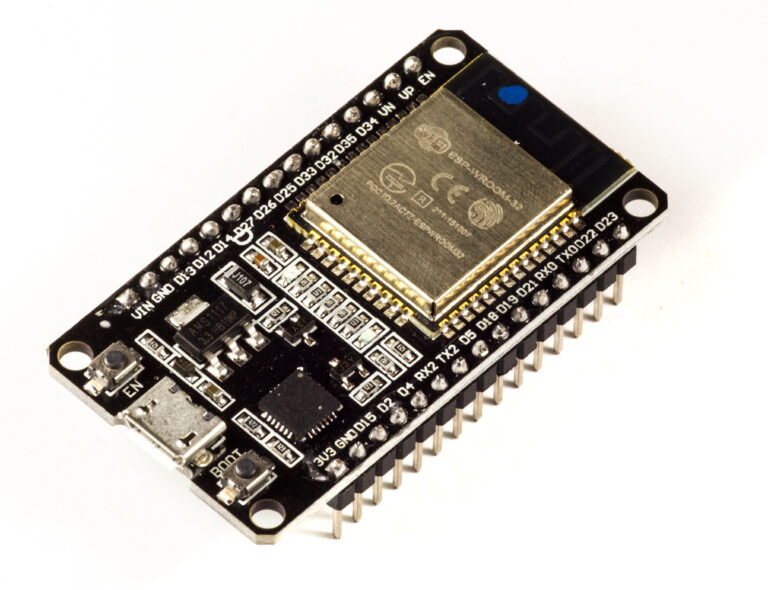
Quick Summary (TL;DR):
You can build a proper Home Assistant voice assistant satellite with ESP32-S3AliExpress price + ESPHome using an I²S microphone such as the INMP441 and an I²S amplifier such as the MAX98357AAliExpress price. The ESP32-S3AliExpress price listens for an on-device wake word using microWakeWord, streams the spoken command to Home Assistant, receives the spoken reply, and plays it through the speaker. The important architectural point is that the ESP32-S3AliExpress price is not normally doing the speech recognition or natural-language processing itself. Home Assistant runs the Assist pipeline: wake word → speech-to-text → intent/conversation → text-to-speech. The wake word can run locally on the ESP32-S3AliExpress price, while STT/TTS can be either fully local in Home Assistant using Speech-to-Phrase or Whisper + Piper, or provided by Home Assistant Cloud. For DIY hardware, use an ESP32-S3 board with PSRAM if possible because current ESPHome explicitly warns that voice/audio components consume significant RAM and CPU. Do not combine a heavy BLE proxy, large display, camera and voice assistant on a small no-PSRAM S3 and then blame ESPHome when it becomes unstable. A good basic build is: ESP32-S3 + INMP441 + MAX98357A + 4 Ω speaker + microWakeWord + ESPHome native API. It will not match the far-field acoustic performance of Home Assistant Voice Preview Edition, because that device uses a dual-microphone array and dedicated XMOS audio processing for echo cancellation/noise reduction. But for a desk, bedside, workshop or room satellite, a correctly built S3 voice node can be fast, private, local and inexpensive.
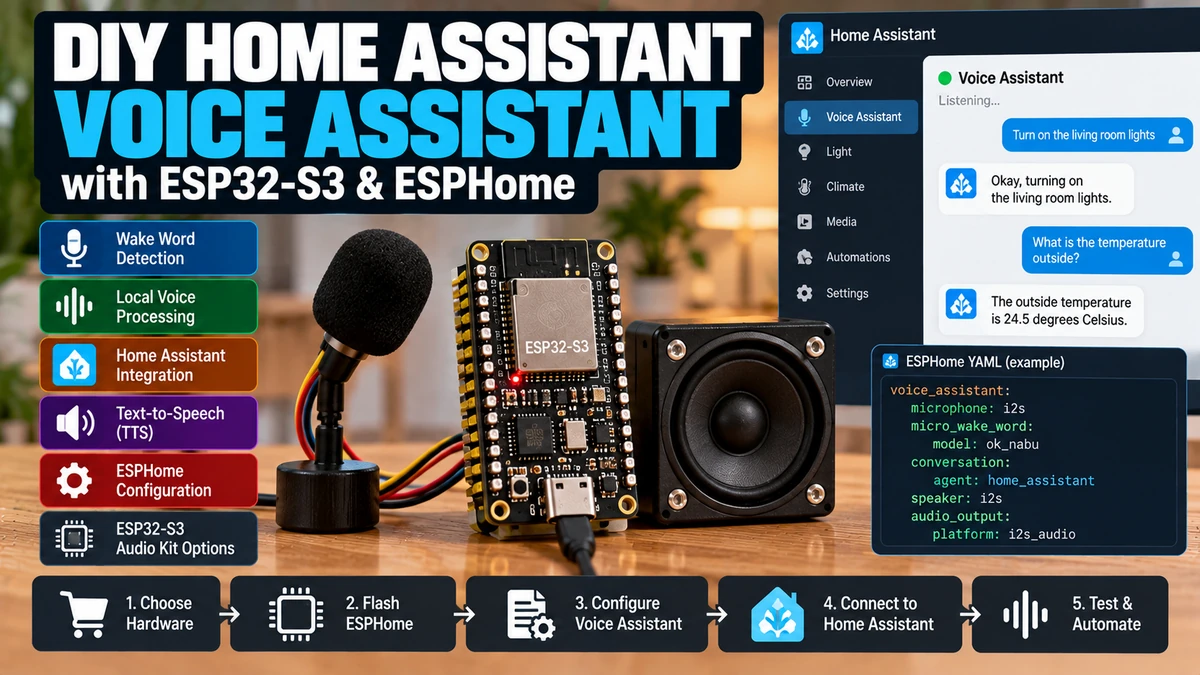
Materials You’ll Need
| Item | Why you need it |
|---|---|
| ESP32-S3 development board with PSRAM | Best platform for ESPHome voice/audio workloads |
| INMP441 I²S microphone | Captures voice digitally without ESP32 ADC noise |
| MAX98357A I²S amplifier | Converts digital audio from ESP32-S3 into speaker output |
| 4 Ω or 8 Ω speaker | Plays Home Assistant responses and alerts |
| 5 V USB power supply | Powers ESP32-S3 and amplifier reliably |
| Jumper wires / prototype PCB | Audio connections |
| Home Assistant | Runs Assist pipeline and smart-home intents |
| ESPHome | Firmware, I²S audio, wake word and Assist integration |
| Optional push button | Push-to-talk / mute / fallback interaction |
| Optional status LED | Listening/processing/responding feedback |
How the ESP32-S3 Voice Assistant Actually Works
You say wake word
      ↓
ESP32-S3 microWakeWord detects it locally
      ↓
ESP32-S3 streams microphone audio over ESPHome API
      ↓
Home Assistant Assist pipeline
├─ Speech-to-Text
├─ Intent / conversation agent
└─ Text-to-Speech
      ↓
response audio streamed back to ESP32-S3
      ↓
MAX98357A + speaker
This architecture is important because it explains both the strengths and limitations of an ESP32 voice satellite. The S3 does not need enough compute to run a large Whisper model locally; it only needs to handle audio capture/playback, wake-word inference and the ESPHome connection.
What Home Assistant Assist Does
Home Assistant Assist is the voice-control framework built into Home Assistant. The pipeline is composed of separate stages so you can choose local or cloud components.
| Stage | Example |
|---|---|
| Wake word | microWakeWord on ESP32-S3 or server-side wake word |
| Speech-to-text | Speech-to-Phrase, Whisper, Home Assistant Cloud |
| Intent / conversation | Home Assistant intents, custom sentences, optional conversational agent |
| Text-to-speech | Piper, Home Assistant Cloud |
This modular structure is why the same ESP32-S3 satellite can work with a fully local pipeline today and a different STT/TTS engine later without changing the microphone hardware.
Why ESP32-S3 Is the Best DIY ESP32 for Voice
- dual-core 240 MHz CPU
- PSRAM-capable modules
- native I²S peripherals
- PDM microphone support
- 2.4 GHz Wi-Fi
- mature ESPHome voice support
- on-device microWakeWord support
- many proven voice-assistant boards use S3
A classic ESP32 can run basic voice projects, but ESP32-S3 gives much more memory/performance headroom and is the platform used by Home Assistant’s official Voice Preview Edition and Espressif S3-BOX voice hardware.
Use an ESP32-S3 with PSRAM
This is one of the most important hardware choices. Current ESPHome documentation warns that audio and voice components consume significant RAM and CPU, and that combining too many resource-heavy components can cause crashes.
For a new DIY voice node, choose a PSRAM-equipped ESP32-S3 board. 8 MB PSRAM is a comfortable target for experimentation.
No PSRAM S3
→ may work for simple voice config
→ less memory headroom

PSRAM S3
→ better for wake-word models
→ more stable audio buffers
→ better future expansion
Check the Actual Module, Not Just the Board Name
ESP32-S3-DevKitC-1 exists with several WROOM module variants. Some include PSRAM and some do not.
Read the module marking or the seller specification before assuming “ESP32-S3” automatically means PSRAM.
Hardware Architecture
INMP441 microphone
   BCLK / WS / DATA
        ↓
     ESP32-S3
        ↓
   I²S audio out
        ↓
MAX98357A amplifier
        ↓
      speaker
Why Use an I²S Microphone?
INMP441 produces a digital I²S audio stream. The analog conversion happens inside the microphone module, so the ESP32 does not have to measure a tiny microphone signal using its own ADC.
- less analog noise sensitivity
- simple digital wiring
- predictable sample format
- good ESPHome support
- widely available modules
Why Use MAX98357A?
MAX98357A is a small I²S digital-input Class-D amplifier. It receives the audio stream directly from the ESP32-S3 and drives a small speaker.
It removes the need for a separate DAC plus analog amplifier.
Recommended GPIO Example
The following pin assignment is only an example for a generic ESP32-S3-DevKitC-1. ESP32-S3 has a flexible GPIO matrix, so I²S signals can be routed to many pins.
| Function | Example GPIO |
|---|---|
| INMP441 SD / DIN | GPIO4 |
| INMP441 WS / LRCLK | GPIO5 |
| INMP441 SCK / BCLK | GPIO6 |
| MAX98357A DIN | GPIO7 |
| MAX98357A LRC / LRCLK | GPIO8 |
| MAX98357A BCLK | GPIO9 |
GPIO4–9 are convenient general-purpose starting pins on the official S3 DevKitC-1. Do not copy these blindly if your specific board uses them for a display, camera, PSRAM or other onboard function.
INMP441 Wiring
| INMP441 Pin | ESP32-S3 |
|---|---|
| VDD | 3.3 V |
| GND | GND |
| SD | GPIO4 |
| WS | GPIO5 |
| SCK | GPIO6 |
| L/R | GND for left channel in this example |
Do not power an INMP441 module from 5 V unless the exact breakout board explicitly includes suitable regulation/level handling. The microphone IC itself is a low-voltage device; 3.3 V is the safe ESP32 default.
MAX98357A Wiring
| MAX98357A Pin | ESP32-S3 / supply |
|---|---|
| VIN | 5 V |
| GND | GND |
| DIN | GPIO7 |
| LRC / LRCLK | GPIO8 |
| BCLK | GPIO9 |
| Speaker + / – | Directly to speaker terminals |
The MAX98357A speaker outputs are bridge-tied. Do not connect either speaker output to ESP32 ground.
Why I Use Separate I²S Clock Pins in This Example
ESP32-S3 has enough I²S capability and GPIO flexibility to keep microphone input and speaker output on separate I²S bus definitions. That makes the example easier to reason about and avoids forcing an unknown microphone/amplifier combination to share clock settings.
Some purpose-built voice boards share or route clocks differently. Follow the schematic for your actual hardware.
Basic ESPHome Device Skeleton
esphome:
  name: s3-voice-assistant
  friendly_name: S3 Voice Assistant

esp32:
  board: esp32-s3-devkitc-1
  framework:
    type: esp-idf

logger:

api:
  encryption:
    key: !secret voice_api_key

ota:
  - platform: esphome
    password: !secret ota_password

wifi:
  ssid: !secret wifi_ssid
  password: !secret wifi_password
Why ESP-IDF Instead of Arduino Framework?
ESPHome voice/audio development is generally strongest on the ESP-IDF framework because newer ESP32-S3 audio and memory features land there first and official ESPHome voice configurations commonly use it.
For this project, there is little reason to select Arduino framework unless another required component specifically forces you to.
Configure the Microphone I²S Bus
i2s_audio:
  - id: i2s_mic_bus
    i2s_lrclk_pin: GPIO5
    i2s_bclk_pin: GPIO6

  - id: i2s_speaker_bus
    i2s_lrclk_pin: GPIO8
    i2s_bclk_pin: GPIO9
Configure INMP441 in ESPHome
microphone:
  - platform: i2s_audio
    id: va_microphone
    i2s_audio_id: i2s_mic_bus
    i2s_din_pin: GPIO4
    adc_type: external
    pdm: false
    channel: left
    sample_rate: 16000
    bits_per_sample: 32bit
For voice recognition, 16 kHz is a very common speech sample rate and matches Home Assistant Assist pipeline expectations well.
Configure MAX98357A Speaker
speaker:
  - platform: i2s_audio
    id: va_speaker
    i2s_audio_id: i2s_speaker_bus
    dac_type: external
    i2s_dout_pin: GPIO7
    channel: mono
Add On-Device Wake Word
ESPHome’s micro_wake_word component runs wake-word inference locally on the ESP32.
micro_wake_word:
  id: mww
  microphone: va_microphone
  models:
    - model: okay_nabu
The exact wake-word models available can change over time. The important architecture is that the ESP32-S3 continuously performs the small wake-word model locally instead of uploading all room audio to Home Assistant just to decide whether you said the wake phrase.
ESPHome 2026.8 Wake-Word Improvement
ESPHome 2026.8 added groundwork for wake-word models that are not permanently baked into firmware. microWakeWord can now load/remove models at runtime using PSRAM, and Home Assistant integration is moving toward downloading models advertised by Home Assistant.
That is another reason PSRAM is increasingly valuable on a voice-focused S3.
Configure the Voice Assistant
voice_assistant:
  id: va
  microphone: va_microphone
  speaker: va_speaker
  micro_wake_word: mww

  noise_suppression_level: 2
  auto_gain: 20dBFS
  volume_multiplier: 1.5

  on_listening:
    - logger.log: "Listening"

  on_stt_end:
    - logger.log:
        format: "Heard: %s"
        args: ['x.c_str()']

  on_error:
    - logger.log:
        format: "Voice error: %s - %s"
        args: ['code.c_str()', 'message.c_str()']
Current ESPHome supports noise suppression levels from 0 to 4 and automatic gain up to 31 dBFS. Do not immediately set everything to maximum; tune from real recordings/recognition results.
How Wake Word and Voice Assistant Are Linked
When micro_wake_word is associated with voice_assistant, Home Assistant can manage the active wake-word model through the Assist satellite integration.
For more custom behaviour, you can explicitly trigger voice_assistant.start from on_wake_word_detected. That is useful when you want LEDs, tones or custom state handling.
Explicit Wake-Word Automation Example
micro_wake_word:
  id: mww
  microphone: va_microphone
  models:
    - model: okay_nabu

  on_wake_word_detected:
    - voice_assistant.start:
        wake_word: !lambda return wake_word;
Add a Push-to-Talk Button
A push button is extremely useful while tuning microphone gain and Home Assistant pipelines because it removes wake-word accuracy from the troubleshooting chain.
binary_sensor:
  - platform: gpio
    name: "Voice Button"
    pin:
      number: GPIO10
      mode:
        input: true
        pullup: true
      inverted: true

    on_press:
      - voice_assistant.start:
Once push-to-talk works reliably, add wake word. This is a much faster troubleshooting sequence than trying to debug microphone, Wi-Fi, STT and wake word simultaneously.
Recommended Bring-Up Order
1. ESP32 boots + connects to Home Assistant
2. microphone captures intelligible audio
3. push-to-talk Assist works
4. speaker plays TTS response
5. add microWakeWord
6. tune gain/noise suppression
7. build enclosure / improve acoustics
Home Assistant Assist Pipeline
The ESP32 satellite needs a working Assist pipeline in Home Assistant.
You have two broad choices:
| Pipeline | Advantages | Trade-offs |
|---|---|---|
| Home Assistant Cloud STT/TTS | Fast setup, strong recognition, low local CPU requirement | Requires cloud subscription/connectivity |
| Fully local | Voice stays on your hardware, no cloud dependency | Requires suitable Home Assistant compute |
Fully Local Voice: Speech-to-Phrase vs Whisper
| STT | Best for | Trade-off |
|---|---|---|
| Speech-to-Phrase | Home-control commands, lower-resource local system | Close-ended vocabulary/phrases |
| Whisper | General/open-ended speech | More CPU/GPU demand and latency |
Home Assistant currently documents both as local speech-to-text options.
Piper for Local Text-to-Speech
Piper is Home Assistant’s common local neural text-to-speech engine. It generates the spoken response on the Home Assistant machine and streams the resulting audio back to the ESP32-S3 speaker.
Fully Local Pipeline
Wake word: ESP32-S3 microWakeWord
STT: Home Assistant Speech-to-Phrase or Whisper
Intent: Home Assistant
TTS: Piper

Internet required for command processing: NO
Your local Wi-Fi/LAN and Home Assistant still need to be running, but spoken commands do not need to leave the home.
Home Assistant Cloud Pipeline
Wake word: ESP32-S3 microWakeWord
STT: Home Assistant Cloud
Intent: Home Assistant
TTS: Home Assistant Cloud
This is often the easiest way to validate DIY voice hardware before investing time tuning local STT performance.
Expose the Right Entities to Assist
A perfect microphone cannot control a light that Home Assistant has not exposed to Assist.
- Expose only entities that make sense for voice control.
- Use clear entity names.
- Assign entities to correct Home Assistant areas.
- Add aliases for natural phrases where useful.
- Avoid exposing hundreds of technical diagnostic entities.
Good entity naming can improve voice success more than another 6 dB of microphone gain.
Why Areas Matter
If the voice satellite is assigned to the living room, Home Assistant can interpret commands such as “turn off the lights” in a more natural area-aware way instead of requiring the full entity name every time.
Assist Satellite Entity
Modern Home Assistant represents ESPHome voice devices using the Assist Satellite entity model.
That gives consistent satellite states such as listening, processing and responding, and supports actions including announcements and conversations.
Useful Assist Satellite Automations
- LED turns blue while listening
- LED pulses while processing
- LED turns green while responding
- lower music volume when listening
- announce doorbell/washer/timer events
- start a conversation from another Home Assistant automation
Announcement Example
A voice satellite can also be an announcement speaker. For example, Home Assistant can announce that the washing machine has finished or the garage door is still open.
This turns the DIY device into more than a microphone for commands.
Microphone Gain: More Is Not Always Better
If STT misses quiet speech, increasing gain may help. But excessive gain also amplifies fan noise, room echo, speaker feedback and electrical noise.
Too little gain → speech too quiet
Good gain → strong speech, reasonable noise floor
Too much gain → clipping/noise → recognition becomes worse
Noise Suppression
ESPHome lets you request pipeline noise suppression levels from 0 to 4. Start around 1–2 in a normal room and compare recognition rather than automatically using 4.
Aggressive suppression can sometimes damage speech detail in an already quiet signal.
Speaker Volume Multiplier
The voice-assistant component can apply a response volume multiplier. Use this for modest tuning, but fix amplifier gain/speaker efficiency physically if you need a major volume change.
The Biggest DIY Problem: Acoustic Echo
A basic INMP441 + MAX98357A build has no sophisticated acoustic echo cancellation. When the speaker talks, the microphone hears it.
speaker → room → microphone
          ↑ echo path
That can cause false wake words, poor interruption behaviour and self-triggering depending on the enclosure and volume.
How to Reduce Echo Without Dedicated DSP
- Place microphone and speaker physically apart.
- Do not aim the speaker directly at the microphone.
- Use enclosure partitions / acoustic isolation.
- Keep response volume reasonable.
- Pause/restrict wake-word listening while response audio is playing if your configuration requires it.
- Use soft material/gaskets to reduce enclosure vibration.
Mechanical design matters enormously. A good microphone in a bad plastic echo chamber performs badly.
Why Voice Preview Edition Performs Better
Home Assistant Voice Preview Edition also uses ESP32-S3, but it adds a dedicated XMOS XU316 audio processor, dual microphones and purpose-designed acoustics.
The XMOS front end performs functions such as echo cancellation, stationary-noise removal and automatic gain control before/around the ESPHome voice pipeline.
That is why a €10 microphone + amplifier breadboard should not be expected to match a purpose-built far-field voice appliance.
DIY vs Home Assistant Voice Preview Edition
| Feature | DIY S3 + INMP441/MAX98357A | Voice Preview Edition |
|---|---|---|
| Cost | Low | Higher |
| Custom GPIO/peripherals | Excellent | Good expansion but fixed hardware |
| Microphones | Usually 1 | Dual mic array |
| Dedicated audio DSP | No | XMOS XU316 |
| Echo cancellation | Basic/software/physical mitigation | Dedicated processing |
| ESPHome | Yes | Yes |
| Learning value | Excellent | Lower |
| Far-field reliability | Depends heavily on build | Much better baseline |
DIY vs ESP32-S3-BOX-3
ESP32-S3-BOX-3 remains a useful reference because Home Assistant provides a ready-made voice-assistant installation for it. It bundles display, microphones, speaker/audio hardware and buttons around S3.
A bare DevKitC build is cheaper and easier to customize, but BOX-3 saves a large amount of acoustic and display integration work.
Why Bluetooth Proxy + Voice Can Be a Bad Combination
Current ESPHome documentation explicitly warns that BLE/Bluetooth components can cause resource issues when combined with voice/audio.
A voice satellite is already a high-resource ESP32 job. Do not assume it should also be the room’s heavy BLE proxy, camera node and large LVGL dashboard.
Best architecture:
voice satellite → voice/audio first

separate cheap C3/S3 node → BLE proxy/sensors if needed
Can You Add Sensors to the Voice Node?
Yes. Simple I²C temperature/light/presence sensors usually add little load.
The rule is to avoid resource-heavy components, not every additional component.
- SHT45 temperature/humidity: reasonable
- BH1750 lux: reasonable
- simple button/LED: reasonable
- BLE tracker with many devices: questionable
- camera: heavy
- large animated display: heavy
Wi-Fi Quality Matters
Unlike a normal temperature sensor, a voice node continuously moves real-time audio across the network during commands/responses.
Weak Wi-Fi can cause delayed STT, chopped audio, timeouts and unstable voice sessions.
- Use a strong 2.4 GHz access point.
- Keep the ESP32 antenna clear of the speaker magnet and metal.
- Do not bury the board behind a large metal grille.
- Test final enclosure RSSI before permanent installation.
Power Supply Matters
The MAX98357A can create significant current peaks when driving a speaker loudly. A marginal USB supply can cause ESP32 brownouts exactly when the voice response begins.
Use a decent 5 V supply and short power wiring. Add local bulk capacitance near the amplifier/board if your prototype supply wiring is long.
Speaker Selection
A small 4 Ω 3 W speaker is a common match for MAX98357A modules. Check the amplifier board and speaker rating rather than assuming any miniature speaker is suitable.
Speaker enclosure volume affects speech intelligibility more than raw wattage.
Microphone Placement
- Expose microphone port directly to room air through a small opening.
- Do not place the microphone behind thick foam or sealed plastic.
- Keep it away from speaker airflow/vibration.
- Keep it away from switching regulators and high-current amplifier traces.
- Orient the INMP441 sound port correctly for the breakout design.
Common Problem: Wake Word Never Triggers
- Test push-to-talk first.
- Confirm microphone audio reaches Home Assistant.
- Check the micro_wake_word component is running.
- Confirm the correct wake-word model is enabled.
- Check PSRAM/memory logs for allocation failures.
- Reduce background noise and improve microphone placement.
Do not start by changing the wake-word probability thresholds if the microphone itself is not working.
Common Problem: Wake Word Triggers Too Often
- Reduce speaker-to-microphone acoustic coupling.
- Move microphone away from TV/speaker sources.
- Try another wake-word model.
- Review model sensitivity/probability settings only after fixing audio quality.
- Make sure response playback is not repeatedly retriggering the microphone.
Common Problem: Home Assistant Hears Nothing
- Verify I²S BCLK/LRCLK/DIN wiring.
- Confirm INMP441 L/R channel pin matches ESPHome channel setting.
- Check microphone supply is 3.3 V.
- Check sample rate/bit format.
- Look for ESPHome microphone errors in logs.
- Test with push-to-talk so wake word is removed from the equation.
Common Problem: Recognition Is Terrible
Separate microphone quality from speech-engine quality.
Step 1: Is captured audio clear?
→ NO: fix hardware/gain/noise
→ YES
Step 2: Does STT transcribe accurately?
→ NO: tune/change STT pipeline
→ YES
Step 3: Does Home Assistant understand intent?
→ NO: entity names/areas/custom sentences
Common Problem: Speaker Is Silent
- Check MAX98357A VIN/GND.
- Check BCLK/LRCLK/DIN assignments.
- Check speaker is connected between amplifier outputs — not to ground.
- Check Home Assistant pipeline includes TTS.
- Check voice_assistant is configured with the speaker ID.
- Check volume multiplier and amplifier gain configuration.
Common Problem: Loud Buzz or Digital Noise
- Improve power supply and grounding.
- Shorten I²S wiring.
- Separate microphone and amplifier wiring physically.
- Avoid breadboard power rails with poor contacts.
- Add proper local decoupling.
- Move to soldered prototype board for final installation.
Common Problem: ESP32 Reboots During TTS
This often points to power or memory pressure.
- Use a stronger 5 V supply.
- Reduce speaker power/volume during testing.
- Use an S3 with PSRAM.
- Remove BLE/camera/display-heavy components.
- Check ESPHome logs/backtrace.
Common Problem: Voice Works Until BLE Is Enabled
That matches ESPHome’s own resource warning. Split BLE proxy duties to another ESP32 instead of trying to tune around persistent RAM/CPU contention.
Common Problem: Long Delay Before Response
Break the latency into stages:
wake word detection
→ upload speech
→ STT processing
→ intent processing
→ TTS generation
→ audio playback
If you use local Whisper on slow Home Assistant hardware, STT can dominate the delay even when the ESP32 and Wi-Fi are perfect.
Speech-to-Phrase for Faster Home Control
If your main voice use is “turn on the kitchen lights”, “set heating to 21 degrees” and other home-control phrases, Speech-to-Phrase can provide lower-resource local recognition than open-ended Whisper.
Use Whisper when you need broader/free-form speech recognition.
Timers
Current ESPHome voice assistant support includes timer lifecycle events, letting a satellite react to timers locally in its UI/LED logic while Home Assistant manages the conversation.
This is useful if you add a status LED or small display later.
Conversation Context
The voice assistant component supports a conversation timeout (default 300 seconds) so follow-up interactions can preserve conversation context when the selected Home Assistant conversation agent supports it.
Can the ESP32-S3 Run an LLM Locally?
Not in the sense people usually mean by a modern conversational large language model. The S3 is an excellent microcontroller for audio transport and small wake-word inference, but large speech/language models belong on the Home Assistant server, another local computer or a cloud service.
Do not confuse “AI-capable ESP32-S3” with “runs ChatGPT-class model locally.”
Can It Work Without Internet?
Yes, if your Assist pipeline is fully local.
Local Wi-Fi/LAN: required
Home Assistant: required
Internet: not required
Cloud STT/TTS: not required if using local engines
A local Home Assistant failure still disables the normal Assist processing path because the ESP32 satellite depends on Home Assistant for STT/intent/TTS.
Can Voice Commands Work If Home Assistant Is Down?
Not normally. microWakeWord can still detect the phrase on the ESP32, but the command cannot be processed into a Home Assistant intent without the Assist backend.
Privacy
With on-device wake word + local STT/TTS, audio remains on your local network and your own Home Assistant system.
This is the strongest privacy configuration and one of the main reasons Home Assistant voice is attractive compared with conventional cloud smart speakers.
A Physical Mute Switch Is Better Than a Software Toggle
If privacy is important, consider a hardware switch that physically removes microphone power or interrupts its clock/data path.
A software “mute” entity is convenient, but a physical disconnect gives a stronger guarantee.
Add a Status LED
Voice interfaces are much easier to use when the device visibly shows its state.
| State | Example LED behaviour |
|---|---|
| Idle | Off or dim |
| Wake word detected / listening | Blue |
| Processing | Purple/pulse |
| Responding | Green |
| Error | Red |
Use the on_listening, on_stt_end, on_tts_stream_start, on_tts_stream_end and on_error triggers to drive LEDs.
Example Voice-State LED Logic
voice_assistant:
  id: va
  microphone: va_microphone
  speaker: va_speaker
  micro_wake_word: mww

  on_listening:
    - light.turn_on:
        id: status_led
        blue: 100%
        red: 0%
        green: 0%

  on_tts_stream_start:
    - light.turn_on:
        id: status_led
        green: 100%
        red: 0%
        blue: 0%

  on_end:
    - light.turn_off: status_led

  on_error:
    - light.turn_on:
        id: status_led
        red: 100%
        green: 0%
        blue: 0%
The LED hardware itself depends on your board; this example focuses on the voice-assistant event structure.
Complete DIY ESPHome Example
esphome:
  name: s3-voice-assistant
  friendly_name: S3 Voice Assistant

esp32:
  board: esp32-s3-devkitc-1
  framework:
    type: esp-idf

logger:

api:
  encryption:
    key: !secret voice_api_key

ota:
  - platform: esphome
    password: !secret ota_password

wifi:
  ssid: !secret wifi_ssid
  password: !secret wifi_password

i2s_audio:
  - id: i2s_mic_bus
    i2s_lrclk_pin: GPIO5
    i2s_bclk_pin: GPIO6

  - id: i2s_speaker_bus
    i2s_lrclk_pin: GPIO8
    i2s_bclk_pin: GPIO9

microphone:
  - platform: i2s_audio
    id: va_microphone
    i2s_audio_id: i2s_mic_bus
    i2s_din_pin: GPIO4
    adc_type: external
    pdm: false
    channel: left
    sample_rate: 16000
    bits_per_sample: 32bit

speaker:
  - platform: i2s_audio
    id: va_speaker
    i2s_audio_id: i2s_speaker_bus
    dac_type: external
    i2s_dout_pin: GPIO7
    channel: mono

micro_wake_word:
  id: mww
  microphone: va_microphone
  models:
    - model: okay_nabu

voice_assistant:
  id: va
  microphone: va_microphone
  speaker: va_speaker
  micro_wake_word: mww

  noise_suppression_level: 2
  auto_gain: 20dBFS
  volume_multiplier: 1.5

  on_listening:
    - logger.log: "Voice Assistant listening"

  on_stt_end:
    - logger.log:
        format: "STT: %s"
        args: ['x.c_str()']

  on_error:
    - logger.log:
        format: "Voice Assistant error: %s - %s"
        args: ['code.c_str()', 'message.c_str()']

binary_sensor:
  - platform: gpio
    name: "Voice Push Button"
    pin:
      number: GPIO10
      mode:
        input: true
        pullup: true
      inverted: true

    on_press:
      - voice_assistant.start:
Treat this as a strong starting template, not a universal pinout. Check your exact S3 board, microphone channel configuration and amplifier module.
Why I Included Push-to-Talk Even with Wake Word
A physical button gives you a reliable fallback when the room is noisy, and it is the best diagnostic tool when wake-word behaviour is questionable.
You can remove it later if you want a cleaner enclosure.
Home Assistant Setup Checklist
- Create/select an Assist pipeline.
- Choose STT engine.
- Choose TTS engine.
- Expose required Home Assistant entities to Assist.
- Add ESPHome S3 device to Home Assistant.
- Assign voice satellite to correct area.
- Select active pipeline/wake word as exposed by the integration.
- Test push-to-talk.
- Test wake word.
- Test spoken response.
Best Voice Commands to Test First
- Turn on the living room light.
- Turn off the kitchen lights.
- What lights are on?
- Is the front door locked?
- Set the thermostat to 21 degrees.
Start with simple built-in Home Assistant intents before debugging complex custom conversations.
Custom Sentences
Home Assistant can use custom sentence triggers when your desired command is not covered by built-in intents.
This is useful for project-specific phrases such as “start cinema mode” or “open the driveway gate,” while keeping the ESP32 voice hardware unchanged.
When to Use an LLM Conversation Agent
Use a conversational/LLM agent when you want broader natural-language questions or multi-step conversation. Do not add one just to control normal lights and switches; built-in Home Assistant intents are faster and more predictable for that.
Best Hardware Choices
| Build | Recommendation |
|---|---|
| Cheapest DIY experiment | ESP32-S3 + INMP441 + MAX98357A |
| Ready-made Espressif dev hardware | ESP32-S3-BOX-3 |
| Best finished Home Assistant hardware | Home Assistant Voice Preview Edition |
| Custom voice + display project | PSRAM ESP32-S3 board + purpose-built audio/display PCB |
When DIY ESP32-S3 Voice Is the Right Choice
- you want to learn ESPHome audio
- you need custom enclosure/shape
- you want custom buttons/sensors/LEDs
- you need several inexpensive room satellites
- near-field/desk voice is enough
- you accept tuning microphone/speaker acoustics
When to Buy Voice Preview Edition Instead
- you want reliable far-field voice immediately
- echo cancellation matters
- you do not want to tune I²S hardware
- family acceptance matters more than DIY cost
- you want a polished physical mute/volume interface
My Recommended Build Order
Stage 1
ESP32-S3 + INMP441 + push-to-talk
→ prove STT/Assist

Stage 2
add MAX98357A + speaker
→ prove TTS

Stage 3
add microWakeWord
→ hands-free operation

Stage 4
build enclosure + acoustic isolation
→ real daily-use satellite
Final Recommendation
A DIY ESP32-S3 voice assistant is one of the most interesting Home Assistant projects because it turns the ESP32 from a passive sensor node into an interactive room interface.
The simplest reliable architecture is PSRAM-equipped ESP32-S3 + INMP441 + MAX98357A + ESPHome microWakeWord. Let the S3 handle wake-word detection and audio transport; let Home Assistant handle speech recognition, intent processing and text-to-speech.
For privacy, use Speech-to-Phrase or Whisper plus Piper locally. For the easiest initial setup, validate the hardware with Home Assistant Cloud first and switch the pipeline later.
The main limitation of a cheap DIY build is not ESP32 CPU performance — it is acoustics. Microphone placement, speaker echo, enclosure vibration and room noise determine whether the finished device feels like a real voice appliance.
If you want a polished far-field device, Voice Preview Edition is the better buy. If you want a flexible, inexpensive voice satellite that can also become a custom ESP32 room node, the DIY S3 route is much more interesting.
Related ESP32 Guides
- Home Assistant Voice Preview Edition: Private Voice Control for Smart Homes
- ESP32-S3 DevKitC-1 Pinout: GPIOs, Safe Pins and Wiring Guide
- ESP32-S3 Boards Compared: 2026 Guide
- Best ESP32 for Home Assistant: S3 vs C3 vs C6 vs C5
Datasheets & External Resources
All external manufacturer/framework references are collected here so the main article keeps readers inside esp32.co.uk.
- ESPHome Voice Assistant — current voice-assistant configuration, satellite integration, noise suppression, gain, timers and events.
- ESPHome Micro Wake Word — on-device ESP32 wake-word framework and model configuration.
- ESPHome I²S Audio Component — I²S clock/bus configuration.
- ESPHome I²S Microphone — digital/PDM microphone configuration and ESP32-S3 support.
- ESPHome I²S Speaker — I²S speaker/DAC configuration and resource warnings.
- Home Assistant Assist — current Home Assistant voice architecture and supported DIY voice devices.
- Home Assistant Fully Local Voice Assistant — Speech-to-Phrase, Whisper and Piper local pipeline setup.
- Home Assistant Assist Satellite — satellite states, triggers, conditions and announcement/conversation actions.
- Home Assistant ESP32-S3-BOX Voice Assistant — official S3-BOX ESPHome voice implementation.
- ESPHome 2026.8 Release Notes — runtime microWakeWord model groundwork and current voice/media changes.