Quick Summary (TL;DR):
The BH1750AliExpress price is one of the easiest ways to give an ESP32AliExpress price a real lux measurement for Home Assistant. Unlike an LDR/photoresistor, it returns calibrated digital illuminance over I²C, so Home Assistant sees an actual value in lux instead of an arbitrary ADC percentage. Current ESPHome support is extremely simple: configure I²C, add platform: bh1750AliExpress price, and ESPHome reads the sensor at address 0x23 by default or 0x5C when the ADDR pin is pulled high. The default update interval is 60 seconds. The BH1750FVI datasheet specifies a broad nominal range of roughly 1–65,535 lux, a spectral response designed to approximate the human eye, and internal rejection of 50/60 Hz lighting flicker. For Home Assistant lighting, however, the biggest source of error is usually where you mount the sensor, not the chip. A BH1750AliExpress price on the ceiling looking at the floor, beside a window, inside a dark enclosure or directly illuminated by the lamp it controls will all produce very different lux values. The most reliable automation pattern is occupancy + lux threshold + hysteresis: turn a light on only when someone is present and ambient light is below a lower threshold, then do not treat the light’s own output as “daylight” and immediately switch it back off. If the BH1750AliExpress price sits in the same room as the controlled lamp, avoid a feedback loop by using lux primarily as an ON condition, while presence or a separate higher threshold controls OFF. For most rooms, use a 5–15 second ESPHome update interval, a short median or moving-average filter, compare the reading with a reference lux meter/phone only to identify a systematic offset, and choose automation thresholds from the actual mounted sensor rather than copying someone else’s 50-lux value.
Materials You’ll Need
| Item | Why you need it |
|---|---|
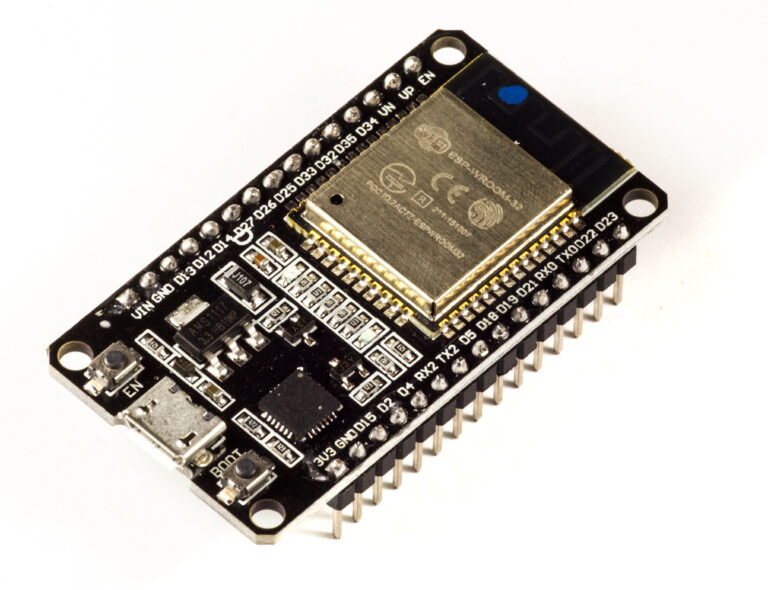
| ESP32 development board | Runs ESPHome and Home Assistant integration |
| BH1750 breakout module | Digital ambient-light measurement in lux |
| Four jumper wires | VCC, GND, SDA and SCL |
| 3.3 V supply from ESP32 | Safe default for common BH1750 breakout boards |
| Home Assistant | Lighting automations, history and dashboards |
| ESPHome 2026.x | Current BH1750 I²C component |
| Optional reference lux meter | Useful for checking systematic offset |
| Optional PIR/mmWave sensor | Adds occupancy to daylight-aware lighting |
Why BH1750 Is Better Than an LDR for Home Assistant
| Feature | BH1750 | LDR / photoresistor |
|---|---|---|
| Output | Digital lux | Analog voltage/resistance |
| Interface | I²C | ADC + resistor divider |
| Calibration | Factory digital conversion | Highly component/circuit dependent |
| Home Assistant meaning | Real illuminance entity | Usually arbitrary %/ADC scale |
| Repeatability | Much better | Varies strongly between LDRs |
| Extra resistor | No for the sensor IC function | Required voltage divider |
An LDR is perfectly adequate for a simple “dark/not dark” decision. BH1750 becomes much more useful when you want meaningful thresholds, graphs, room comparisons and proper Home Assistant illuminance entities.
What Lux Actually Measures
Lux is illuminance: the amount of visible light arriving at a surface, weighted approximately according to human visual sensitivity.
1 lux = 1 lumen per square metre

Low lux → dark surface/location
High lux → bright surface/location
Lux is not the same thing as the brightness percentage of a Home Assistant light. Illuminance is a measured input; brightness is a controllable output.
Typical Lux Values Are Only Rough Context
| Environment | Very rough illuminance |
|---|---|
| Moonlit / very dark interior | <1–5 lx |
| Dim hallway/night light | 5–30 lx |
| Dim living room | 30–100 lx |
| Comfortable domestic task lighting | 100–500 lx |
| Bright office/task area | 300–750+ lx |
| Outdoor overcast daylight | Thousands of lux |
| Direct bright sunlight | Tens of thousands of lux |
Do not turn this table into your automation thresholds. Your mounted sensor may read 35 lx in a room that feels perfectly bright because it is facing away from the window, while another installation may read 300 lx in the same human-perceived conditions.
BH1750 Hardware Capabilities
The BH1750FVI is a digital 16-bit ambient-light sensor designed for an I²C bus. Its datasheet specifies a nominal high-resolution illuminance range from about 1 to 65,535 lux and a spectral response intended to be close to the human eye.
- I²C digital output
- wide lux range
- low power-down current
- 50/60 Hz lighting-noise rejection
- two selectable I²C addresses
- response intended to work across incandescent, fluorescent, halogen, white LED and sunlight sources
ROHM’s original BH1750FVI is an older part and is listed by some distributors as not recommended for new designs, but inexpensive BH1750 breakout modules remain extremely common and ESPHome support is mature.
BH1750 Measurement Modes vs ESPHome Reality
The IC itself supports several measurement commands: high-resolution modes around 1 lx or 0.5 lx resolution with roughly 120 ms typical measurement time, and a faster low-resolution mode around 4 lx with roughly 16 ms typical measurement time.
Current ESPHome does not expose a BH1750 mode: configuration option. The public component currently exposes the I²C address, update interval and standard ESPHome sensor options/filters.
Do NOT copy invented YAML such as:

mode: HIGH_RESOLUTION
resolution: 0.5lx

Current ESPHome BH1750 docs do not expose those options.
For normal Home Assistant use, the practical tuning controls are placement, update interval, filters and optional calibration.
BH1750 I²C Addresses
| ADDR pin | I²C address |
|---|---|
| Low / default | 0x23 |
| High | 0x5C |
Current ESPHome defaults to 0x23. The second address is useful when you want two BH1750 sensors on the same I²C bus.
Basic Wiring
BH1750 VCC → ESP32 3.3V
BH1750 GND → ESP32 GND
BH1750 SDA → ESP32 SDA GPIO
BH1750 SCL → ESP32 SCL GPIO
BH1750 ADDR → leave default / GND for 0x23
Many breakout modules accept a wider VCC range because they include a regulator/level circuitry, but 3.3 V is the simplest safe default when the breakout is intended for ESP32 logic. Verify your specific module.
ESP32 I²C Example
i2c:
  sda: GPIO21
  scl: GPIO22
  scan: true

sensor:
  - platform: bh1750
    name: "Living Room Illuminance"
    id: living_room_lux
    address: 0x23
    update_interval: 10s
Current ESPHome’s BH1750 component defaults to a 60-second update interval. For lighting automation, 5–15 seconds is usually more responsive without creating pointless one-second database traffic.
Why scan: true Is Useful During Setup
ESPHome can scan the I²C bus at boot. If the BH1750 is wired correctly you should normally see 0x23 or 0x5C in the logs. If no device appears, fix wiring before debugging automations.
Two BH1750 Sensors on One ESP32
sensor:
  - platform: bh1750
    name: "Window Illuminance"
    address: 0x23
    update_interval: 10s

  - platform: bh1750
    name: "Room Illuminance"
    address: 0x5C
    update_interval: 10s
This can be useful when you want one sensor facing incoming daylight and another measuring the actual occupied work area.
The Biggest Design Question: Where Should the Sensor Go?
There is no universally correct mounting location because “room brightness” is not a single physical value. Illuminance changes dramatically by surface orientation and distance from windows/lights.
Window-facing sensor
→ measures daylight availability

Desk-facing sensor
→ measures task illumination

Ceiling sensor facing floor
→ measures reflected room light

Sensor beside lamp
→ mostly measures that lamp
For Automatic Lighting, Measure the Light Relevant to the Decision
| Automation goal | Best sensor concept |
|---|---|
| Should room light turn on? | Ambient/daylight at representative room point |
| Is a desk bright enough? | Sensor at desk/work-plane orientation |
| Should blinds close due to strong sun? | Window/facade daylight sensor |
| Night-light control | Low-light sensor away from the night light itself |
The best location is the one that produces a repeatable relationship between the sensor reading and the human decision you want to automate.
Do Not Mount It Directly Under the Lamp It Controls
This creates one of the most common lux-automation failures.
Room dark: 20 lx
→ automation turns lamp ON
→ sensor now sees 250 lx from the lamp
→ automation thinks room is bright
→ lamp OFF
→ room returns to 20 lx
→ lamp ON again

= feedback loop
How to Avoid the Light Feedback Loop
- Use lux mainly as the ON condition.
- Use occupancy timeout to turn the light OFF.
- Or use a much higher OFF lux threshold than ON threshold.
- Place the BH1750 where controlled light has less direct influence.
- Use a separate daylight/window sensor for daylight decisions.
For most rooms, the simplest logic is: when occupancy starts, check whether lux is below the ON threshold. Once the light is on, keep it on while the room is occupied rather than continuously re-evaluating the same sensor against the lamp it controls.
Best Lighting Logic: Occupancy + Lux
Person enters
→ occupancy ON
→ lux < 60 lx?
   YES → light ON
   NO  → leave light OFF

Person leaves
→ occupancy OFF for 2 min
→ light OFF
Lux decides whether artificial lighting is needed; occupancy decides whether anyone needs it.
ESPHome + Home Assistant Automation Example
alias: Living room light on when dark and occupied
triggers:
  - trigger: state
    entity_id: binary_sensor.living_room_occupied
    to: "on"

conditions:
  - condition: numeric_state
    entity_id: sensor.living_room_illuminance
    below: 60

actions:
  - action: light.turn_on
    target:
      entity_id: light.living_room
Home Assistant currently supports dedicated illuminance triggers/conditions as well as normal numeric-state logic. The important part is the physical threshold, not which UI helper you choose.
Light-Off Automation
alias: Living room light off when empty
triggers:
  - trigger: state
    entity_id: binary_sensor.living_room_occupied
    to: "off"
    for: "00:02:00"

actions:
  - action: light.turn_off
    target:
      entity_id: light.living_room
Notice that the OFF automation does not care whether the lamp pushed the BH1750 above 60 lux. That completely removes the feedback loop.
Hysteresis When Lux Controls Both ON and OFF
If you really want light level to turn the lamp both on and off while the room remains occupied, use two thresholds.
Turn ON below 50 lx
Turn OFF above 120 lx

50–120 lx
→ keep previous state
That gap is hysteresis. It prevents rapid toggling when daylight hovers around one threshold.
Why 50 lx Is Not a Universal Threshold
One room’s 50 lx may feel dark; another sensor location may see 50 lx while the work surface is perfectly usable. Determine the thresholds empirically after permanent mounting.
- Note lux when you personally decide the room needs lights.
- Repeat morning, afternoon and overcast conditions.
- Choose an ON threshold below/around that transition.
- Choose an OFF threshold substantially higher if lux also controls OFF.
Use Home Assistant History to Find the Threshold
Before automating anything, log the BH1750 for several days. Compare the graph with the times you manually turn lights on/off. The recurring lux range around those decisions is a much better starting threshold than a value copied from a forum.
Update Interval
| Use case | Recommended starting interval |
|---|---|
| Normal room lighting | 5–15 s |
| Slow daylight / blinds logic | 30–60 s |
| Dashboard only | 60 s |
| Fast experimental response | 1–5 s, temporarily |
Indoor daylight changes relatively slowly. Ten-second readings are already responsive for automatic lighting.
Filtering: Why Raw Lux Can Jump
- people walking past the sensor
- clouds moving across the sun
- car headlights
- TV screen changes
- shadows from curtains
- lamp switching
Some of these changes are real and should not be removed. The goal is to stop one brief spike from changing the automation state.
Median Filter
sensor:
  - platform: bh1750
    name: "Living Room Illuminance"
    id: living_room_lux
    address: 0x23
    update_interval: 5s
    filters:
      - median:
          window_size: 5
          send_every: 1
          send_first_at: 1
A small median window is useful when you get short anomalous points. Do not use enormous windows that delay genuine sunset/darkness changes.
Moving Average
filters:
  - sliding_window_moving_average:
      window_size: 6
      send_every: 1
With 5-second samples, a six-value window represents roughly 30 seconds of history. That produces a stable lighting signal without making the automation feel minutes behind reality.
Median vs Moving Average
| Filter | Best for |
|---|---|
| Median | Rejecting isolated spikes/outliers |
| Moving average | Smoothing continuous small variation |
For indoor daylight automation, a short moving average is usually sufficient. Add median first only if you actually see isolated bad samples.
ESPHome Calibration
ESPHome’s standard sensor filters can apply a multiplier or linear calibration if your mounted BH1750 consistently differs from a trusted reference.
filters:
  - multiply: 1.08
Do not calibrate from one reading. Compare across several light levels and verify the offset is truly systematic.
BH1750 Accuracy Expectations
BH1750 is excellent for automation, but it is not a laboratory photometer. Datasheet/distributor material commonly shows device-to-device measurement variation on the order of roughly ±20%. Optical windows, breakout geometry and sensor orientation add more system-level error.
For Home Assistant, repeatability matters more than absolute laboratory accuracy. If 48 lux today and 52 lux tomorrow both correspond to “room is dark,” the automation can be completely reliable.
Phone Lux Apps Are Only Approximate References
Phones use different ambient-light sensor locations, filters, covers and calibration. They can help identify a large offset, but a dedicated calibrated lux meter is a better reference.
Optical Windows and Enclosures
Any translucent plastic, smoked acrylic or diffuser in front of the BH1750 reduces and reshapes incoming light. The original IC even supports measurement-time adjustment to compensate for optical windows, although current ESPHome does not expose that low-level feature directly.
For ESPHome projects, calibrate the finished enclosure rather than the bare breakout on a desk.
Do Not Put the Sensor Behind Opaque Plastic
A tiny pinhole may create angle-dependent readings; smoked plastic can attenuate daylight by a large factor. Give the sensor a clear, repeatable optical path.
Orientation Matters
Lux measures light arriving at the sensor surface. Rotate a flat sensor toward or away from a window and the reading can change dramatically even though a person standing in the room reports “same brightness.”
Fix the final orientation physically before selecting thresholds.
Ceiling Mounting
A ceiling-mounted BH1750 facing downward can work well for general room automation because it samples reflected light rather than looking directly at the window. However, it may under-read task lighting on a desk and may be strongly influenced by ceiling-light geometry.
Wall Mounting
A wall-mounted sensor can measure incoming daylight effectively if it is aimed into the room rather than directly at a nearby window or lamp. This is often a good compromise for occupancy-light nodes.
Near-Window Mounting
A sensor near the window is useful for “is there enough daylight coming in?” decisions but often poor for actual room-task illuminance. It may report thousands of lux while the opposite side of the room remains dark.
Use Two Sensors When One Number Cannot Describe the Room
Window BH1750
→ daylight availability

Desk / room BH1750
→ usable occupied-area light

Home Assistant
→ smarter lighting/blinds decisions
At less than a few pounds/dollars per sensor, a second BH1750 can be simpler than trying to derive the entire room from one badly placed sensor.
Combine BH1750 with PIR
A PIR + BH1750 node is the straightforward “motion only when dark” solution. PIR gives fast movement; BH1750 gives a real lux value rather than an arbitrary LDR level.
PIR motion ON
+ BH1750 < threshold
→ light ON

PIR no motion for timeout
→ light OFF
Combine BH1750 with mmWave Presence
For offices, living rooms and bedrooms, mmWave is usually better than PIR for keeping lights on while somebody sits still. The ideal room node can therefore expose occupancy + lux from the same ESP32.
LD2410/mmWave
→ is somebody still here?

BH1750
→ is natural/ambient light sufficient?

Home Assistant
→ only light occupied dark rooms
Best Match: mmWave + PIR Fusion + BH1750
If you already use the PIR + mmWave fusion approach, BH1750 becomes the third input: presence tells you whether someone is there; lux tells you whether artificial light is needed.
Room Occupied = PIR OR mmWave

IF Room Occupied
AND lux below threshold
→ turn light ON
Lux and Home Assistant’s Illuminance Support
Modern Home Assistant distinguishes illuminance from controllable light brightness. A BH1750 entity with illuminance device class can be used with dedicated illuminance conditions/triggers or ordinary numeric-state logic.
This makes lux-based automation easier to understand in the UI than an LDR entity named “Light Level 37%”.
Daylight-Aware Dimming
Instead of simple ON/OFF, Home Assistant can reduce artificial brightness as daylight increases. This is useful for offices and workspaces, but it introduces a control loop that needs sensible deadband and update speed.
Very dark (<30 lx)
→ light 100%

Moderate daylight (30–100 lx)
→ light 60%

Bright (>150 lx)
→ light 20% or OFF
Use broad bands rather than continuously recalculating brightness from every 1-lux fluctuation.
Stepped Dimming Example
alias: Office daylight-aware light
triggers:
  - trigger: state
    entity_id:
      - sensor.office_illuminance
      - binary_sensor.office_occupied

conditions:
  - condition: state
    entity_id: binary_sensor.office_occupied
    state: "on"

actions:
  - choose:
      - conditions:
          - condition: numeric_state
            entity_id: sensor.office_illuminance
            below: 30
        sequence:
          - action: light.turn_on
            target:
              entity_id: light.office
            data:
              brightness_pct: 100

      - conditions:
          - condition: numeric_state
            entity_id: sensor.office_illuminance
            below: 100
        sequence:
          - action: light.turn_on
            target:
              entity_id: light.office
            data:
              brightness_pct: 60

    default:
      - action: light.turn_off
        target:
          entity_id: light.office
If the sensor sees the controlled light strongly, this automation can still self-interact. A window/daylight sensor or careful placement is better for closed-loop dimming.
Better Closed-Loop Daylight Control
For true constant-illuminance control, place the sensor at the work plane and use slow, bounded adjustments. Do not let the automation change brightness every second in response to its own last change.
- Use 10–30 second lux averaging.
- Adjust brightness in small steps.
- Use a deadband around the target lux.
- Limit minimum/maximum brightness.
- Pause changes after manual user override.
Manual Override
A person may intentionally turn the lights brighter/dimmer than your daylight logic. Respect that for a defined period rather than immediately “correcting” them back.
Manual light change detected
→ suspend auto-brightness for 30–120 min

Room becomes empty
→ clear override
BH1750 for Blind / Roller Shutter Automation
Lux can also help decide when direct sun is strong enough to justify closing blinds/shutters, especially when combined with sun azimuth/elevation and indoor temperature.
Facade sun-facing
+ BH1750 > high lux threshold
+ indoor temp rising
→ partially close shutter
This is more robust than closing shutters only at a fixed clock time.
Outdoor Use
The BH1750 breakout itself is not weatherproof. If used outdoors, put the electronics behind a clear weatherproof optical window and calibrate the finished assembly.
Direct sun can approach or exceed the nominal BH1750 measurement range under very bright conditions, so outdoor solar monitoring may need a higher-range sensor depending on your application.
BH1750 Saturation
The original BH1750FVI nominal high-resolution range is around 65,535 lux. Very bright direct sunlight can be above that. For indoor automation this is rarely a limitation; for outdoor solar intensity, choose the sensor/mode/range appropriate to the application.
Low-Light Performance
High-resolution BH1750 operation is intended to work well in low light, and the datasheet explicitly recommends high-resolution mode for darkness below roughly 10 lux. Current ESPHome abstracts the sensor operation, so your configuration remains simple.
Address Conflict
If ESPHome reports no BH1750 but another I²C device appears at the same address, inspect ADDR wiring. BH1750 gives you only 0x23 and 0x5C, so a conflict with another fixed-address sensor may require moving one device or using a second I²C bus/multiplexer.
Troubleshooting: I²C Scan Finds Nothing
- SDA/SCL swapped
- wrong GPIO pins
- no common ground
- breakout not powered
- bad jumper wire
- I²C pull-ups missing on unusual bare-board design
Most common BH1750 breakouts already include I²C pull-up resistors.
Troubleshooting: Address 0x5C Instead of 0x23
The ADDR pin is high. Either configure address: 0x5C or change the ADDR hardware state.
Troubleshooting: Lux Is Always Zero
- sensor covered / opaque enclosure
- I²C communication failing intermittently
- wrong/broken module
- very dark environment close to low-end resolution
Shine a normal room light directly at the sensor during testing. A healthy BH1750 should respond clearly.
Troubleshooting: Lux Is Always Very High
- sensor facing a lamp directly
- sensor beside a window
- direct sunlight/saturation
- calibration multiplier wrong
Move the sensor to the representative location before changing software.
Troubleshooting: Reading Jumps When Someone Walks Past
That is often real shadowing/reflection. Add a short moving average if it affects automations, but do not hide all dynamic light changes.
Troubleshooting: Lights Toggle Repeatedly
This is almost always a feedback/hysteresis problem rather than a broken BH1750.
Fix order:
1. stop using same threshold for ON and OFF
2. use occupancy to control OFF
3. add hysteresis
4. move sensor away from controlled lamp
5. add light filtering
Troubleshooting: Lux Doesn’t Match Phone
Different sensor angle, optical window and phone calibration can easily explain the difference. Put both sensors side by side in the same orientation before comparing.
Troubleshooting: Two BH1750 Modules Differ
Some device-to-device variation is expected, and low-cost breakout boards may use clone/compatible parts. If both track changing light similarly, apply a modest calibration multiplier only if absolute agreement matters.
Complete Production ESPHome Example
esphome:
  name: living-room-lux
  friendly_name: Living Room Lux

esp32:
  board: esp32dev
  framework:
    type: esp-idf

logger:

api:
  encryption:
    key: !secret lux_api_key

ota:
  - platform: esphome
    password: !secret ota_password

wifi:
  ssid: !secret wifi_ssid
  password: !secret wifi_password

i2c:
  sda: GPIO21
  scl: GPIO22
  scan: true

sensor:
  - platform: bh1750
    name: "Living Room Illuminance"
    id: living_room_lux
    address: 0x23
    update_interval: 10s
    filters:
      - sliding_window_moving_average:
          window_size: 3
          send_every: 1
This keeps the node deliberately simple. Change pins, filters and interval for your actual board/room.
Recommended Home Assistant Dashboard
- Current illuminance (lux)
- 24-hour lux history graph
- Room occupancy
- Controlled light brightness/state
- Optional window/daylight lux
- Optional sun elevation
Viewing lux and light state on the same graph is the fastest way to spot a feedback loop.
A Simple Commissioning Process
- Mount the BH1750 in its final position.
- Run it for several days without automation.
- Note lux when you manually decide lighting is needed.
- Choose a conservative ON threshold.
- Add occupancy as the trigger.
- Use occupancy/time for OFF initially.
- Add hysteresis only if lux must also control OFF.
- Calibrate only after the physical setup is final.
BH1750 vs LDR
| Choose BH1750 when… | Choose LDR when… |
|---|---|
| You want real lux values | You only need dark/not-dark |
| You want repeatable thresholds | Absolute value does not matter |
| You want Home Assistant graphs | Lowest cost is everything |
| You want I²C/no ADC calibration | You already have an analog input design |
For a new Home Assistant room node, BH1750 is usually worth the tiny extra cost.
BH1750 vs TSL2591 / Higher-Range Sensors
BH1750 is ideal for ordinary indoor illuminance. For extremely low-light measurement, very bright outdoor sun, wide dynamic range or advanced gain/integration control, a sensor such as TSL2591 or another newer ALS may be a better choice.
Best Use Cases
| Project | Why BH1750 helps |
|---|---|
| Hallway lighting | Only turn on when genuinely dark |
| Office lighting | Daylight-aware brightness |
| Living-room occupancy lights | Avoid daytime switching |
| Bedroom night lighting | Low-lux mode selection |
| Blind/shutter control | Measure strong daylight with sun-position context |
| Plant area | General visible-light trend, not a PAR meter |
BH1750 is not a PAR/PPFD plant-growth sensor. Lux is human-vision-weighted, not a direct photosynthetic photon measurement.
My Recommended Room Logic
Occupancy starts
      ↓
BH1750 lux < ON threshold?
   ├─ YES → light ON
   └─ NO  → leave OFF

While occupied
→ do not switch OFF just because the lamp raises lux

Occupancy clear for timeout
→ light OFF
Final Recommendation
BH1750 is one of the best low-cost sensors for making Home Assistant lighting genuinely daylight-aware because it gives you a meaningful lux value with almost no ESPHome complexity.
Use the current ESPHome configuration as it actually exists: I²C, platform: bh1750, address 0x23 or 0x5C, and a sensible update interval. Do not copy stale/invented measurement-mode YAML options that the current component does not expose.
Spend most of your effort on placement. Mount the sensor where its lux reading corresponds to the lighting decision you care about, not simply wherever the ESP32 enclosure is convenient.
For automatic room lights, combine BH1750 with PIR or mmWave occupancy. Use lux to decide whether the light should turn ON, and use occupancy/time to decide when it turns OFF. That avoids the classic self-feedback loop where the lamp illuminates its own sensor and immediately convinces Home Assistant the room no longer needs lighting.
Finally, choose thresholds from your own sensor history after permanent mounting. A calibrated 55-lux threshold in your room is more useful than an internet recommendation of 100 lux measured at a completely different surface and angle.
Related ESP32 Guides
- ESP32 PIR + LDR Light Sensor for Home Assistant
- ESP32 PIR Motion Sensor with Home Assistant
- ESP32 LD2410 mmWave Presence Sensor with Home Assistant
- ESP32 mmWave + PIR Presence Fusion
- Home Assistant RGBW LED Strip Controller with ESP32
Datasheets & External Resources
All external manufacturer/framework references are collected here so the main article keeps readers inside esp32.co.uk.
- ESPHome BH1750 Component — current I²C address and update-interval configuration.
- ROHM BH1750FVI Datasheet — measurement range, resolution modes, timing, spectral response and 50/60 Hz noise rejection.
- Home Assistant Illuminance — current illuminance triggers/conditions and distinction between lux and light brightness.
- Home Assistant Automation Conditions — illuminance/numeric conditions used with occupancy lighting.