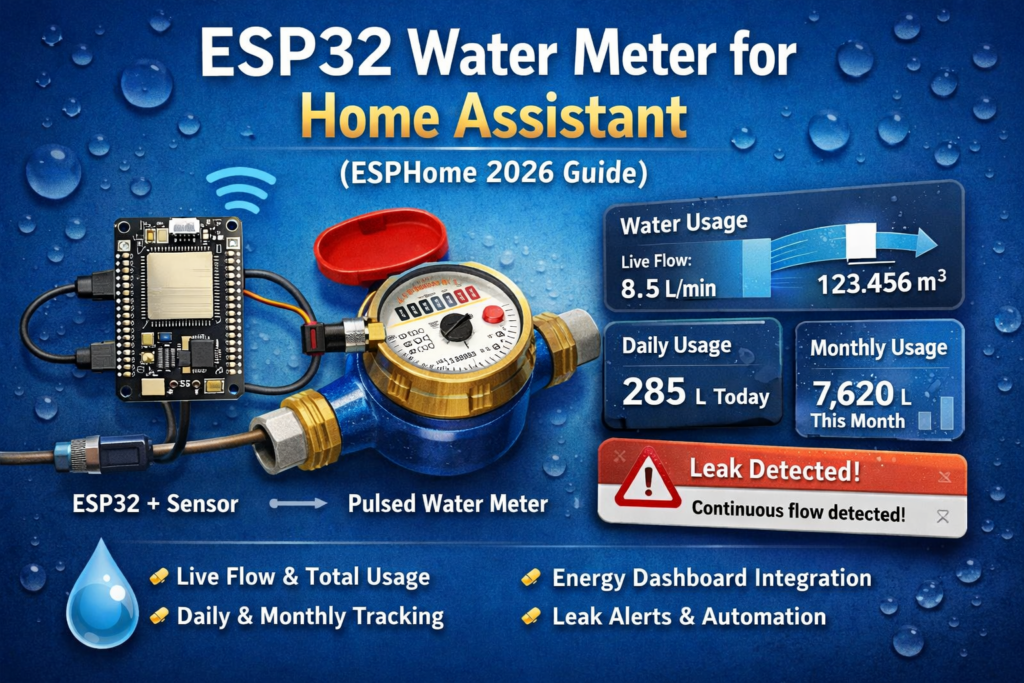
Turn a basic pulse-output water meter into a fully local Home Assistant sensor using an ESP32 and ESPHome. This guide shows wiring, pulse_meter setup, live flow rate, total consumption, Energy dashboard integration, daily and monthly usage tracking, and simple leak-detection automations.
Home Assistant water monitoring has become much more useful lately. In Home Assistant 2026.3, the Energy dashboard got separate Electricity, Gas, and Water sections, plus real-time water-flow badges and a water Sankey view in the Now tab. That makes a simple ESP32 water meter project much more worthwhile than it used to be.
Why this project is worth doing
A cheap pulse-reading ESP32 can give you:
- live water flow in liters per minute
- total water consumption in liters or cubic meters
- daily, monthly, and yearly usage in Home Assistant
- leak alerts when water keeps flowing for too long
- a fully local setup with no cloud dependency
ESPHome is a good fit here because its pulse_meter sensor is designed to measure pulse frequency and total pulses, and it gives better low-rate resolution than pulse_counter because it measures the time between pulses instead of only counting within a fixed interval.
What type of water meter this works with
This project works best when your water meter gives you a pulse for a fixed amount of water.
Typical cases are:
- a meter with a built-in pulse output
- a meter with a magnetic rotating target that can be read by a reed switch or Hall sensor
- a meter with an optical marker or rotating disk that can be read by a light sensor
Home Assistant’s water documentation also notes that many newer meters have a rotary disk that can be read with either light sensing or magnetic/proximity sensing, while some older meters may need a more DIY camera-based approach such as an ESP32-CAM running AI-on-the-edge.
If your meter only has number wheels and no pulse target at all, this exact guide is not the best route. In that case, an ESP32-CAM meter-reading project is usually the better option.
What you need
- an ESP32 development board
- a sensor matched to your meter
- reed switch
- Hall effect sensor
- optical reflective sensor
- a few jumper wires
- optional small enclosure
- Home Assistant
- ESPHome
The most important thing is not the ESP32. It is knowing your meter constant:
- 1 pulse = 1 liter
- 1 pulse = 0.5 liters
- 1 pulse = 0.1 liters
That value decides all your math.
Sensor choice
Reed switch
Best when the meter already offers a dry contact pulse output, or when a magnetic target passes close enough to trigger a contact.
Pros:
- simple
- cheap
- easy to wire
Cons:
- contact bounce can create double counts if filtering is poor
Hall effect sensor
Best when the meter has a magnetic rotating target and you want a solid electronic signal.
Pros:
- no mechanical contact
- usually cleaner than a reed switch
Cons:
- some modules output 5V and are not ESP32-friendly without checking first
Optical sensor
Best when the meter has a visible marker or rotating disk but no magnetic pulse.
Pros:
- can work on meters with no pulse wire
- good resolution on some designs
Cons:
- placement matters
- sunlight and reflections can cause false triggers if the sensor is not shielded
Wiring
The wiring depends on the sensor type.
Dry contact or reed switch
This is the simplest case.
- one side of the reed switch goes to GND
- the other side goes to an ESP32 GPIO
- enable the ESP32 internal pull-up on that GPIO
That way, the input normally sits high and drops low when the switch closes.
Active Hall or optical sensor board
Usually:
- VCC to 3.3V
- GND to GND
- signal to an ESP32 GPIO
Be careful here. Some cheap sensor boards are designed for 5V systems and may output 5V logic. Do not feed 5V directly into an ESP32 GPIO.
For the example below, I’ll assume a simple pulse input on GPIO27, but any suitable free GPIO can be used.
How the pulse math works
ESPHome pulse_meter reports pulses per minute by default. That means the live flow calculation is straightforward:
- flow in L/min = pulses per minute × liters per pulse
The total is also straightforward:
- total liters = total pulses × liters per pulse
- total m³ = total liters ÷ 1000
ESPHome documents that pulse_meter defaults to pulses per minute, supports filters for conversion, and can also expose a total sensor for total pulses counted.
ESPHome YAML example
This example assumes:
- 1 pulse = 0.1 liters
- dry contact or open-collector style pulse input
- GPIO27 used as the input pin
If your meter uses a different pulse constant, just change the multiply values.
esphome:
  name: esp32-water-meter
  friendly_name: ESP32 Water Meteresp32:
  board: esp32dev
  framework:
    type: arduinologger:api:ota:wifi:
  ssid: !secret wifi_ssid
  password: !secret wifi_passwordsensor:
  - platform: pulse_meter
    pin:
      number: GPIO27
      mode:
        input: true
        pullup: true
    name: "Water Flow"
    id: water_flow
    unit_of_measurement: "L/min"
    device_class: volume_flow_rate
    state_class: measurement
    accuracy_decimals: 2    # Start conservative. Raise this if you get bounce or false counts.
    internal_filter: 20ms
    internal_filter_mode: EDGE    # If no pulse arrives for 30 seconds, report zero flow
    timeout: 30s    # pulse_meter reports pulses/min by default
    # 1 pulse = 0.1 L, so pulses/min x 0.1 = L/min
    filters:
      - multiply: 0.1    total:
      name: "Water Total"
      id: water_total
      unit_of_measurement: "m³"
      device_class: water
      state_class: total_increasing
      accuracy_decimals: 3      # total is raw pulse count
      # 1 pulse = 0.1 L = 0.0001 m³
      filters:
        - multiply: 0.0001
This setup matches how pulse_meter is designed to work:
- it reads pulses on a GPIO
internal_filteris used to reject noise or bouncetimeoutlets the flow drop back to zero after inactivity- the
totalsensor exposes the accumulated pulse count - filters convert the raw pulse values into useful units
If your meter is 1 pulse per liter
Use these values instead:
filters:
  - multiply: 1
and for the total sensor:
filters:
  - multiply: 0.001
Because:
- 1 pulse/min = 1 L/min
- 1 pulse = 0.001 m³
If your meter is 1 pulse per 0.5 liters
Use:
filters:
  - multiply: 0.5
and for total:
filters:
  - multiply: 0.0005
Tuning the debounce filter
This is the part that catches people out.
If you use a reed switch and your totals climb too fast, you are probably counting bounce. ESPHome’s internal_filter is there specifically to discard pulses that are too short, and it offers two modes:
EDGEis good when the signal mostly looks clean and you only want to ignore fast repeated edgesPULSEis better when the pulse itself is noisy and should only count if it stays valid for long enough
A good starting point is:
20msfor a reasonably clean reed or Hall signal- higher if you still see false double counts
Do not set it absurdly high unless you are sure your sensor pulse stays active longer than that.
Adding it to Home Assistant
Once the node is online in ESPHome and discovered by Home Assistant:
- confirm that Water Flow is updating when water is running
- confirm that Water Total only moves upward
- let it collect some statistics
Then go to the Energy dashboard and add the Water Total sensor to the water section.
Home Assistant’s Energy documentation and FAQ say water usage can be added directly, and if a sensor does not appear, the main things to check are:
device_classmust bewaterfor water totalsstate_classmust betotalortotal_increasing- the unit must be an accepted water unit
- the entity must be a
sensor - the entity must not have statistics errors
A note about total vs total_increasing
Home Assistant currently accepts both total and total_increasing for water totals in the Energy dashboard. The developer docs recommend total when a sensor is a lifetime total that never goes backwards, while total_increasing is better when the value may reset to zero periodically.
For a simple ESPHome water meter guide, total_increasing is the safer general example because many DIY counters may occasionally restart or get recalibrated.
If you know your total will never decrease and will survive restarts cleanly, total is also a valid choice.
Daily and monthly tracking with Utility Meter
The Energy dashboard is useful, but you will usually also want neat daily and monthly helper sensors for dashboards, billing checks, and automations.
That is where utility_meter comes in. Home Assistant’s utility_meter integration is designed to track consumption over daily, monthly, yearly, or tariff-based cycles. It can also be told whether the source sensor is expected to reset or not.
Add this to configuration.yaml:
utility_meter:
  water_daily:
    source: sensor.water_total
    cycle: daily
    periodically_resetting: false  water_monthly:
    source: sensor.water_total
    cycle: monthly
    periodically_resetting: false  water_yearly:
    source: sensor.water_total
    cycle: yearly
    periodically_resetting: false
You will need to replace sensor.water_total with the actual entity ID created by your ESPHome device.
Why periodically_resetting: false here?
Because if your source is a lifetime running total, Home Assistant should treat it as a continuous meter and calculate the difference between readings. The docs specifically note that this option should be disabled when the source is a domestic utility meter that does not reset during normal use.
If your source sensor really does reset to zero on reboot or on a schedule, then set it to true.
Optional tariff tracking
Most people will not need tariffs for water, but utility_meter supports them if your billing has separate bands or special charging rules. When tariffs are configured, Home Assistant creates separate entities for each tariff and lets you switch them with automations or selects.
That is probably overkill for most homes, but it is there if you need it.
Leak detection automations
This is where the project becomes genuinely useful.
A water dashboard is nice. A leak alert saves money.
Night-time continuous flow alert
This catches things like a toilet cistern slowly refilling all night, a dripping outdoor tap, or a small hidden leak.
automation:
  - alias: Water leak - night flow too long
    triggers:
      - trigger: numeric_state
        entity_id: sensor.water_flow
        above: 0.2
        for: "00:20:00"
    conditions:
      - condition: time
        after: "00:00:00"
        before: "06:00:00"
    actions:
      - action: notify.mobile_app_your_phone
        data:
          title: "Possible water leak"
          message: "Water has been flowing continuously for 20 minutes during the night."
Away-from-home flow alert
automation:
  - alias: Water leak - flow while away
    triggers:
      - trigger: numeric_state
        entity_id: sensor.water_flow
        above: 0.2
        for: "00:05:00"
    conditions:
      - condition: state
        entity_id: person.your_name
        state: "not_home"
    actions:
      - action: notify.mobile_app_your_phone
        data:
          title: "Water running while away"
          message: "The water meter is showing flow while nobody is home."
High-flow burst alert
This one is useful for pipe failures or hose problems.
automation:
  - alias: Water leak - high flow burst
    triggers:
      - trigger: numeric_state
        entity_id: sensor.water_flow
        above: 8
        for: "00:01:00"
    actions:
      - action: notify.mobile_app_your_phone
        data:
          title: "High water flow detected"
          message: "Water flow has been above 8 L/min for more than 1 minute."
If you also have a smart shutoff valve, this is where the project gets serious. You can automatically close the valve when abnormal flow is detected.
Calibrating the total to match the real meter
There are two ways to handle totals:
- start from zero on the day you install it
- align the ESPHome total with the reading on the physical meter
ESPHome supports pulse_meter.set_total_pulses, which lets you set the raw pulse total directly. The docs note that this action works with the raw pulse count, not the filtered engineering value you see on the sensor.
That means:
- if your total sensor is shown in m³
- you must convert the actual meter reading back into raw pulses first
Example with 1 pulse = 0.1 L:
- meter reading: 123.456 m³
- convert to liters: 123456 L
- divide by liters per pulse: 123456 / 0.1 = 1,234,560 pulses
Optional API action:
api:
  actions:
    - action: set_water_total
      variables:
        new_total: int
      then:
        - pulse_meter.set_total_pulses:
            id: water_flow
            value: !lambda "return new_total;"
That is useful if you want the ESPHome total to match the actual utility meter exactly after installation or recovery.
Common problems
The flow sensor stays at zero
Usually one of these:
- wrong pin
- wrong pull-up or pull-down logic
- sensor output incompatible with 3.3V logic
- sensor too far from the magnetic or optical target
The total climbs too fast
Usually:
- reed switch bounce
- electrical noise
internal_filtertoo low
Try increasing internal_filter and improve cable routing.
The Energy dashboard will not accept the sensor
Check:
- it is a
sensor - total sensor has
device_class: water - total sensor has
state_class: totalortotal_increasing - unit is valid
- there are no statistics warnings in Developer Tools
Those are the exact areas Home Assistant tells you to check when an entity does not show up in Energy.
My total is wrong after a reboot
If that happens, either:
- use Home Assistant helpers based on a stable lifetime total
- or recalibrate the ESPHome pulse total with
pulse_meter.set_total_pulses
Good dashboard ideas
Once the basic setup works, add:
- a gauge card for live flow
- daily and monthly utility meter cards
- an automation badge for leak alerts
- a history graph for overnight flow
- a card that compares today vs yesterday
- a card for outdoor vs indoor usage if you later add a second meter
Home Assistant also supports tracking individual water devices and defining upstream relationships to avoid double-counting, so this can scale beyond just one main meter later on.
Final thoughts
This is one of those ESP32 projects that is actually useful every day.
It is cheap, local, easy to maintain, and now fits much better into Home Assistant than it did a couple of years ago. With ESPHome pulse_meter, a correctly scaled total sensor, and a couple of leak automations, you get live flow, proper long-term tracking, and real alerts instead of just another graph nobody checks.