Quick Summary (TL;DR)
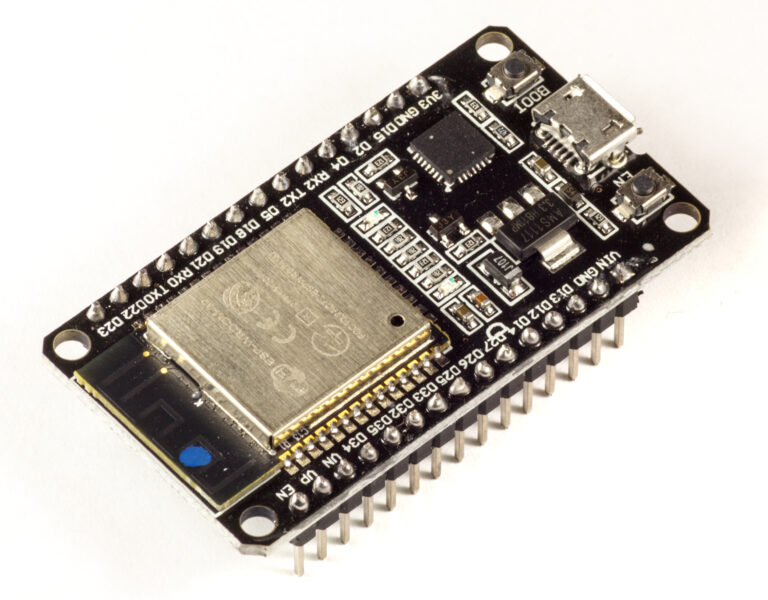
Build an ESP32AliExpress price optical pulse reader if your existing electricity meterAliExpress price has an accessible, suitable kWh pulse LED and you mainly want a low-cost Home Assistant grid-energy feed. It can count energy directly from the meter without opening the consumer unit, but you must confirm the LED’s meaning, the printed impulses-per-kWh constant, optical alignment and what happens after reboots. It does not automatically provide voltage, power factor, individual circuits or separate import and export totals.
Buy a commercial energy monitor when you need per-circuit visibility, reliable signed import/export data, phase-by-phase measurements, manufacturer-supported installation or a predictable maintenance burden. A locally integrated CT system such as Shelly Pro 3EM v2 is a different instrument from a pulse reader: it measures electrical quantities at selected conductors rather than decoding the utility meter’s flashes. A documented RS485 Modbus meter is another option where a qualified electrician can install a dedicated submeter.
The cheap component is rarely the entire cost. Include a stable power supplyAliExpress price, light-shielded sensor, enclosure, mounting, network coverage, time to configure and maintain the firmware, and any professional electrical work. For grid import only, a good pulse reader may be sufficient; for solar export, load attribution and three-phase diagnostics, it usually is not. This is a buy-or-build decision guide, not a live-mains installation tutorial.
The buying decision in one table
| Option | What it actually measures | Best reason to choose it | Main trade-off |
|---|---|---|---|
| ESP32AliExpress price + optical pulse sensor | Energy represented by the accessible meter pulse output; inferred average power from pulse intervals | Reuse a suitable utility meter, avoid electrical-panel work, customise local firmware | One measurement boundary; no intrinsic phase, voltage or direction information |
| Home Assistant Glow project | A packaged open-source approach to optical LED pulse reading using ESPHome | Start from an established design rather than inventing the whole firmware and mounting arrangement | Still depends on the actual meter LED and correct physical setup |
| Commercial optical pulse reader / pulse-input logger | Meter pulse output via optical pickup or compatible isolated pulse input | Prefer ready-made sensor hardware and vendor documentation | Compatibility, output protocol and Home Assistant integration vary by product |
| Local CT energy monitor | Current and voltage at its installed measurement points, with device-calculated power/energy | Observe multiple circuits or phases; support signed power on compatible models | Qualified electrical installation; CT sizing, placement and phase association matter |
| DIN-rail Modbus submeter | Energy and electrical quantities on a dedicated metered feeder | Documented registers, wired integration, defined metering boundary | Panel space, protection, wiring and possibly RS485 interface cost |
| Supported smart-meter data interface | Whatever import/export, power and tariff registers the meter and authorised interface expose | Potentially the richest utility-side data without extra metering | Availability and access depend heavily on country, meter model and supplier |
A pulse reader is not an inferior CT monitor, nor is a CT monitor a better pulse reader. The first is a reader of a meter’s own pulse output; the second is an independent measurement system. They can be used together, but the best choice depends on which question you need answered. For a broader comparison of mains, socket and circuit measurement points, see the verified site guide on smart plugs versus CT clamps and DIN-rail meters.
What an optical pulse reader can—and cannot—tell you
Many electronic electricity meters have a visible LED labelled with an impulse constant, for example 1,000 imp/kWh or 10,000 imp/kWh. A sensor detects flashes; software converts their count into energy. At 1,000 imp/kWh, 1,000 valid flashes represent 1 kWh at that output. A light detector does not measure mains voltage or current and does not know whether the house is using a kettle or charging an EV.
This distinction matters for accuracy. If the LED represents the same active-energy register used for billing, a correctly counted pulse train is a way to observe the meter’s own energy accumulation. That does not make your DIY reader billing-approved: missing pulses, false flashes, the wrong LED, export behaviour and firmware counter resets all introduce their own errors. If the LED instead represents reactive energy, a diagnostic status or a different register, the conversion is meaningless. Read the exact meter face and documentation before assuming anything.
A pulse output also does not necessarily encode direction. Some bidirectional meters provide separate import/export pulses; some have a pulse output assigned to a configurable register; others have only one LED for a selected energy quantity. With solar PV, a single pulse train may be import-only, export-only, totalised, or behave differently in each direction. Never infer export from a change in blink rate or assume a zero-pulse interval means zero household load.
For a project reference, Home Assistant’s electricity-grid guide explicitly describes reading a utility meter LED with Home Assistant Glow. OpenEnergyMonitor’s pulse-counting documentation also distinguishes optical LED readers from wired pulse outputs and warns that stray light can cause detection errors.
Pulse rate, update speed and why low loads look awkward
Let K be the meter’s impulses per kWh and t the seconds between valid flashes. The average power represented by that interval is P(W) = 3,600,000 / (K × t). For cumulative energy, E(kWh) = counted pulses / K. These are unit conversions, not calibration corrections. They are valid only when K corresponds to the observed pulse output.
| Printed constant | Energy per pulse | Interval at 100 W | Interval at 1 kW | Interval at 10 kW |
|---|---|---|---|---|
| 100 imp/kWh | 10 Wh | 360 s | 36 s | 3.6 s |
| 1,000 imp/kWh | 1 Wh | 36 s | 3.6 s | 0.36 s |
| 10,000 imp/kWh | 0.1 Wh | 3.6 s | 0.36 s | 0.036 s |
These are calculated illustrations at steady power, not device benchmarks. At 100 W with 1,000 imp/kWh, a pulse arrives about every 36 seconds. The inferred instantaneous power can therefore react slowly after a load changes, even while total energy remains correct. At a 10 kW load with a 10,000 imp/kWh LED, pulses may arrive roughly 36 milliseconds apart; your optical circuit and debounce settings must not reject legitimate pulses. The ESPHome pulse_meter documentation explains the interval method, filter modes and timeout. Avoid copying someone else’s debounce value without checking your meter’s pulse width and maximum expected rate.
This is why a pulse reader is excellent for accumulated kWh yet may be a poor source for fast load-shedding or precise EV charging feedback. If your automation must respond promptly to a grid-import limit or solar surplus, use a measurement path with documented update behaviour and safe fallback controls. Home Assistant automations are supervisory; they are not a substitute for a charger’s protective functions.
ESPHome implementation: the right abstraction, not a blind YAML copy
ESPHome supports both pulse_meter, which measures time between pulses, and pulse_counter, which counts over a fixed update interval. The former is generally attractive for optical electricity-meter pulses because it can provide useful resolution at low pulse rates. The latter can be appropriate for other pulse sources, but a one-minute counter window is not equivalent to an instantaneous wattmeter. Both can expose a pulse total; the exact available actions and filter behaviour depend on the current ESPHome component version.
The source code and firmware are your responsibility. Specify the input polarity, suitable GPIO, safe sensor output voltage, pull-up/pull-down arrangement, optical shielding, pulse constant, and reboot strategy. The ESP32AliExpress price GPIO is not a mains input. If the sensor has a separate supply or an industrial pulse output, ensure the electronics are electrically compatible and isolated where required; do not connect an unknown meter terminal to the ESP32.
Use device_class: energy, an accepted energy unit such as kWh and the appropriate state_class for the cumulative energy entity. The derived power entity needs device_class: power, units of W or kW and a measurement state class. ESPHome’s total sensor represents pulse counts, so apply the correct conversion factor; do not accidentally feed raw pulse count to the Home Assistant Energy dashboard as kWh. The Home Assistant energy FAQ describes the required sensor metadata and statistics checks.
For a complete implementation rather than another partial recipe, follow the existing, verified ESP32 electricity-meter pulse reader tutorial. For context on when a pulse meter makes more sense than a CT, PZEM or Modbus approach, read ESP32 energy-monitoring methods compared. This article concentrates on the decision and long-term ownership costs.
The hidden cost of building an optical reader
An ESP32 board is only one line of the bill of materials. The parts you need, and whether they can be bought as a kit, depend on the physical meter and its location. Do not compare a bare development board with a fully installed commercial meter and call the price difference your savings.
| Cost item | DIY pulse reader | Commercial CT/Modbus alternative | Question before buying |
|---|---|---|---|
| Measurement hardware | ESP32 board, compatible optical sensor, light shield or printed mount | Meter body, matched CTs or direct-connected meter | Is the exact meter interface usable and documented? |
| Power and housing | Suitable low-voltage supply, cable, enclosure, strain relief, safe mounting | Protected mains supply or power feed specified by manufacturer; panel accessories | Is a socket available near the meter, and is the installation compliant? |
| Network | Wi-Fi coverage or suitable wired design; router configuration | Wi-Fi/Ethernet for local CT, RS485 adapter or gateway for Modbus | Will it work through meter-cupboard walls and during internet outages? |
| Commissioning | Flashing, YAML, pulse constant, sensor alignment, Home Assistant entity validation | Electrician configuration, CT mapping, register mapping, local integration | Who is responsible for each task? |
| Professional labour | Usually no panel work for a non-invasive optical pickup; ask permission if needed | Often electrician labour and possibly a planned outage | What is the full written installed quotation? |
| Maintenance | Re-adhesion, optical cleaning, firmware updates, counter recovery | Firmware, network, CT checks, meter replacement, gateway support | Who will troubleshoot it in three years? |
| Software and cloud | ESPHome native API can be local; Home Assistant host required for dashboard | Local integration depends on exact model; vendor cloud may be optional or required | Is local access official, or an unsupported workaround? |
There is no defensible universal “DIY costs £X, commercial costs £Y” number: retailer stock, country, electrical access, enclosure condition and labour dominate the total. Build your own quote using parts + power and mounting + network + installer labour + commissioning time + expected maintenance. If you already run Home Assistant and have a reliable low-voltage socket near the meter, the incremental DIY spend may be modest. If you must add power, install an enclosure, arrange a qualified electrician and spend several evenings debugging false pulses, the apparent advantage can shrink quickly.
Your time is not necessarily a financial loss: for an engineer, building the reader may be the point. For someone who wants energy history to survive house moves, firmware updates and ownership changes, the commercial device’s documentation and replaceability may be worth more than a small initial saving.
What current commercial hardware actually offers
Choose the exact SKU, not a familiar product family name. As checked against manufacturer pages in October 2026, the original Shelly Pro 3EM 120A product page marks that model discontinued and points buyers to Shelly Pro 3EM v2. The successor is a DIN-rail, CT-based energy monitor for suitable single- or three-phase arrangements; it is not an optical pulse reader. Shelly’s current Pro EM-50 is a different two-channel, single-phase device. Neither is interchangeable with a meter LED pickup, and their supported electrical configurations must be checked before ordering.
| Example and current identity | Officially described measurement/connectivity | What it adds beyond optical pulses | Purchase/installation caveat |
|---|---|---|---|
| Shelly Pro 3EM v2, 120 A variant | Three-phase/single-phase CT meter, LAN/Wi-Fi/Bluetooth; local Shelly ecosystem | Per-phase electrical readings and four-quadrant metering capability | Match CTs and model; qualified installer; confirm exact v2 firmware and supported integration entities |
| Shelly Pro EM-50 | Two independent 50 A CT channels on the same phase; LAN/Wi-Fi; local protocols | Two selected circuit/feeder measurements, import/export-capable meter family | Not a substitute for a three-phase whole-home installation; CTs and wiring must match SKU |
| Eastron SDM120-M | Single-phase direct-connected meter; 45 A maximum; RS485 Modbus variant | Electrical parameters and bidirectional energy registers | A different SDM120 suffix may use pulse or M-Bus instead of Modbus; direct-current rating matters |
| Eastron SDM630 family | Three-phase models with documented RS485 Modbus or other interfaces depending on suffix | Multi-phase energy and electrical registers from an independent submeter | CT-operated and direct-connected versions differ; verify exact current rating, wiring and register map |
| OpenEnergyMonitor optical pulse sensor / pulse input | Optical LED pickup or compatible pulse-input logger | More documented sensing hardware without designing the optical front end | Confirm logger compatibility and the route into Home Assistant; no universal plug-and-play claim |
The Shelly product pages Pro 3EM v2 and Pro EM-50 provide current hardware specifications. The legacy Pro 3EM page explicitly identifies the discontinued model. For a wired meter example, Eastron lists the SDM120-M RS485 Modbus model. Product pages are not substitutes for the installation manual, current conformity documents and an electrician’s site assessment.
A direct-connected DIN-rail meter may need the measured load current to pass through its terminals, whereas a CT meter senses current via matched transformers and also uses voltage references. That difference changes the installation work. A separate optical reader placed over a utility meter’s existing LED does not involve rewiring that meter, but it still needs a safe power supply and permitted access.
UK, EU and North American compatibility: avoid the regional trap
There is no single “smart meter standard” covering all countries, and a successful Home Assistant demonstration in one market does not guarantee compatibility in another. Your first check is the physical and logical interface on the exact meter installed in your property—not a retailer’s broad claim of “smart meter compatible”.
| Location / situation | Practical checks | Do not assume |
|---|---|---|
| Great Britain, supplier-owned smart meter | Check visible pulse LED and its legend; investigate supported authorised consumer access; keep seals intact | That a continental European P1 reader plugs into a British smart meter or that ordinary Zigbee can join its utility network |
| Netherlands, Belgium, Luxembourg with supported DSMR/P1 meter | Verify P1/DSMR revision, power provision, connector and data permissions | That an optical reader is necessary if a supported direct data port is already available |
| Other EU homes, including Greece | Identify meter manufacturer/model, kWh pulse constant, direction behaviour and cabinet access; check local utility rules | That an optical pulse LED, open HAN interface or identical meter model is universal |
| North America, split-phase service | Check meter LED availability, utility permissions, supply configuration and listed equipment for the region | That a 230 V EU DIN-rail product or European CT kit is suitable for a 120/240 V installation |
| Solar, batteries or bidirectional EV charging anywhere | Confirm import/export registers and sign conventions before selecting the energy source | That one LED or one unsigned kWh total gives both grid import and export |
Home Assistant’s official electricity-grid documentation describes P1 as a standardised interface in the Netherlands, Belgium and Luxembourg and notes that utility Zigbee Energy Profile is not the same as ordinary Home Assistant Zigbee; provider provisioning may be necessary. That is a useful warning against buying the wrong regional adapter. In Great Britain, electrical work in domestic installations is subject to applicable rules, including Part P in England and Wales where relevant; GOV.UK guidance on competent-person schemes explains how qualifying work can be certified. Elsewhere, use the locally applicable wiring code and qualified professional.
Never open a supplier-sealed meter, remove its cover, interfere with metering terminals or modify a consumer unit to make a DIY project easier. Ofgem’s meter-tampering guidance is explicit about contacting the supplier rather than attempting repairs. An externally mounted optical pickup is not a licence to bypass utility access rules.
Installation preflight: ten questions that prevent a wasted purchase
- Which exact meter? Photograph the visible model and legends without disturbing seals; find its manual.
- Which LED? Confirm it is an active-energy pulse output, not a communications or status LED.
- Which constant? Record the printed
imp/kWhor other output setting and its unit. - Which direction? Establish what the pulse output does on import and export; do not guess.
- Which measurement boundary? Is this the grid connection, a solar generation meter, an EV feeder or a tenant submeter?
- Can the sensor be attached? Check line of sight, meter-face geometry, permission, removable adhesive and maintenance access.
- Where is power? Plan a compliant, accessible low-voltage supply without exposed or improvised mains wiring.
- How is the network? Check Wi-Fi coverage at the meter location, local IP access and behaviour during internet loss.
- Who maintains it? Decide who will restore firmware, update ESPHome and recalibrate after a meter exchange.
- How will it be validated? Plan a documented comparison against the meter’s displayed kWh over a meaningful interval.
If any of the first four answers is unknown, do not order parts based on an attractive product photo. A £10 sensor that cannot see the right LED is not a bargain; neither is a professional monitor that cannot physically fit in the distribution board.
Data quality: compare like with like
There are at least three distinct error sources. Source error concerns what the meter or CT actually measures. Capture error concerns lost or duplicated pulses, network dropouts, CT orientation or misassigned phase. Processing error concerns units, sign conventions, resets, Home Assistant statistics and combining sensors at different measurement boundaries. You need to separate these before blaming “calibration”.
| Symptom | Pulse-reader checks | Commercial-monitor checks |
|---|---|---|
| Energy consistently high or low | Wrong impulses-per-kWh value, duplicate detections, wrong LED | CT ratio, voltage reference, phase assignment, scaling |
| Power jumps at night | Stray light, sensor alignment, debounce/filter, sporadic pulses | Low-load threshold, polling cadence, noise or configuration |
| Energy drops to zero after restart | Raw total reset, restore policy, Home Assistant statistics handling | Counter persistence, device reset, register mapping |
| Solar export appears as consumption | LED output may not encode direction; wrong boundary | CT direction, signed register selection, separate import/export entities |
| Totals disagree with bill | Different date range, meter register or energy direction | Different boundary, tariff windows, phase omission or CT configuration |
| Data disappears when internet fails | Wi-Fi, Home Assistant availability, buffering and reconnection | Local-vs-cloud integration, gateway, broker, device history |
The most useful test is not “does the dashboard number look plausible right now?” It is whether a recorded interval can be reconciled against the same physical meter register. Note the displayed kWh at the beginning and end of a day or another suitable period; compare the difference with the pulse-derived kWh from the same boundary. Allow for pulse quantisation: at 1,000 imp/kWh one pulse represents 0.001 kWh, so a very short test can be dominated by start/end pulse timing. Repeat with a longer interval and after an ESP32 restart.
If the reading is off by a factor of ten, investigate the impulse constant and units first. If errors increase only during bright daylight, investigate optical shielding. If the count agrees until reboot, investigate persistence. If a CT meter disagrees on one phase, ask the electrician to check CT-to-voltage-phase association. Do not “correct” an unknown problem by multiplying the sensor until it matches yesterday’s bill.
A sensible validation plan before relying on the dashboard
- Baseline: note meter model, serial identifier if accessible, pulse constant, register name, firmware version and measurement boundary.
- Visual check: observe a series of LED flashes and confirm the reader reports exactly one count per valid flash; avoid looking into inaccessible compartments.
- Load-change check: use normal household appliances and observe whether the inferred power reacts in the expected direction and approximate time.
- Energy reconciliation: compare a full-day or longer interval against the same displayed import register; account for the LED’s quantisation.
- Restart check: restart the ESP32 and separately restart Home Assistant; record whether cumulative totals remain continuous and whether statistics develop gaps.
- Network check: briefly disconnect internet access without disrupting the local network; separately test the Home Assistant connection if safe to do so.
- Maintenance record: keep the configuration, pulse constant, mounting method and known-good firmware in your own backup.
Do not claim a reader is “accurate to 1%” because its number looks similar to the bill once. A meter accuracy class, a vendor’s sensor specification and the error of your completed optical system are different things. Also distinguish a missing power update from lost energy: a correctly retained cumulative counter can sometimes reconcile energy after a temporary network outage even though Home Assistant did not record every intermediate watt reading.
Offline operation and the reboot problem
A local ESPHome device can continue counting while the internet is unavailable, provided it has power and its firmware continues running. But Home Assistant only records what reaches its recorder. If the ESP32 loses power, pulses that occur while it is off cannot be counted. If the device keeps counting during a LAN outage, a retained cumulative counter may allow the total kWh to catch up on reconnection; it does not reconstruct the exact missing power curve. A device that resets its total to zero can instead create misleading long-term statistics.
ESPHome’s native Home Assistant integration is a documented local API, not an external cloud requirement; see the official ESPHome integration documentation. That fact says nothing by itself about your particular sensor’s counter persistence. The current ESPHome pulse_meter reference documents a total-pulse sensor and an action to set the total; it does not justify assuming every custom build preserves the counter across all reboots. Verify the exact firmware design and backup mechanism.
A commercial system also needs scrutiny. The Shelly Home Assistant integration communicates directly with supported Shelly devices and does not need a cloud connection. Some Shelly energy meters have on-device historical storage, but the exact retention and ability to backfill Home Assistant statistics depend on model and integration behaviour. “The device stores history” and “Home Assistant automatically imports that history after a two-day outage” are different claims. Ask for both to be demonstrated if this is a purchase requirement.
Solar PV and export: the decisive limitation
For a solar home, the dashboard often needs at least two cumulative quantities: energy imported from the grid and energy exported to the grid. Solar production is a third boundary, usually measured by the inverter or a dedicated generation meter. Home battery charge/discharge introduces further flows. A single unsigned LED pulse stream is insufficient to reconstruct all of these. A pulse reader is still useful when it represents one clearly identified import register, but it cannot invent missing export data.
Consider a home consuming 2 kW while its panels produce 3 kW. The grid connection may be exporting 1 kW even though household consumption is positive. An import-only LED may stop flashing, and the reader would show near-zero grid import. That does not mean the house is using no electricity. A properly configured bidirectional meter at the grid boundary and a separate inverter production entity can describe the flows, subject to correct sign conventions and counter selection.
When a utility meter exposes distinct import/export LEDs or registers, verify the documentation for that specific model and the accessibility of each output. Do not treat two physically adjacent LEDs as automatically representing opposite directions. For more comprehensive equipment selection, the verified home energy monitor comparison covers whole-home monitors and local integration. Home Assistant’s electricity grid setup explains the separate import and export Energy dashboard inputs.
Circuit monitoring, phase data and power factor: what you are paying for
A pulse reader on the utility meter measures only what that meter’s selected output represents. It cannot attribute 8 kWh to the heat pump and 3 kWh to the EV charger unless those devices are measured separately. It also cannot reveal a heavily loaded phase, low power factor, apparent power, voltage sag or an incorrectly oriented CT because none of those quantities is encoded in a simple kWh pulse count.
A commercial multi-channel CT meter can supply these additional measurements if its model, wiring and integration expose them. That capability is useful for deciding which circuit to investigate or whether an EV charger needs dynamic load management. It is not inherently more accurate than the utility meter’s own energy register; rather, it gives more kinds of information at additional measurement points. The extra visibility is often the real reason to buy rather than build.
If you only want a household monthly kWh trend, an optical reader may be sufficient. If you want to distinguish grid import from solar export, identify an appliance’s energy share, balance a three-phase supply or create a robust load-management signal, start with a metering architecture that actually exposes those values. Buying a more expensive ESP32 board will not add measurements that the pulse output never provided.
Which option is best in six real homes?
| Situation | Most defensible starting point | Why | What could change the recommendation |
|---|---|---|---|
| Rented flat with accessible meter LED and no permission for panel work | Removable optical ESP32 reader, subject to meter/landlord permissions | Non-invasive and limited to the grid register | If no valid LED or suitable power/network is available |
| Owner-occupied single-phase house, wants only import kWh | Optical reader or supported direct smart-meter interface | Avoid unnecessary panel modifications | Need for separate solar export or faster control data |
| House with rooftop PV and export tariff | Bidirectional grid meter data plus inverter generation data | Correct energy directions and boundaries | If the existing utility interface already exposes verified import/export registers |
| Three-phase home with EV charger and heat pump | Professionally installed multi-phase monitor or documented submeter | Phase visibility, signed power and dedicated feeder data | If the goal is purely monthly total kWh rather than operational control |
| Engineering hobbyist with Home Assistant and a suitable meter LED | ESP32 optical reader or Home Assistant Glow | Learning value and transparent custom firmware | Need for certified billing/submetering or a maintenance-free installation |
| Landlord or shared building with cost allocation | Appropriately approved submeter and documented installation | Traceable measurement, suitable accuracy and legal framework | Local regulations, tenancy agreements and billing requirements |
A DIY reader is a monitoring aid, not a revenue meter or a substitute for a meter approved for tenant billing. Whether submetering requires MID conformity, calibration or another approval depends on jurisdiction and use. Ask the installer or metering specialist before relying on any device for contractual cost allocation.
A practical total-cost decision, without fictional price tags
Ask for two quotes that describe the same desired outcome. Build scenario: optical pickup + ESP32 + low-voltage power + mount + enclosure + local network + commissioning + your maintenance time. Buy scenario: exact commercial meter SKU + matching CTs or direct-connected rating + protective hardware + DIN space/enclosure + qualified installation + interface/gateway + Home Assistant configuration + ongoing support. If a utility interface already supplies the needed data, price that third route too.
Then compare total cost of ownership over your intended use period, not just the first shopping basket. Include a likely sensor reattachment or meter replacement, firmware maintenance, failed power supplies, network changes and the value of your time. There is no universal payback: neither an optical reader nor a commercial monitor automatically saves electricity. Savings require a change in behaviour or control that is justified by the measurements, tariff and actual load.
If your current problem is “I do not know how much energy my house imported yesterday”, spend as little as needed to get a reliable answer. If the problem is “my EV charger must respond to phase load and solar export safely”, do not make a one-channel optical pulse reader responsible for the entire control decision. Reliability and the right data matter more than the smallest bill of materials.
Common buying mistakes
- Buying an optical sensor for a meter without a usable energy LED. Check the label and model before ordering.
- Assuming all pulses mean imported energy. Bidirectional meters may expose different registers or no direction on the LED.
- Copying a fixed debounce setting. Legitimate pulse spacing and pulse width depend on the meter constant and load.
- Confusing pulses with instantaneous watts. A long gap at low loads is normal and does not prove the circuit is off.
- Using a bare ESP32 as the entire cost estimate. Power, enclosure, mounting, network and maintenance still exist.
- Choosing a discontinued or regionally unsuitable meter by product-family name. Confirm the exact model and manufacturer successor.
- Expecting a CT monitor to be clamp-on with zero electrical work. Voltage references, protection and phase matching usually require professional work.
- Assuming local API equals complete offline history. Verify counter retention, reconnection and backfill separately.
- Putting raw pulse totals into an energy dashboard. Convert using the exact impulses-per-kWh constant and correct metadata.
- Using hobby data for regulated billing or safety-critical EV controls. Use approved equipment and required protections.
Frequently asked questions
Is an ESP32 pulse reader as accurate as a commercial energy monitor?
It can reproduce the energy represented by the meter’s own pulse output closely if every pulse is captured, the constant is correct and the total survives restarts. That does not establish a system accuracy class or make it a certified meter. A CT monitor independently measures at a different boundary and may provide richer data, but has its own sensor and installation error sources. Compare both with the same reference register over a meaningful interval.
Can a pulse reader show live watts?
It can estimate average power from the interval between pulses. At low loads the interval may be tens of seconds or longer, so “live” can be misleading. It is useful for trends, not necessarily for fast feedback. For fast control, assess the response time of a suitable signed-power monitor and the safety architecture of the controlled equipment.
Can I monitor solar export using the meter LED?
Only if the exact meter provides a documented output for export that you can access and interpret. An import-only pulse LED cannot measure export. If the meter has a data interface or separate registers for both directions, that may be the better source. Otherwise use a suitable bidirectional commercial meter and correctly configured inverter data.
Is Home Assistant Glow a commercial energy meter?
No. It is an open-source ESPHome-based optical reader project that reads pulses from a compatible electricity meter. It does not replace the meter’s certified measurement element. Consult the Home Assistant energy-management project introduction and the upstream Home Assistant Glow project for supported builds and current firmware details.
What happens if Wi-Fi fails?
The optical circuit may keep counting while the ESP32 has power, but only if the firmware is designed to do so. Home Assistant will not see intermediate samples while disconnected. On reconnection, a reliable cumulative total may restore the energy delta, whereas missing instantaneous power history cannot be recreated exactly. Test a disconnect and reboot before relying on the data.
Do I need an electrician for an optical reader?
A removable, externally mounted low-voltage optical sensor may not require work on the electrical installation, provided it is safe and permitted. Any new mains supply, distribution-board modification, CT installation or direct-connected meter work must follow local rules and be handled by a suitably qualified professional. Do not disturb utility seals or meter terminals.
Should I buy Shelly Pro 3EM v2 instead of the older Pro 3EM?
For a new purchase, note that the manufacturer identifies the original Pro 3EM 120A as discontinued and recommends Pro 3EM v2. Compare the exact current SKU, CT kit, firmware, supported electrical arrangement, warranty and Home Assistant entities rather than assuming two generations are identical. Existing functioning older units need not automatically be replaced solely because a successor exists.
Verdict: buy information, not just hardware
Choose the ESP32 pulse reader when the utility meter already provides a documented, accessible pulse signal, the required output is cumulative grid kWh, and you accept responsibility for mounting, configuration and maintenance. Start with a known project such as Home Assistant Glow rather than an untested optical circuit. Choose a commercial CT monitor or Modbus submeter when you need independent measurement points, phase data, export direction, power factor, more predictable installation support or data for operational decisions. A supported direct meter interface may beat both if it exposes the exact registers you need.
Before spending, write down the measurement boundary, the exact outputs needed, the electrical supply type, your outage requirements and the full installed cost. Then select the smallest architecture that meets those requirements. The most expensive mistake is not buying the wrong ESP32—it is building a reliable reader of the wrong quantity.
Official documentation and verification notes
Technical sources reviewed for this comparison (14 October 2026): ESPHome pulse_meter; ESPHome pulse_counter; Home Assistant electricity grid; Home Assistant Energy FAQ; ESPHome integration; Shelly local integration; Shelly Pro 3EM v2; Shelly Pro EM-50; Eastron SDM120-M; OpenEnergyMonitor optical pulse guidance. Confirm the current model revision, regional approval, accessory bundle and manufacturer manual at the time of purchase. No hands-on testing, retailer prices, guaranteed savings or affiliate links are claimed here.