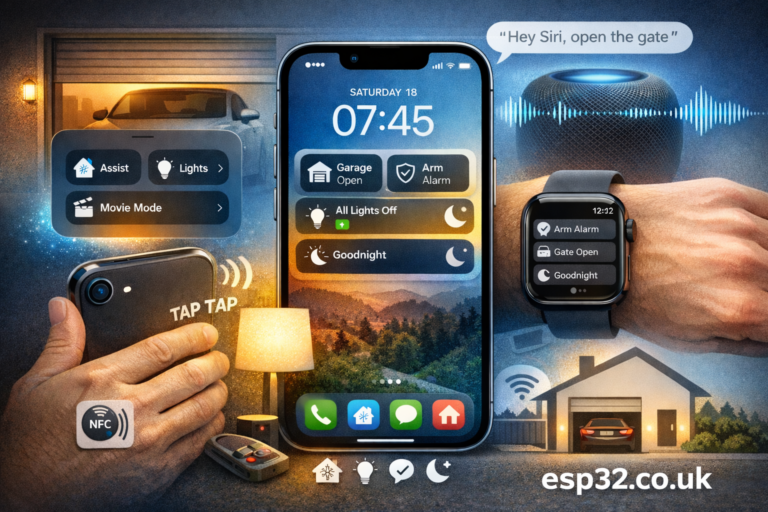
Room presence is one of those Home Assistant upgrades that changes everything. Not “someone is home”, but who is in which room, in real time, with automations that feel instant:
- Lights that follow you without false triggers
- Music that resumes in the room you walk into
- Bathroom fan runs only when someone is actually in there
- Heating targets the room you’re using
You can do this without cameras, without Wi-Fi triangulation, and without cloud services by using:
- BLE beacons (or your phone/watch as the “beacon”)
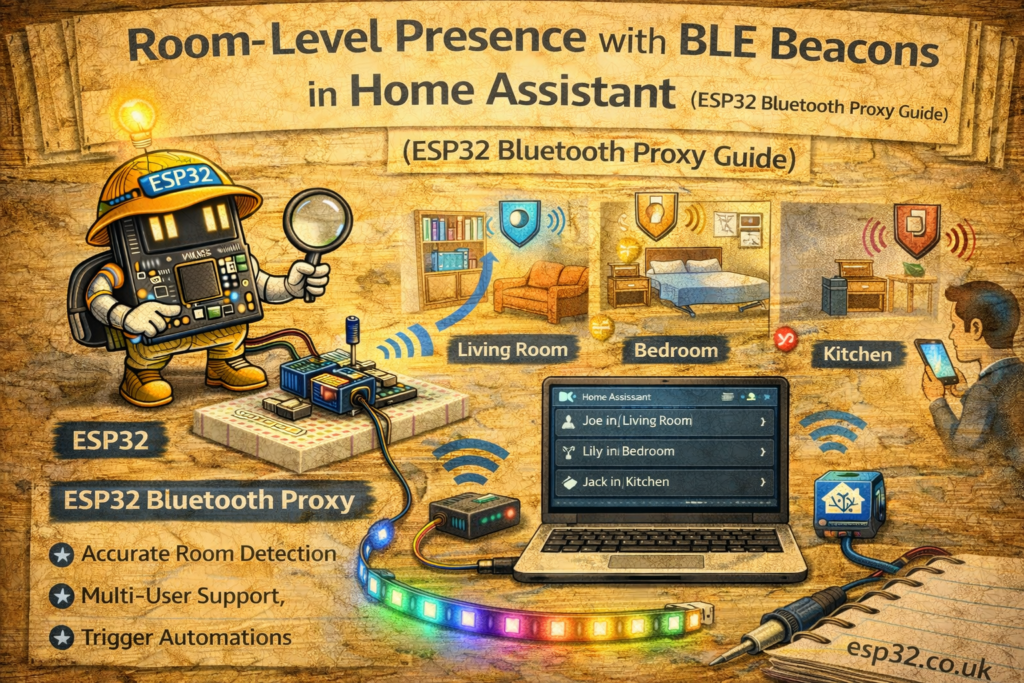
- ESP32 Bluetooth Proxies (placed around the house)
- Home Assistant to decide “which room is closest” based on RSSI
This article shows a practical, reliable way to do it.
1. What You’re Building
Core idea
Each ESP32 proxy “hears” a beacon and reports signal strength (RSSI). The strongest RSSI usually means nearest room.
Beacon / phone → advertised BLE packets → ESP32 proxies → Home Assistant tracks last seen + best RSSI → room presence sensors → automations.
Good targets for “presence”
- A BLE beacon tag on your keys or in your pocket
- Your phone (works, but less consistent due to OS power saving)
- A smartwatch (sometimes better than phones, depends on model)
For best reliability, use a dedicated beacon.
2. Hardware Options
2.1 ESP32 Bluetooth Proxy (recommended)
Any basic ESP32 can become a proxy, but for stable BLE performance pick something decent (and place them well).
- ESP32 DevKit (cheap)
- ESP32-S3 / ESP32-C3 (fine too)
2.2 BLE Beacons
You can use:
- Dedicated iBeacon/Eddystone tags
- A BLE tracker tag (varies by brand)
- Some BLE temp sensors can act as a “presence tag” if you carry them (not ideal)
Dedicated beacon tags are best because they advertise constantly and predictably.
3. Install Bluetooth Proxy in ESPHome
The fastest method is the official ESPHome Bluetooth Proxy installer.
Method A: One-click installer (fastest)
- In Home Assistant: Settings → Add-ons → ESPHome
- Add a new device, or go to the ESPHome dashboard
- Use the Bluetooth Proxy web flasher (ESPHome provides it)
- Flash your ESP32
- Add it to Wi-Fi
Home Assistant will now see it as a Bluetooth Proxy.
Method B: Manual ESPHome YAML (for people who keep everything in YAML)
A minimal example:
esphome:
  name: ble-proxy-livingroom
  platform: ESP32
  board: esp32dev

wifi:
  ssid: "YOUR_WIFI"
  password: "YOUR_PASSWORD"

logger:
api:
ota:

bluetooth_proxy:
  active: true
That’s enough. The device becomes a proxy and HA can use it for BLE devices.
4. The “Room Presence” Problem (and the correct approach)
People make this mistake first:
“If beacon is seen by living room proxy → I’m in the living room.”
It fails because:
- BLE passes through walls
- Multipath reflections happen
- RSSI fluctuates
The correct approach is:
“Best proxy wins” + smoothing + timeouts
- Track RSSI from each proxy
- Decide room = proxy with highest recent RSSI
- Add hysteresis so it doesn’t bounce between rooms
- Add last_seen timeout so it doesn’t get stuck forever
This section is the key to making it feel “professional” instead of jittery.
5. Getting a Beacon into Home Assistant
There are two common routes:
Route A: Use iBeacon tracking
If your beacon advertises iBeacon, you can detect it and use RSSI.
Route B: Use HA BLE device “seen by”
If HA sees the device through Bluetooth Proxy, it often exposes:
- last_seen
- rssi (sometimes)
- and a device entity you can reference
Exact entities vary by integration and beacon type, but the logic below works with either approach as long as you can access RSSI per proxy or a similar “signal quality per proxy” attribute.
6. Practical Implementation Pattern (Recommended)
Step 1 — Create per-room “signal sensors”
You want one sensor per room, e.g.:
sensor.beacon_rssi_livingroomsensor.beacon_rssi_bedroomsensor.beacon_rssi_kitchen
Each reads the RSSI value reported by that proxy for your beacon.
How you get those sensors depends on beacon type/integration, but the end goal is always the same: per-room RSSI numbers.
Step 2 — Smooth RSSI a little
RSSI is noisy. Smoothing helps a lot.
Use a moving average / median filter if available, or in HA use a statistics sensor:
- Statistics helper (rolling mean) over 30–60 seconds
Step 3 — Choose the room with highest RSSI (with margin)
Create a template sensor: “current room”.
Example logic:
- Living room wins if its RSSI is at least X dB stronger than the others.
- Otherwise keep last known room (prevents bouncing).
7. Home Assistant Templates (Core Logic)
Assume you have these sensors already:
sensor.me_ble_rssi_livingroomsensor.me_ble_rssi_kitchensensor.me_ble_rssi_bedroom
Higher RSSI = closer (e.g. -45 is stronger than -80).
7.1 Template sensor: current room
template:
  - sensor:
      - name: "Me Current Room"
        state: >
          {% set lr = states('sensor.me_ble_rssi_livingroom')|float(-999) %}
          {% set kt = states('sensor.me_ble_rssi_kitchen')|float(-999) %}
          {% set br = states('sensor.me_ble_rssi_bedroom')|float(-999) %}
          {% set margin = 6 %}
          {% set best = max(lr, kt, br) %}
          {% if best == lr and (lr - max(kt, br)) >= margin %}
            living_room
          {% elif best == kt and (kt - max(lr, br)) >= margin %}
            kitchen
          {% elif best == br and (br - max(lr, kt)) >= margin %}
            bedroom
          {% else %}
            unknown
          {% endif %}
Why margin matters:
- If two rooms are close in RSSI, you’re probably near a boundary.
- Returning
unknownis better than flipping every 5 seconds.
7.2 Convert room into binary sensors
This is useful for automations:
  - binary_sensor:
      - name: "Me In Living Room"
        state: "{{ is_state('sensor.me_current_room', 'living_room') }}"
      - name: "Me In Kitchen"
        state: "{{ is_state('sensor.me_current_room', 'kitchen') }}"
      - name: "Me In Bedroom"
        state: "{{ is_state('sensor.me_current_room', 'bedroom') }}"
8. Add a “Last Seen” Safety Timeout
If the beacon disappears (you leave home, battery dies), you don’t want stale room states.
If you have a last_seen entity, use it. If not, you can approximate by using availability of RSSI sensors.
Example: if all RSSI sensors are -999 for > 5 minutes → set room to away.
One simple pattern:
- Create
binary_sensor.me_beacon_present= true if any RSSI > -90 - If not present for 5 minutes → “away”
9. Automations That Actually Feel Good
9.1 Lights that follow you (without motion sensors)
Turn on living room light when you enter living room:
automation:
  - alias: "Presence Lights – Living Room"
    trigger:
      - platform: state
        entity_id: sensor.me_current_room
        to: "living_room"
    action:
      - service: light.turn_on
        target:
          entity_id: light.living_room_main
Add a condition so it only runs after sunset, etc.
9.2 Music handoff
If you use a multi-room system:
- When you enter kitchen → move playback to kitchen speaker
- When you leave → pause
9.3 Bathroom fan only when you’re actually in bathroom
This is where BLE presence beats PIR motion sensors, because PIR can’t see someone sitting still.
10. Placement Tips (Most Important Part)
Proxies
- Put one proxy per key room
- Place it:
- at chest height or higher
- away from large metal objects and routers
- not hidden inside a steel cabinet
Beacons
- Don’t bury it deep in a bag with metal
- Pocket/keys works well
- If you want “always accurate”, a small beacon clipped to keys is best
Margin tuning
- Start with
margin = 6 dB - If you get bouncing, increase to 8–10 dB
- If it’s too often “unknown”, reduce to 4–5 dB
11. Common Problems (and fixes)
Problem: It flips rooms constantly
Fix: Add margin + smoothing + “stickiness” (keep last room if difference is small)
Problem: Phone beacon unreliable
Fix: Phones throttle BLE adverts. Use a dedicated iBeacon tag.
Problem: It says you’re in living room while you’re in hallway
Fix: Add a hallway proxy or move living room proxy away from hallway wall.
Problem: RSSI values don’t appear per proxy
Fix: Some integrations don’t expose per-proxy RSSI cleanly; use a beacon/integration that does, or derive room presence via “nearest proxy that sees it” using device tracker entities.
Summary
Room-level presence using BLE beacons is one of the most powerful Home Assistant upgrades:
- Fully local, no cameras
- Very fast, works even when you’re sitting still
- Scales well with multiple ESP32 proxies
The winning formula is:
multiple proxies + per-room RSSI + smoothing + margin/hysteresis + timeouts
Do that and it becomes “invisible automation” — things just happen in the right room at the right time, without false triggers.