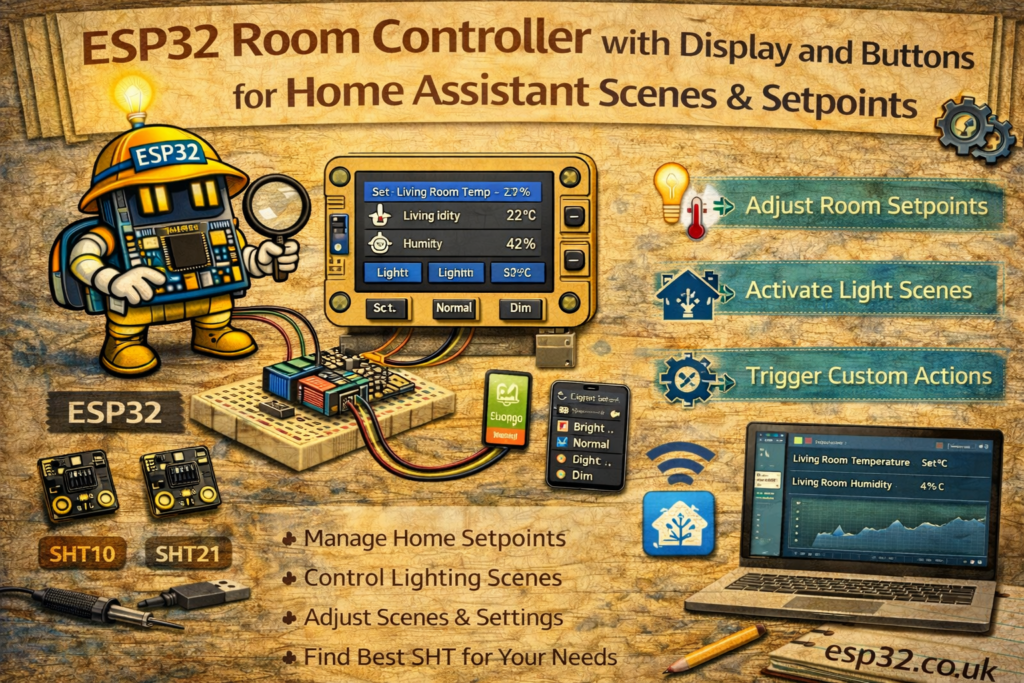
A wall-mounted ESP32 room controller with a small display and a few buttons can replace several physical thermostats and remotes:
- Show room temperature & humidity
- Adjust heating/cooling setpoint
- Trigger Home Assistant scenes (e.g. Movie, Reading, All Off)
- All local, fast and Wi-Fi based
This guide shows how to build an ESP32-based room controller with:
- A small I²C OLED display
- Three buttons (Up / Down / OK)
- Integration with Home Assistant via:
- ESPHome (recommended)
- MQTT (optional, for advanced setups)
1. Hardware Required
- ESP32 DevKit (any common board)
- 0.96″ I²C OLED (SSD1306, 128×64, 3.3V)
- 3 × momentary push buttons (tactile switches)
- 3 × 10 kΩ resistors (if not using internal pull-ups)
- Breadboard or perfboard
- USB cable and 5V USB supply
- Optional: small 3D-printed or plastic enclosure
2. Suggested Pinout
- OLED (SSD1306, I²C)
- SDA → GPIO 21
- SCL → GPIO 22
- VCC → 3.3V
- GND → GND
- Buttons (to GND, using internal pull-ups):
- Up button → GPIO 32
- Down button → GPIO 33
- OK button → GPIO 25
Buttons are wired:
ESP32 GPIO ─── Button ─── GND
Internal pull-ups in firmware keep them stable.
METHOD 1 – ESPHome Room Controller (Recommended)
This method uses ESPHome’s native features:
- Display support
- Buttons as
binary_sensor homeassistantintegration to read entities and call services
In this example:
- The display shows room temperature and current setpoint
- Up/Down buttons change a local target temperature
- OK button sends the new setpoint to Home Assistant via
climate.set_temperature - (Optional) long-press OK triggers a Home Assistant scene
3. ESPHome YAML – Room Controller
esphome:
  name: esp32-room-controller
  platform: ESP32
  board: esp32dev

wifi:
  ssid: "YOUR_WIFI"
  password: "YOUR_PASSWORD"

logger:
api:
ota:

# ------------------------------------------------
# I2C bus for OLED display
# ------------------------------------------------
i2c:
  sda: 21
  scl: 22
  scan: true

# ------------------------------------------------
# Font for OLED
# ------------------------------------------------
font:
  - file: "fonts/arial.ttf"
    id: font_small
    size: 12

  - file: "fonts/arial.ttf"
    id: font_large
    size: 18

# ------------------------------------------------
# Global variable: local target setpoint
# ------------------------------------------------
globals:
  - id: target_temp
    type: float
    initial_value: "21.0"

# ------------------------------------------------
# Get room temperature from Home Assistant
# (replace entity_id with your sensor)
# ------------------------------------------------
sensor:
  - platform: homeassistant
    id: ha_room_temp
    entity_id: sensor.living_room_temperature

# Optional: read current HA target temperature (to sync on boot)
  - platform: homeassistant
    id: ha_target_temp
    entity_id: climate.living_room
    attribute: temperature
    on_value:
      then:
        - lambda: |-
            // Sync local target with HA on update
            if (!isnan(x)) {
              id(target_temp) = x;
            }

# ------------------------------------------------
# Display: SSD1306 OLED
# ------------------------------------------------
display:
  - platform: ssd1306_i2c
    model: "SSD1306 128x64"
    address: 0x3C
    lambda: |-
      // Clear
      it.clear();

      // Room temperature
      if (!isnan(id(ha_room_temp).state)) {
        it.printf(0, 0, id(font_small), "Room: %.1f%cC", id(ha_room_temp).state, 0xB0);
      } else {
        it.printf(0, 0, id(font_small), "Room: --.-C");
      }

      // Setpoint
      it.printf(0, 20, id(font_small), "Setpoint:");
      it.printf(0, 40, id(font_large), "%.1f%cC", id(target_temp), 0xB0);

      // Footer hint
      it.printf(0, 60, id(font_small), "UP/DOWN: Set  OK: Apply");

# ------------------------------------------------
# Buttons as binary_sensors
# ------------------------------------------------
binary_sensor:
  # Up button
  - platform: gpio
    pin:
      number: 32
      mode:
        input: true
        pullup: true
    name: "Room Ctrl Up"
    on_press:
      then:
        - lambda: |-
            id(target_temp) += 0.5;
            if (id(target_temp) > 30.0) id(target_temp) = 30.0;

  # Down button
  - platform: gpio
    pin:
      number: 33
      mode:
        input: true
        pullup: true
    name: "Room Ctrl Down"
    on_press:
      then:
        - lambda: |-
            id(target_temp) -= 0.5;
            if (id(target_temp) < 10.0) id(target_temp) = 10.0;

  # OK button
  - platform: gpio
    pin:
      number: 25
      mode:
        input: true
        pullup: true
    name: "Room Ctrl OK"
    on_click:
      # Short press: apply setpoint to climate entity
      - min_length: 50ms
        max_length: 700ms
        then:
          - homeassistant.service:
              service: climate.set_temperature
              data:
                entity_id: climate.living_room
                temperature: !lambda "return id(target_temp);"

      # Long press: trigger a Home Assistant scene (e.g. Movie mode)
      - min_length: 800ms
        max_length: 3000ms
        then:
          - homeassistant.service:
              service: scene.turn_on
              data:
                entity_id: scene.movie_mode
What this configuration does
- Display always shows:
- Current room temperature from
sensor.living_room_temperature - Local adjustable setpoint
- Current room temperature from
- Up/Down buttons:
- Move the setpoint in 0.5°C steps (bounded between 10°C and 30°C)
- OK (short press):
- Calls Home Assistant service
climate.set_temperatureforclimate.living_room
- Calls Home Assistant service
- OK (long press):
- Calls
scene.turn_onforscene.movie_mode(optional scene hook)
- Calls
The controller behaves like a smart thermostat knob + scene shortcut.
4. Example Home Assistant Dashboard Card
Even though the controller has its own display, showing the same entities in a dashboard is useful:
type: entities
entities:
  - entity: climate.living_room
  - entity: sensor.living_room_temperature
  - entity: scene.movie_mode
METHOD 2 – MQTT-Based Room Controller (Alternative)
For setups where all communication is done through MQTT instead of the ESPHome API, the room controller can:
- Publish setpoint changes to an MQTT topic
- Publish scene commands to another topic
- Let Home Assistant automations or MQTT entities handle the logic
This method is more manual but very flexible.
5. Home Assistant configuration.yaml – MQTT Integration
This example uses:
- A setpoint topic
- A scene command topic
mqtt:
  sensor:
    - name: "Room Controller Setpoint"
      state_topic: "home/room_controller/setpoint"
      unit_of_measurement: "°C"

  # Optional: use MQTT to expose last scene command (for debugging)
  sensor:
    - name: "Room Controller Scene"
      state_topic: "home/room_controller/scene"
Instead of using an MQTT number entity, this design pushes logic into automations.
6. Home Assistant Automations (MQTT → Climate & Scenes)
6.1 Apply received setpoint to climate
automation:
  - alias: "MQTT Room Controller Setpoint Apply"
    trigger:
      - platform: state
        entity_id: sensor.room_controller_setpoint
    action:
      - service: climate.set_temperature
        target:
          entity_id: climate.living_room
        data:
          temperature: "{{ states('sensor.room_controller_setpoint') | float }}"
6.2 Trigger scenes from MQTT
  - alias: "MQTT Room Controller Scene Trigger"
    trigger:
      - platform: state
        entity_id: sensor.room_controller_scene
    action:
      - choose:
          - conditions: "{{ trigger.to_state.state == 'movie' }}"
            sequence:
              - service: scene.turn_on
                target:
                  entity_id: scene.movie_mode

          - conditions: "{{ trigger.to_state.state == 'reading' }}"
            sequence:
              - service: scene.turn_on
                target:
                  entity_id: scene.reading_mode

          - conditions: "{{ trigger.to_state.state == 'all_off' }}"
            sequence:
              - service: scene.turn_on
                target:
                  entity_id: scene.all_off
7. ESP32 Arduino MQTT Code (Display + Buttons)
This sketch:
- Shows values on the OLED
- Adjusts a local setpoint
- Publishes setpoint and scene commands via MQTT
- (Room temperature can be taken from Home Assistant or from a local sensor)
For brevity, this is a structural example; SSD1306 display setup is shown in minimal form.
#include <WiFi.h>
#include <PubSubClient.h>
#include <Wire.h>
#include <Adafruit_SSD1306.h>

#define WIFI_SSID   "YOUR_WIFI"
#define WIFI_PASS   "YOUR_PASSWORD"
#define MQTT_SERVER "192.168.0.10"

#define BUTTON_UP    32
#define BUTTON_DOWN  33
#define BUTTON_OK    25

WiFiClient espClient;
PubSubClient client(espClient);

Adafruit_SSD1306 display(128, 64, &Wire, -1);

float targetTemp = 21.0;

unsigned long lastRefresh = 0;

void setup() {
  pinMode(BUTTON_UP,   INPUT_PULLUP);
  pinMode(BUTTON_DOWN, INPUT_PULLUP);
  pinMode(BUTTON_OK,   INPUT_PULLUP);

  Wire.begin(21, 22);
  display.begin(SSD1306_SWITCHCAPVCC, 0x3C);
  display.clearDisplay();

  WiFi.begin(WIFI_SSID, WIFI_PASS);
  while (WiFi.status() != WL_CONNECTED) delay(500);

  client.setServer(MQTT_SERVER, 1883);
}

void loop() {
  if (!client.connected()) {
    while (!client.connected()) {
      client.connect("ESP32_Room_Controller");
    }
  }

  client.loop();

  // Handle buttons (simple polling)
  if (digitalRead(BUTTON_UP) == LOW) {
    targetTemp += 0.5;
    if (targetTemp > 30.0) targetTemp = 30.0;
    publishSetpoint();
    delay(200);
  }

  if (digitalRead(BUTTON_DOWN) == LOW) {
    targetTemp -= 0.5;
    if (targetTemp < 10.0) targetTemp = 10.0;
    publishSetpoint();
    delay(200);
  }

  if (digitalRead(BUTTON_OK) == LOW) {
    // Example: toggle between "movie" and "all_off" scenes
    client.publish("home/room_controller/scene", "movie");
    delay(500); // simple debounce
  }

  // Periodic display refresh
  if (millis() - lastRefresh > 500) {
    lastRefresh = millis();
    drawScreen();
  }
}

void publishSetpoint() {
  char buf[8];
  dtostrf(targetTemp, 4, 1, buf);
  client.publish("home/room_controller/setpoint", buf);
}

void drawScreen() {
  display.clearDisplay();
  display.setTextSize(1);
  display.setTextColor(SSD1306_WHITE);

  display.setCursor(0, 0);
  display.print("Setpoint:");

  display.setTextSize(2);
  display.setCursor(0, 16);
  display.print(targetTemp, 1);
  display.print((char)247); // degree symbol
  display.print("C");

  display.setTextSize(1);
  display.setCursor(0, 50);
  display.print("UP/DOWN set, OK: scene");

  display.display();
}
Home Assistant then applies the setpoint and scenes based on MQTT automations.
8. Placement & UX Tips
- Mount the controller at light-switch height (around 1.3–1.5 m)
- Avoid direct sunlight on the display
- Use concise on-screen hints (e.g. “OK = Apply”)
- Use long-presses or double-clicks for less frequent actions (e.g. scenes)
- Match names in HA (
climate.living_room,scene.movie_mode) to meaningful room labels
Keywords
esp32 room controller
esp32 thermostat display
home assistant room controller esp32
esphome room thermostat
esp32 scene controller buttons
mqtt esp32 display buttons
esp32 ssd1306 home assistant
diy wall thermostat esp32