An ESP32 can easily replace five separate smart sensors with a single multi-sensor node that sends everything to Home Assistant:
- 🌡️ Temperature
- 💧 Humidity
- 🚶 Motion (PIR)
- 💡 Ambient light (LDR)
- 💦 Water leak (probe)
All fully local, no cloud, and powered from a single USB supply.
This guide shows how to build an all-in-one ESP32 multi-sensor, using:
- ESPHome (automatic integration), and
- MQTT with Arduino code (manual but flexible)
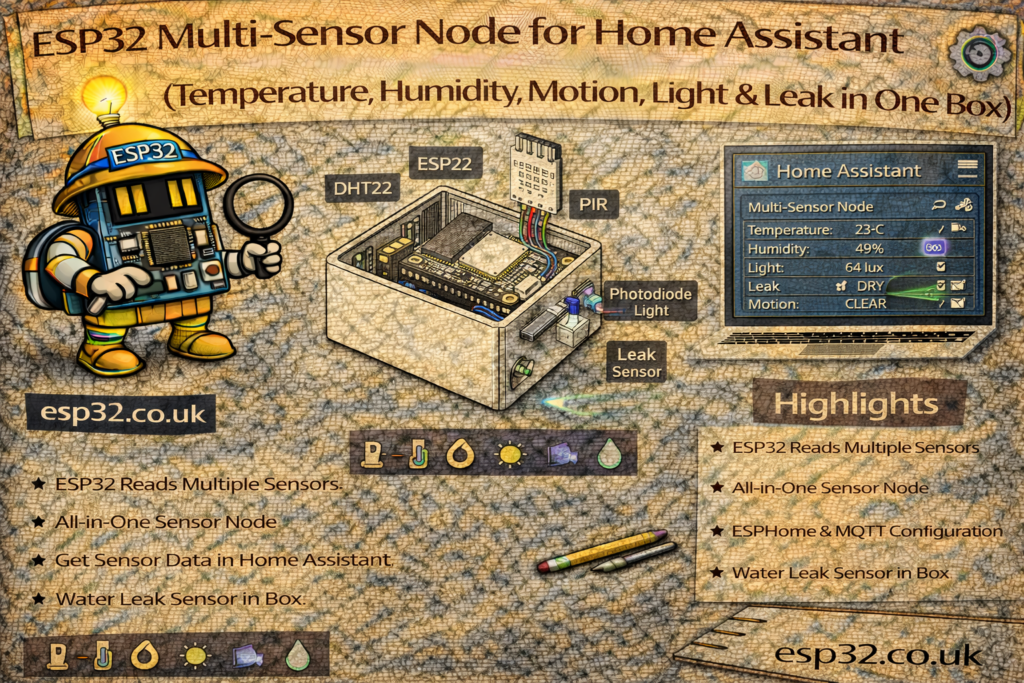
1. Hardware Overview
Suggested sensor combination (cheap and easy to source):
- ESP32 DevKit
- BME280 (temperature, humidity, pressure – I²C)
- PIR motion sensor (AM312 or HC-SR501)
- LDR (photoresistor) + 10 kΩ resistor (light level)
- Water leak sensor (leak probe board or two stainless wires)
- USB power supply and cable
- Wires, small enclosure with holes/vents
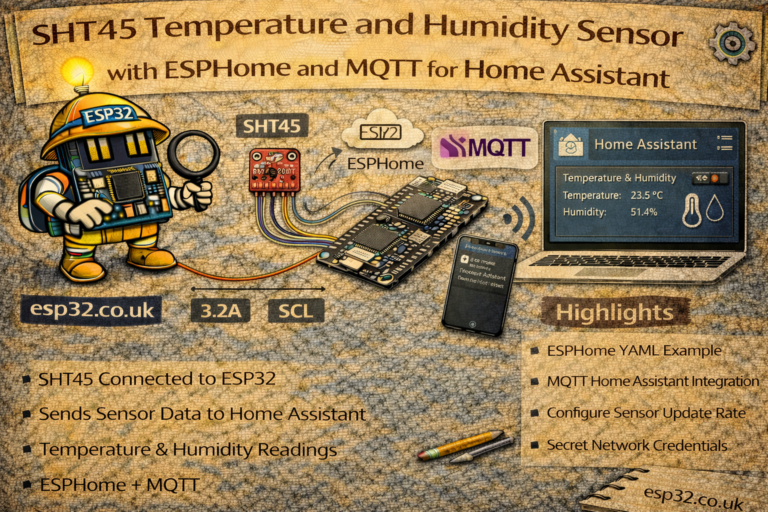
You can swap BME280 with SHT45 or SHT31 – wiring and concept remain the same.
2. Pin Assignments (All Sensors on One ESP32)
Recommended mapping (easy to remember and avoids conflicts):
- BME280 (I²C)
- SDA → GPIO 21
- SCL → GPIO 22
- PIR motion
- OUT → GPIO 27
- LDR (light sensor)
- LDR + 10 kΩ voltage divider → GPIO 34 (ADC)
- Water leak sensor
- OUT / probe input → GPIO 32
METHOD 1 – ESPHome Multi-Sensor Node
This is the simplest way: one ESPHome YAML file, auto-discovered by Home Assistant.
3. ESPHome YAML (All Sensors in One File)
esphome:
  name: esp32-multisensor
  platform: ESP32
  board: esp32dev

wifi:
  ssid: "YOUR_WIFI"
  password: "YOUR_PASSWORD"

logger:
api:
ota:

# -----------------------
# I2C bus for BME280
# -----------------------
i2c:
  sda: 21
  scl: 22
  scan: true

# -----------------------
# Environment: BME280
# -----------------------
sensor:
  - platform: bme280
    address: 0x76
    temperature:
      name: "Node Temperature"
      oversampling: 16x
    pressure:
      name: "Node Pressure"
    humidity:
      name: "Node Humidity"
    update_interval: 10s

  # Light sensor on ADC (LDR + 10k divider on GPIO34)
  - platform: adc
    pin: 34
    name: "Node Light Level"
    attenuation: 11db       # 0–3.3V
    update_interval: 5s
    filters:
      - multiply: 100.0     # scale to 0–100 (%-like)

# -----------------------
# Motion & Leak: binary sensors
# -----------------------
binary_sensor:
  # PIR motion sensor on GPIO27
  - platform: gpio
    name: "Node Motion"
    pin:
      number: 27
      mode:
        input: true
        pullup: true
    device_class: motion
    filters:
      - delayed_off: 2s

  # Water leak sensor on GPIO32
  - platform: gpio
    name: "Node Water Leak"
    pin:
      number: 32
      mode:
        input: true
        pullup: true
    device_class: moisture
    filters:
      - delayed_on: 200ms
      - delayed_off: 10s
After flashing this to the ESP32:
- Home Assistant detects
esp32-multisensorautomatically - Entities appear for:
sensor.node_temperaturesensor.node_humiditysensor.node_pressuresensor.node_light_levelbinary_sensor.node_motionbinary_sensor.node_water_leak
4. Example Home Assistant Dashboard
A simple Lovelace card grouping all sensors:
type: entities
entities:
  - entity: sensor.node_temperature
  - entity: sensor.node_humidity
  - entity: sensor.node_light_level
  - entity: binary_sensor.node_motion
  - entity: binary_sensor.node_water_leak
METHOD 2 – MQTT Multi-Sensor Node (Your Style)
In this method, the ESP32 sends MQTT messages and Home Assistant reads them via mqtt: in configuration.yaml.
We’ll use:
- One JSON topic for environment data
- Separate topics for motion and leak
5. Home Assistant configuration.yaml (MQTT Sensors)
mqtt:
  sensor:
    - name: "Node Temperature"
      state_topic: "home/multisensor/env"
      value_template: "{{ value_json.temperature }}"
      unit_of_measurement: "°C"

    - name: "Node Humidity"
      state_topic: "home/multisensor/env"
      value_template: "{{ value_json.humidity }}"
      unit_of_measurement: "%"

    - name: "Node Pressure"
      state_topic: "home/multisensor/env"
      value_template: "{{ value_json.pressure }}"
      unit_of_measurement: "hPa"

    - name: "Node Light Level"
      state_topic: "home/multisensor/env"
      value_template: "{{ value_json.light }}"
      unit_of_measurement: "%"

  binary_sensor:
    - name: "Node Motion"
      state_topic: "home/multisensor/motion"
      payload_on: "1"
      payload_off: "0"
      device_class: motion

    - name: "Node Water Leak"
      state_topic: "home/multisensor/leak"
      payload_on: "LEAK"
      payload_off: "DRY"
      device_class: moisture
Topics used:
home/multisensor/env→ JSON with temp/hum/pressure/lighthome/multisensor/motion→"1"or"0"home/multisensor/leak→"LEAK"or"DRY"
6. ESP32 Arduino MQTT Code (All Sensors Together)
This sketch reads:
- BME280 over I²C
- PIR on GPIO27
- LDR on GPIO34 (scaled 0–100)
- Leak on GPIO32
…and publishes to the topics defined above.
#include <WiFi.h>
#include <PubSubClient.h>
#include <Wire.h>
#include <Adafruit_BME280.h>

#define WIFI_SSID   "YOUR_WIFI"
#define WIFI_PASS   "YOUR_PASSWORD"
#define MQTT_SERVER "192.168.0.10"

#define PIR_PIN   27
#define LDR_PIN   34
#define LEAK_PIN  32

WiFiClient espClient;
PubSubClient client(espClient);
Adafruit_BME280 bme;

int lastMotion = -1;
int lastLeak = -1;

void setup() {
  Serial.begin(115200);

  pinMode(PIR_PIN, INPUT_PULLUP);
  pinMode(LEAK_PIN, INPUT_PULLUP);
  analogReadResolution(12); // 0–4095 on ESP32

  Wire.begin(21, 22);
  if (!bme.begin(0x76)) {
    Serial.println("BME280 not found!");
  }

  WiFi.begin(WIFI_SSID, WIFI_PASS);
  while (WiFi.status() != WL_CONNECTED) {
    delay(500);
  }

  client.setServer(MQTT_SERVER, 1883);
}

void loop() {
  if (!client.connected()) {
    while (!client.connected()) {
      client.connect("ESP32_Multisensor");
    }
  }

  // ---------- Environment: BME280 + LDR ----------
  float temp = bme.readTemperature();
  float hum  = bme.readHumidity();
  float press = bme.readPressure() / 100.0F; // Pa → hPa

  int rawLdr = analogRead(LDR_PIN);          // 0–4095
  float lightPercent = (rawLdr / 4095.0) * 100.0;

  String envJson = "{";
  envJson += "\"temperature\":" + String(temp, 2) + ",";
  envJson += "\"humidity\":" + String(hum, 1) + ",";
  envJson += "\"pressure\":" + String(press, 1) + ",";
  envJson += "\"light\":" + String(lightPercent, 1);
  envJson += "}";

  client.publish("home/multisensor/env", envJson.c_str());

  // ---------- Motion ----------
  int motion = digitalRead(PIR_PIN);
  if (motion != lastMotion) {
    lastMotion = motion;
    if (motion == HIGH)
      client.publish("home/multisensor/motion", "1");
    else
      client.publish("home/multisensor/motion", "0");
  }

  // ---------- Leak ----------
  int leak = digitalRead(LEAK_PIN); // LOW when water present if wired to GND
  if (leak != lastLeak) {
    lastLeak = leak;
    if (leak == LOW)
      client.publish("home/multisensor/leak", "LEAK");
    else
      client.publish("home/multisensor/leak", "DRY");
  }

  client.loop();
  delay(2000);
}
7. Example Automations
Motion-based light only when dark (using this node only)
automation:
  - alias: "Hallway Light On (Motion & Dark)"
    trigger:
      - platform: state
        entity_id: binary_sensor.node_motion
        to: "on"
    condition:
      - condition: numeric_state
        entity_id: sensor.node_light_level
        below: 40
    action:
      - service: light.turn_on
        target:
          entity_id: light.hallway

  - alias: "Hallway Light Off After No Motion"
    trigger:
      - platform: state
        entity_id: binary_sensor.node_motion
        to: "off"
        for: "00:02:00"
    action:
      - service: light.turn_off
        target:
          entity_id: light.hallway
Leak alarm
automation:
  - alias: "Node Leak Alarm"
    trigger:
      - platform: state
        entity_id: binary_sensor.node_water_leak
        to: "on"
    action:
      - service: notify.mobile_app
        data:
          message: "Water leak detected by multisensor node!"
8. Placement Tips
For a single multi-sensor box:
- Mount high on a wall or shelf for good Wi-Fi, PIR field of view, and realistic room temperature
- Add side/bottom vents for airflow to the BME280
- Run leak probes via wires to floor level (under sink, behind appliance)
- Keep PIR away from direct sun and hot appliances
- Avoid placing the LDR where it sees direct lamp glare (unless that’s desired)
Keywords
esp32 multisensor node
esp32 temperature humidity motion light leak
home assistant multisensor esp32
mqtt multisensor esp32
esphome multisensor bme280 pir ldr leak
all in one esp32 sensor
esp32 home assistant room sensor